For use in place of Roland M-128, M-256, M-512 data memory card. Can act as 8(eight) M-512 cards or 16(sixteen) M-256/M-128 cards.
About this product
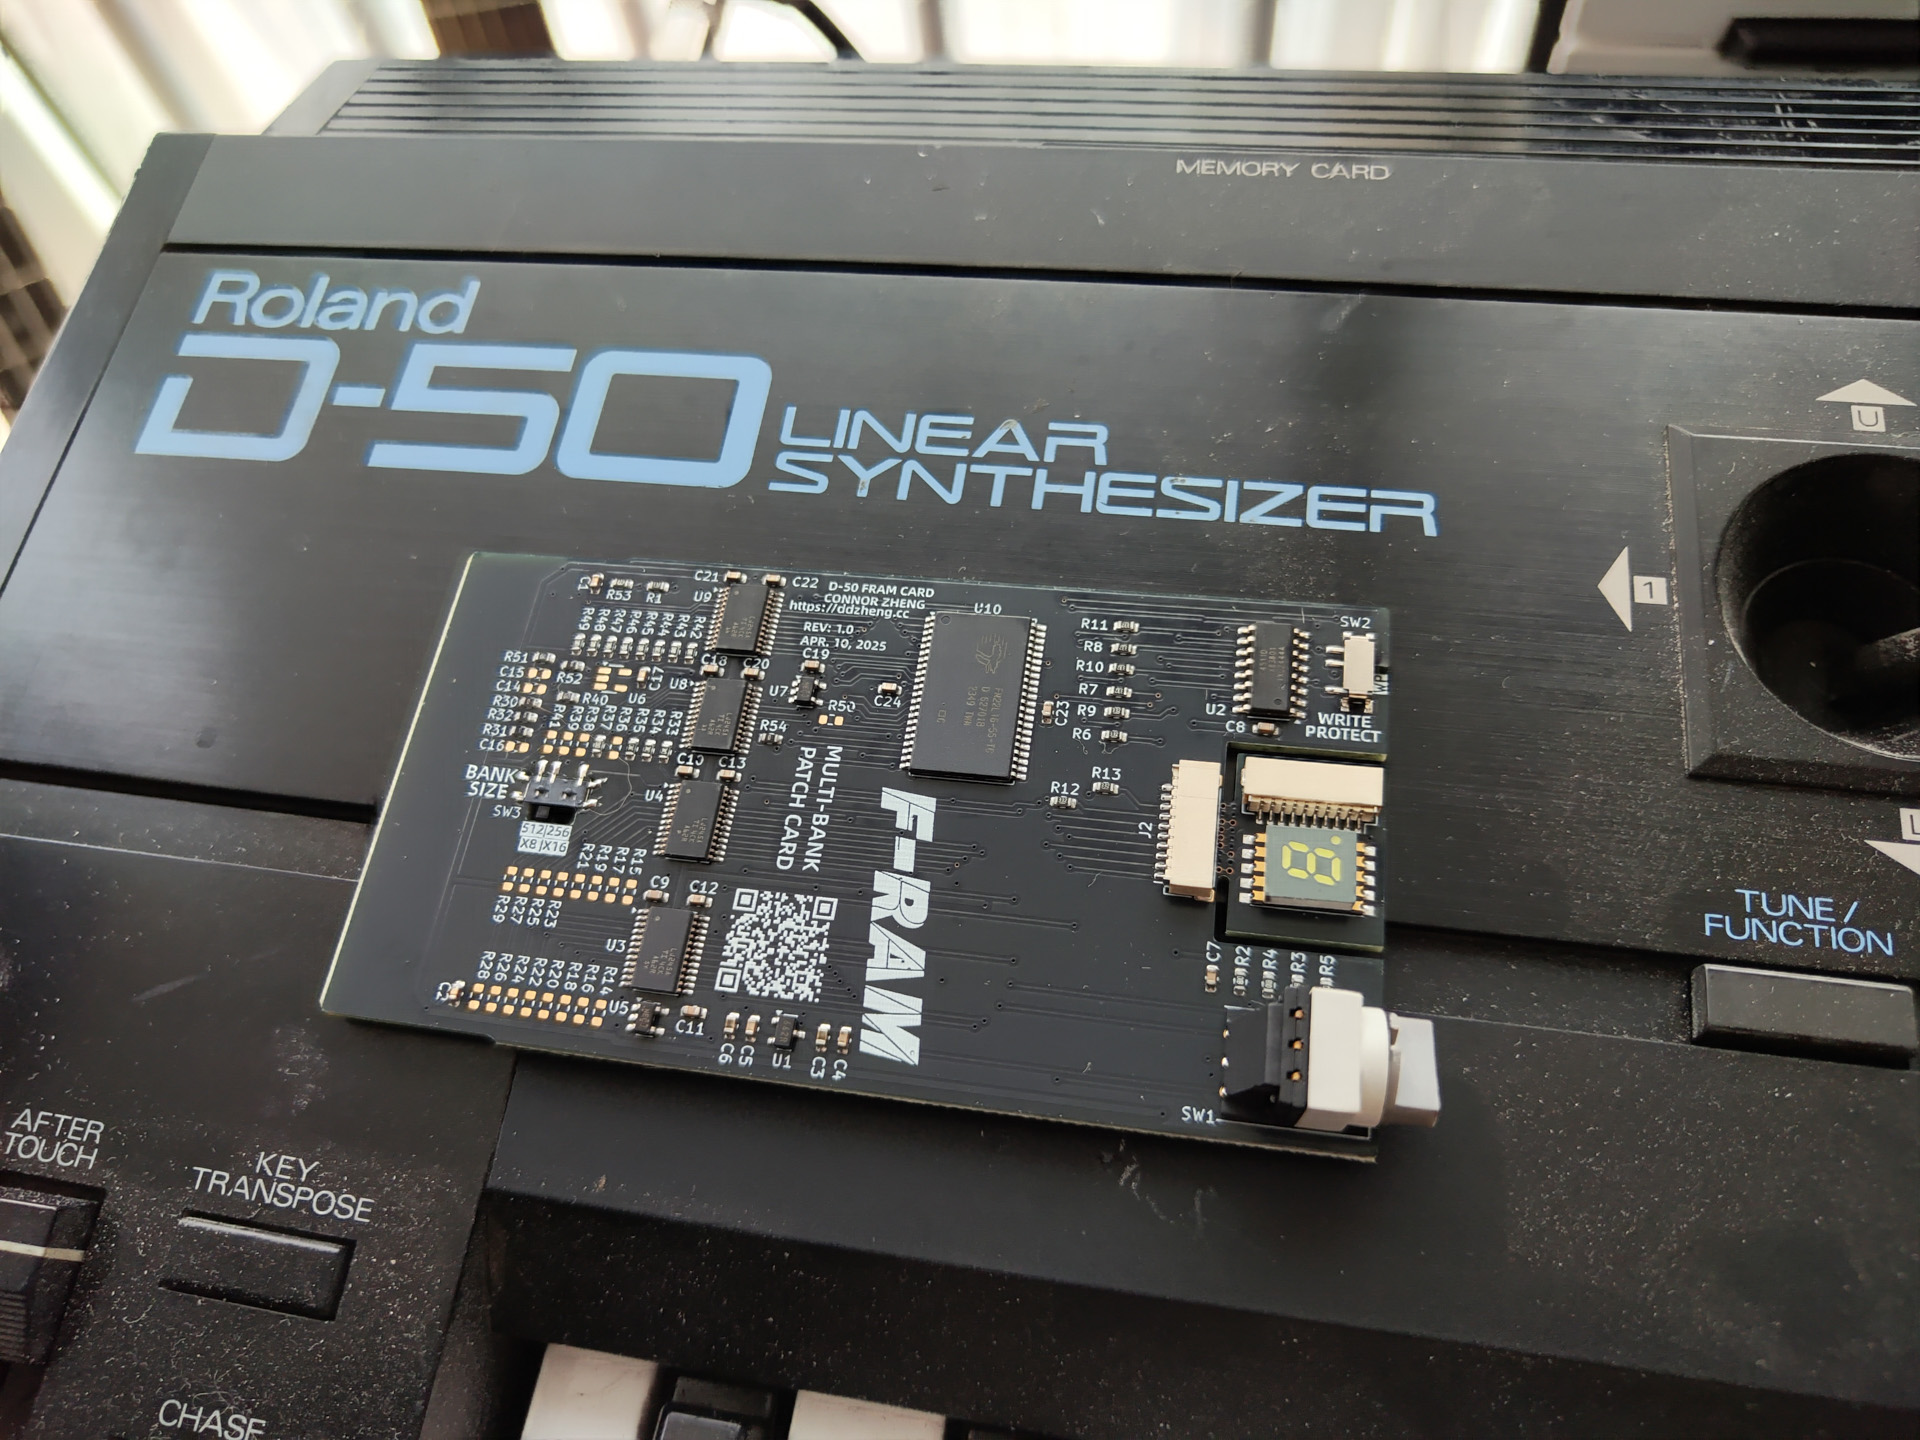
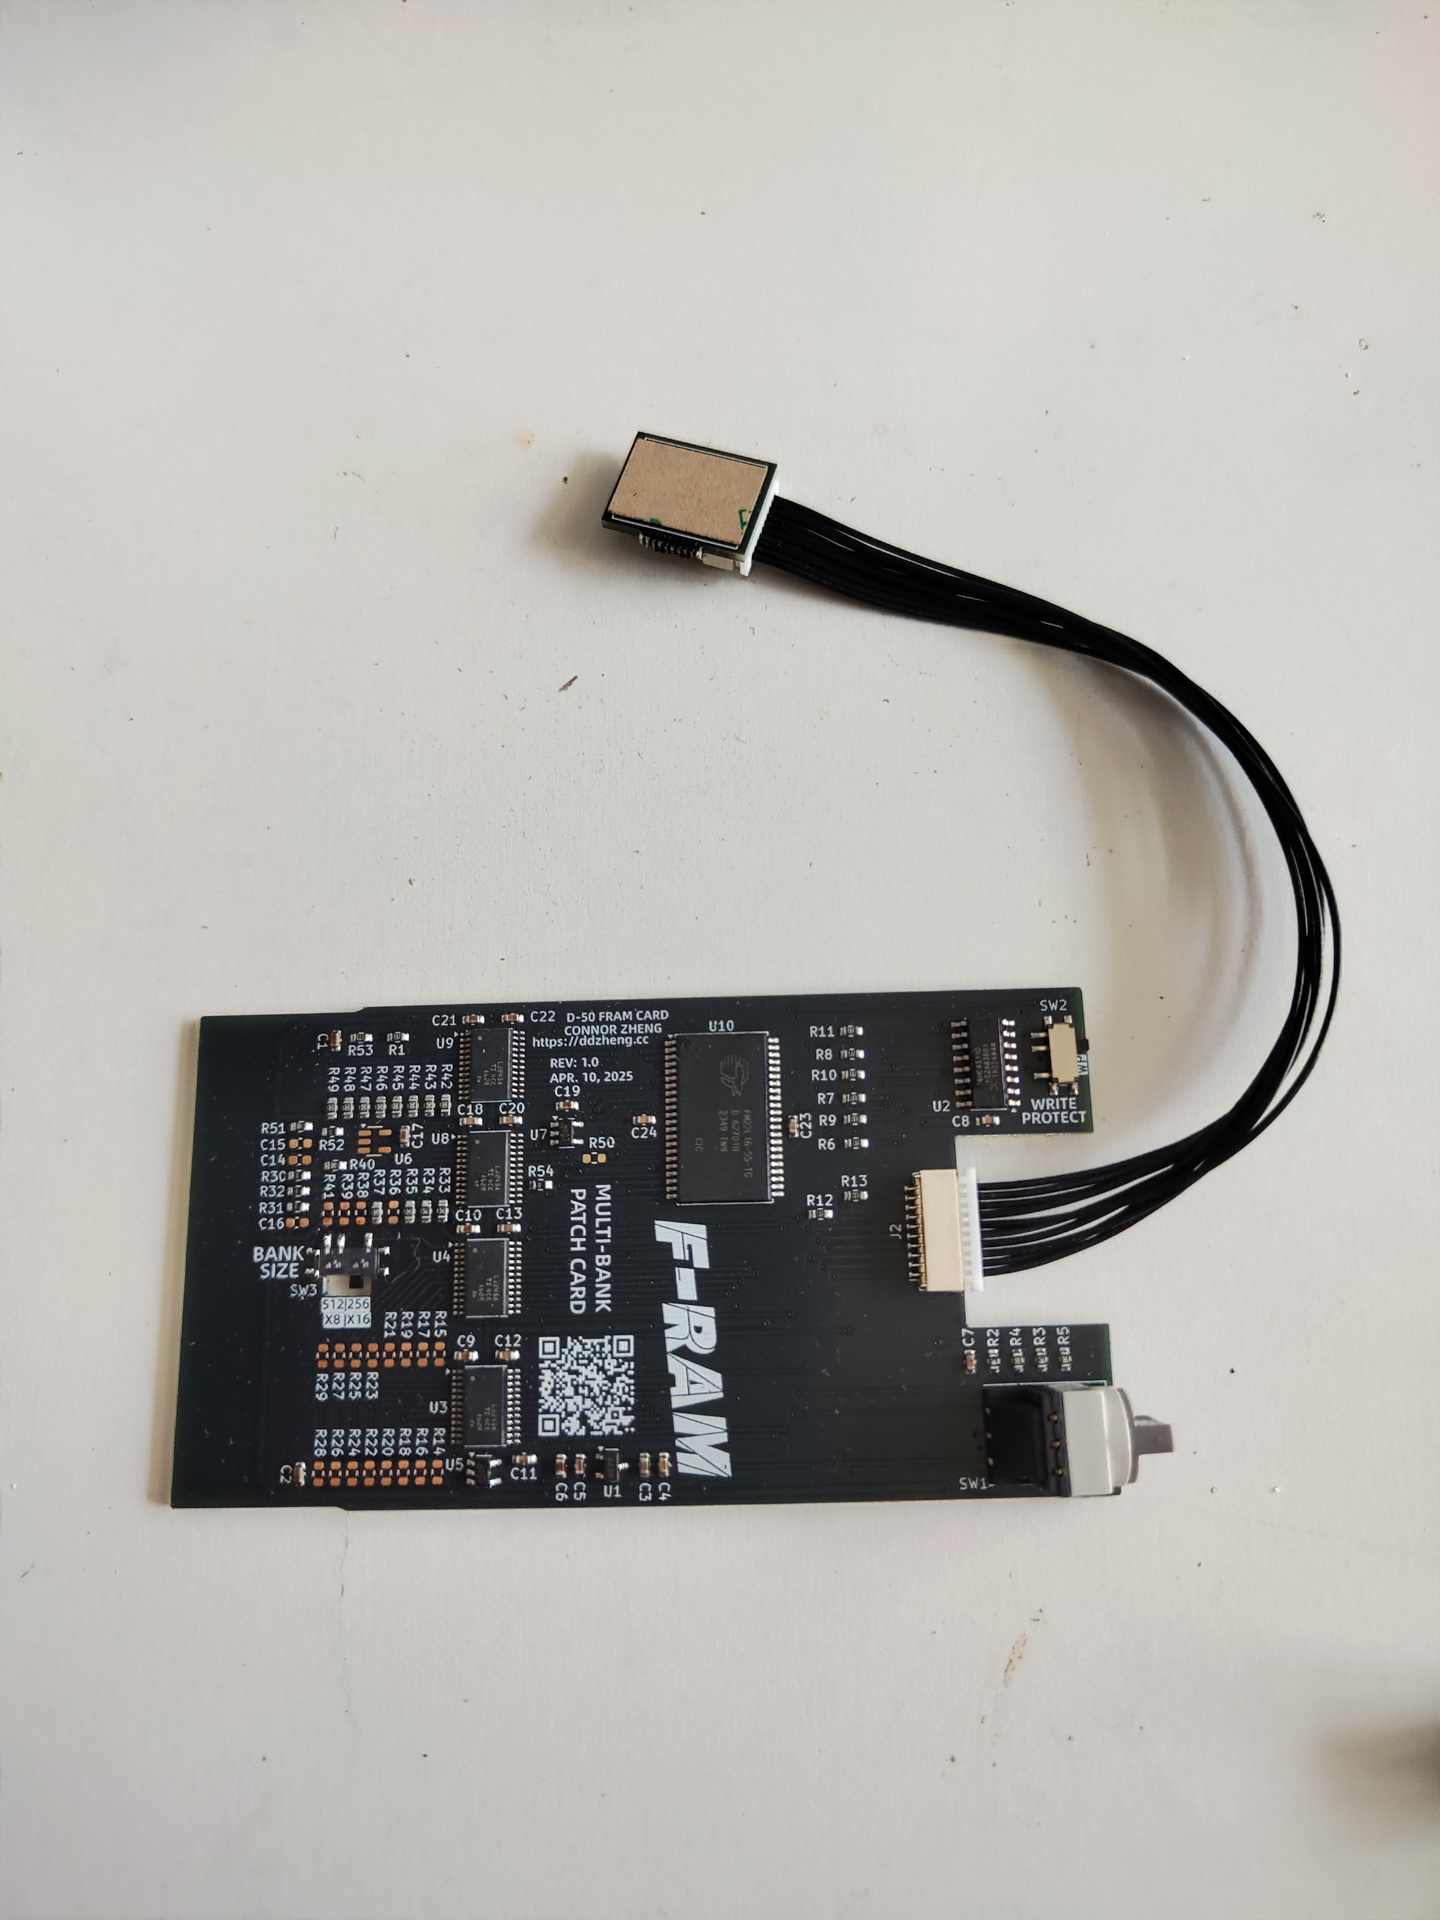
This product (P/N: FR04) is a battery-less multi-bank RAM card based on the dojoe M-RAM card, with 7-seg display to show card number (orientation can be flipped), detachable display, rotary switch.
Compatible Hosts
This card is designed to be compatible with all Roland synthesizer which have slot for M-128/256/512 series RAM cards. However, not all hosts are tested. Green means the combination of hardware revision and host is tested to work, while orange means partial or complete incompatibility. Blank means it’s not tested but should work, feedback are welcome.
| Synthesizer | Compatibility |
| A-90 | Not tested |
| D-5 | Yes |
| D-50 | Yes |
| D-550 | Yes |
| D-10 | Not tested |
| D-110 | Not tested |
| D-20 | Not tested |
| D-70 | Not tested |
| GR-1 | Not tested |
| GR-50 | Yes |
| JD-800 | Yes |
| JD-990 | Yes |
| JV-880 | Yes |
| JV-1000 | Yes |
| JV-1080 | Yes |
| JV-2080 | Yes |
| PM-16 | Not tested |
| R-880 (GC-8) | Not tested |
| R-8M | Yes |
| TR-626 | Not tested |
| U-20 | Not tested |
| Akai MX-1000 | Not tested |
| Akai VX600 | Not tested |
| Roland TD-10, TD-20, Roland VG-8, Peavey Tubefex | No |
Parts and Function
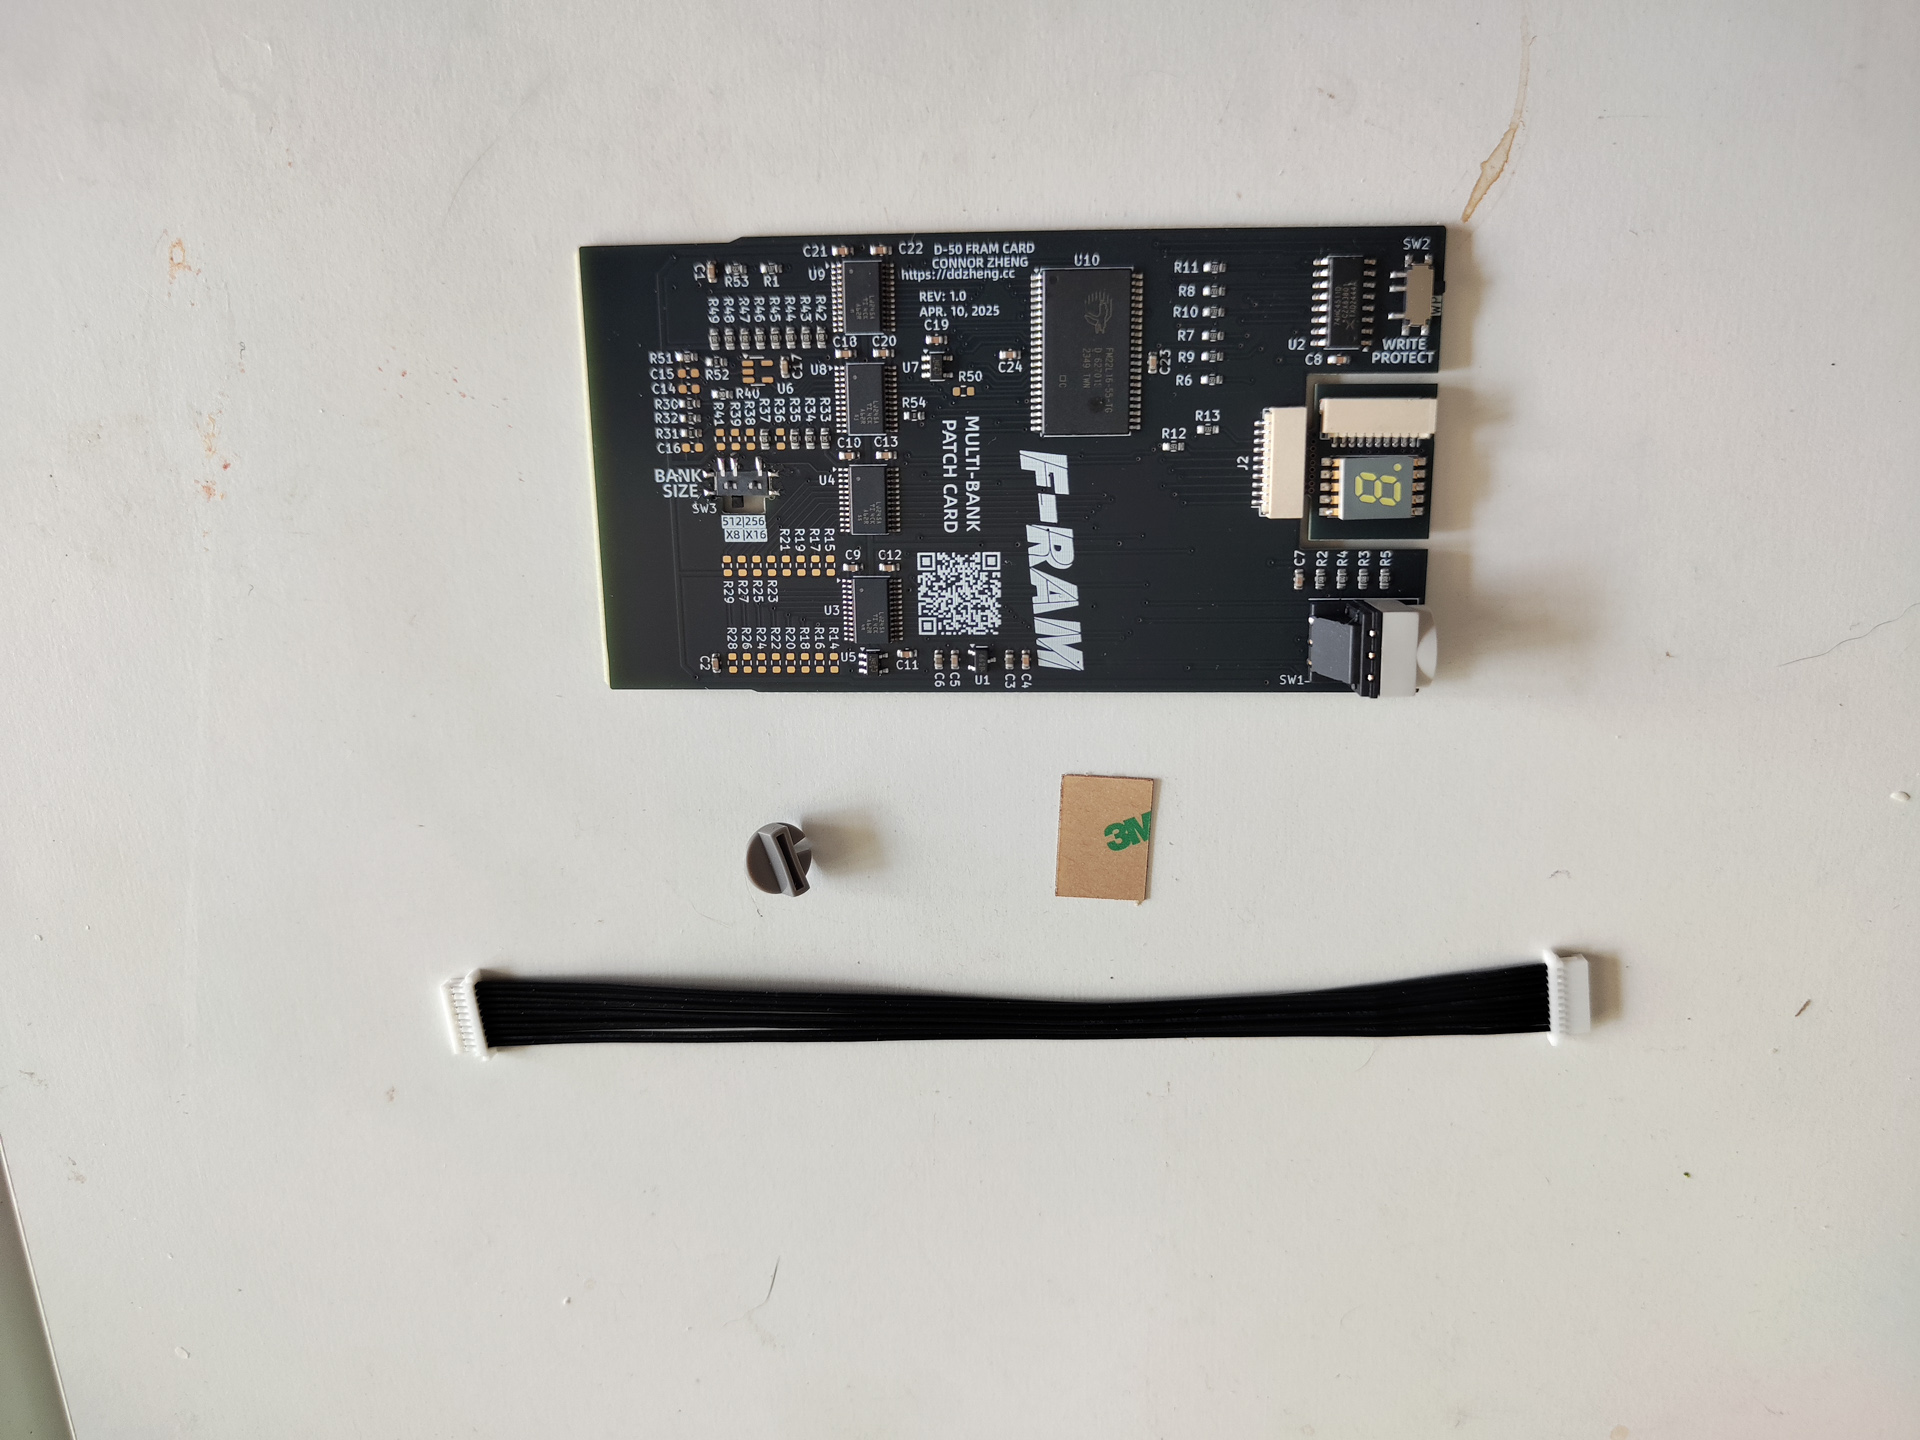
Within the package you should have received the card itself, the handle for the rotary switch, a piece of 3M 300LSE double-sided tape, and a cable for split display connection.
Installation
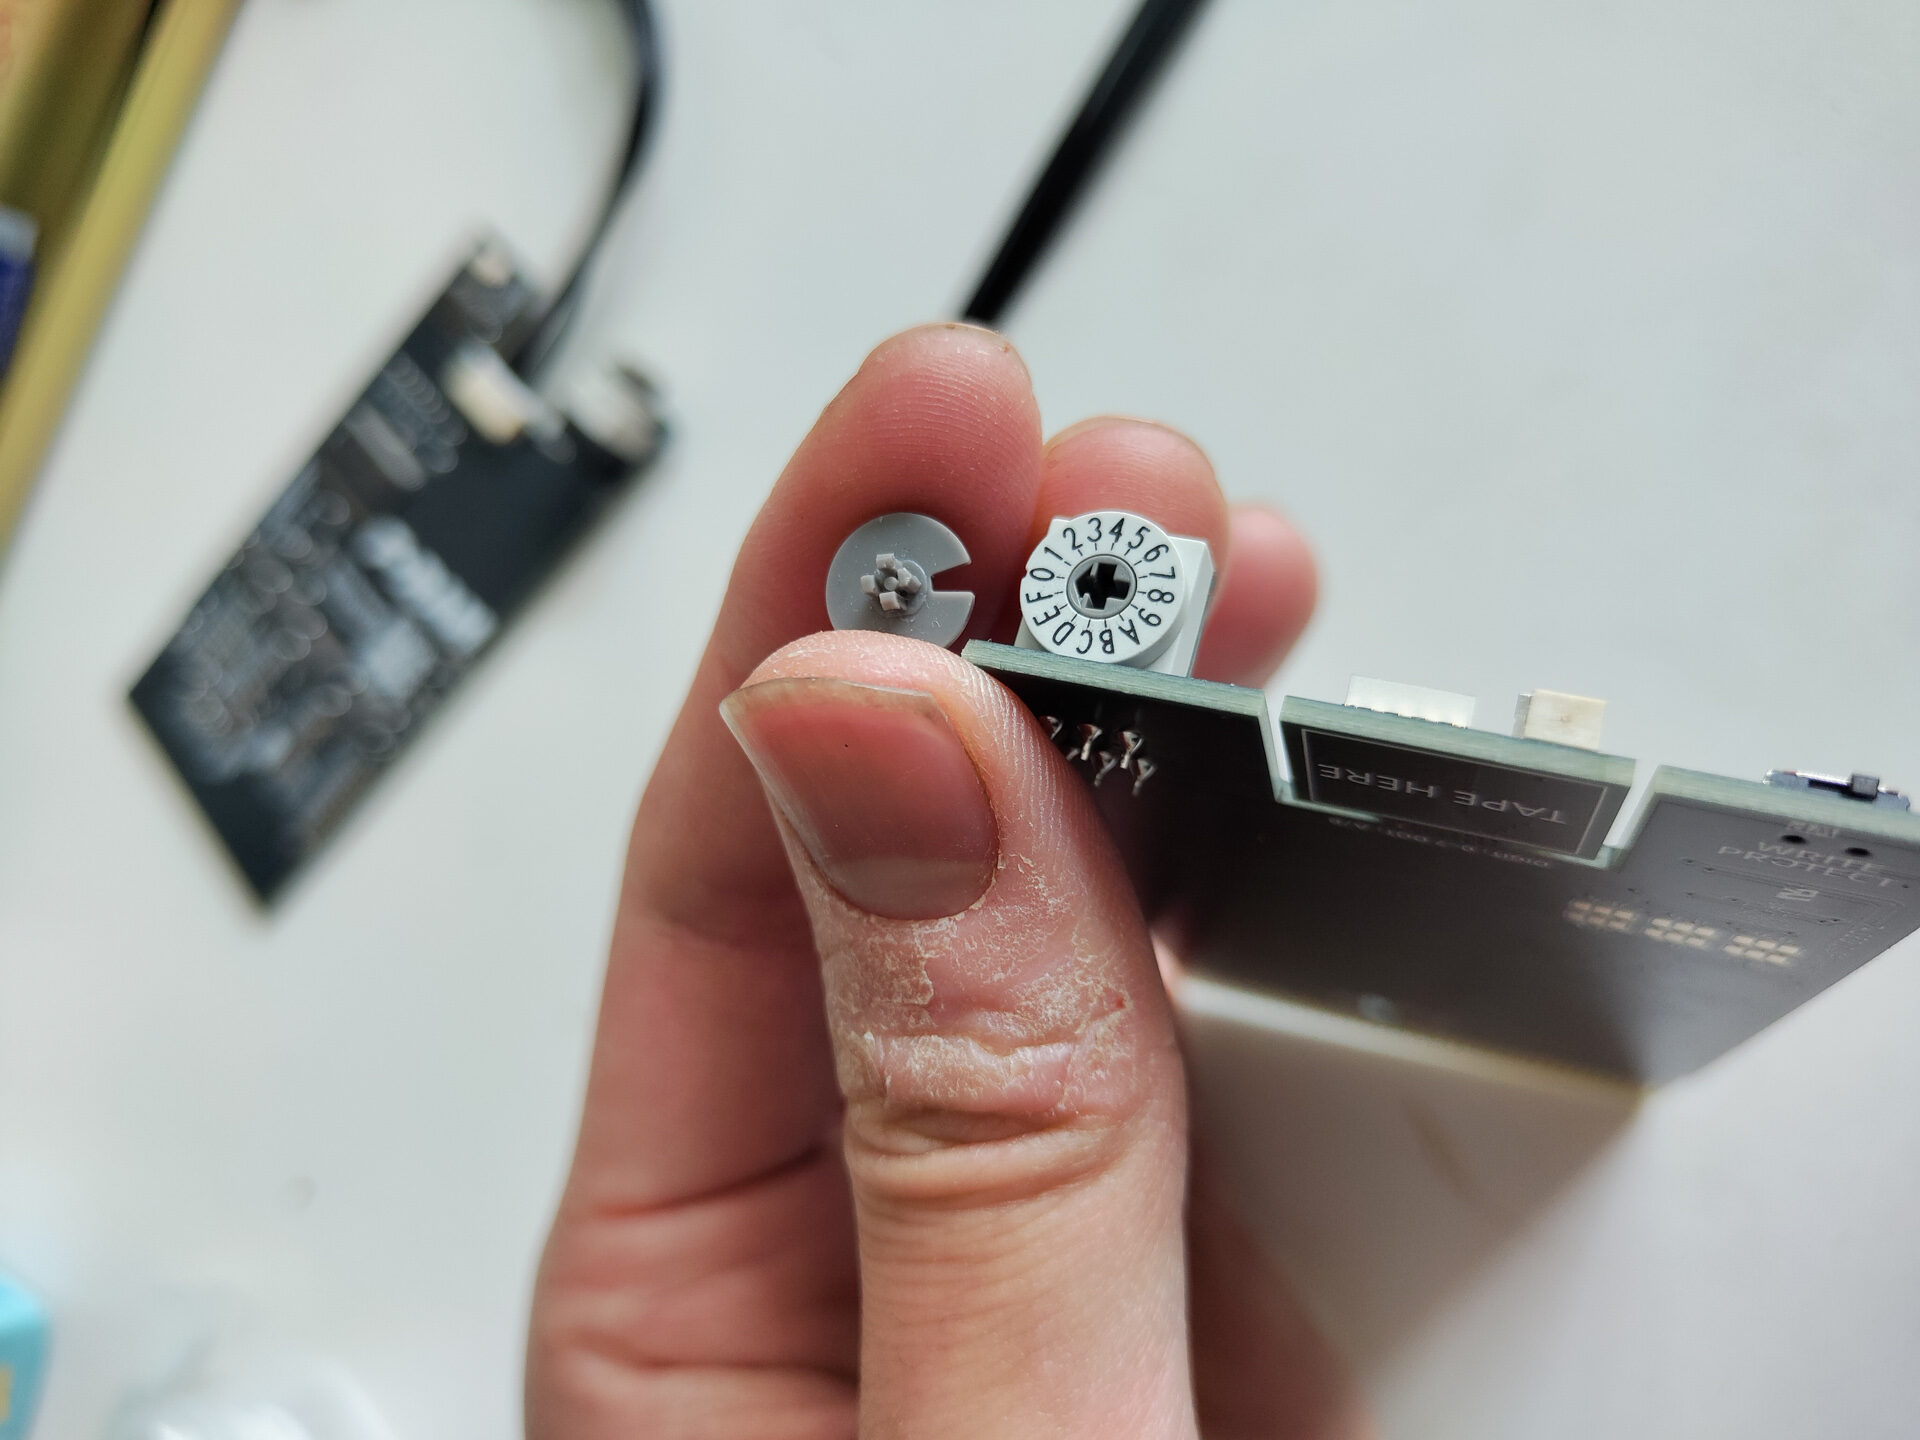
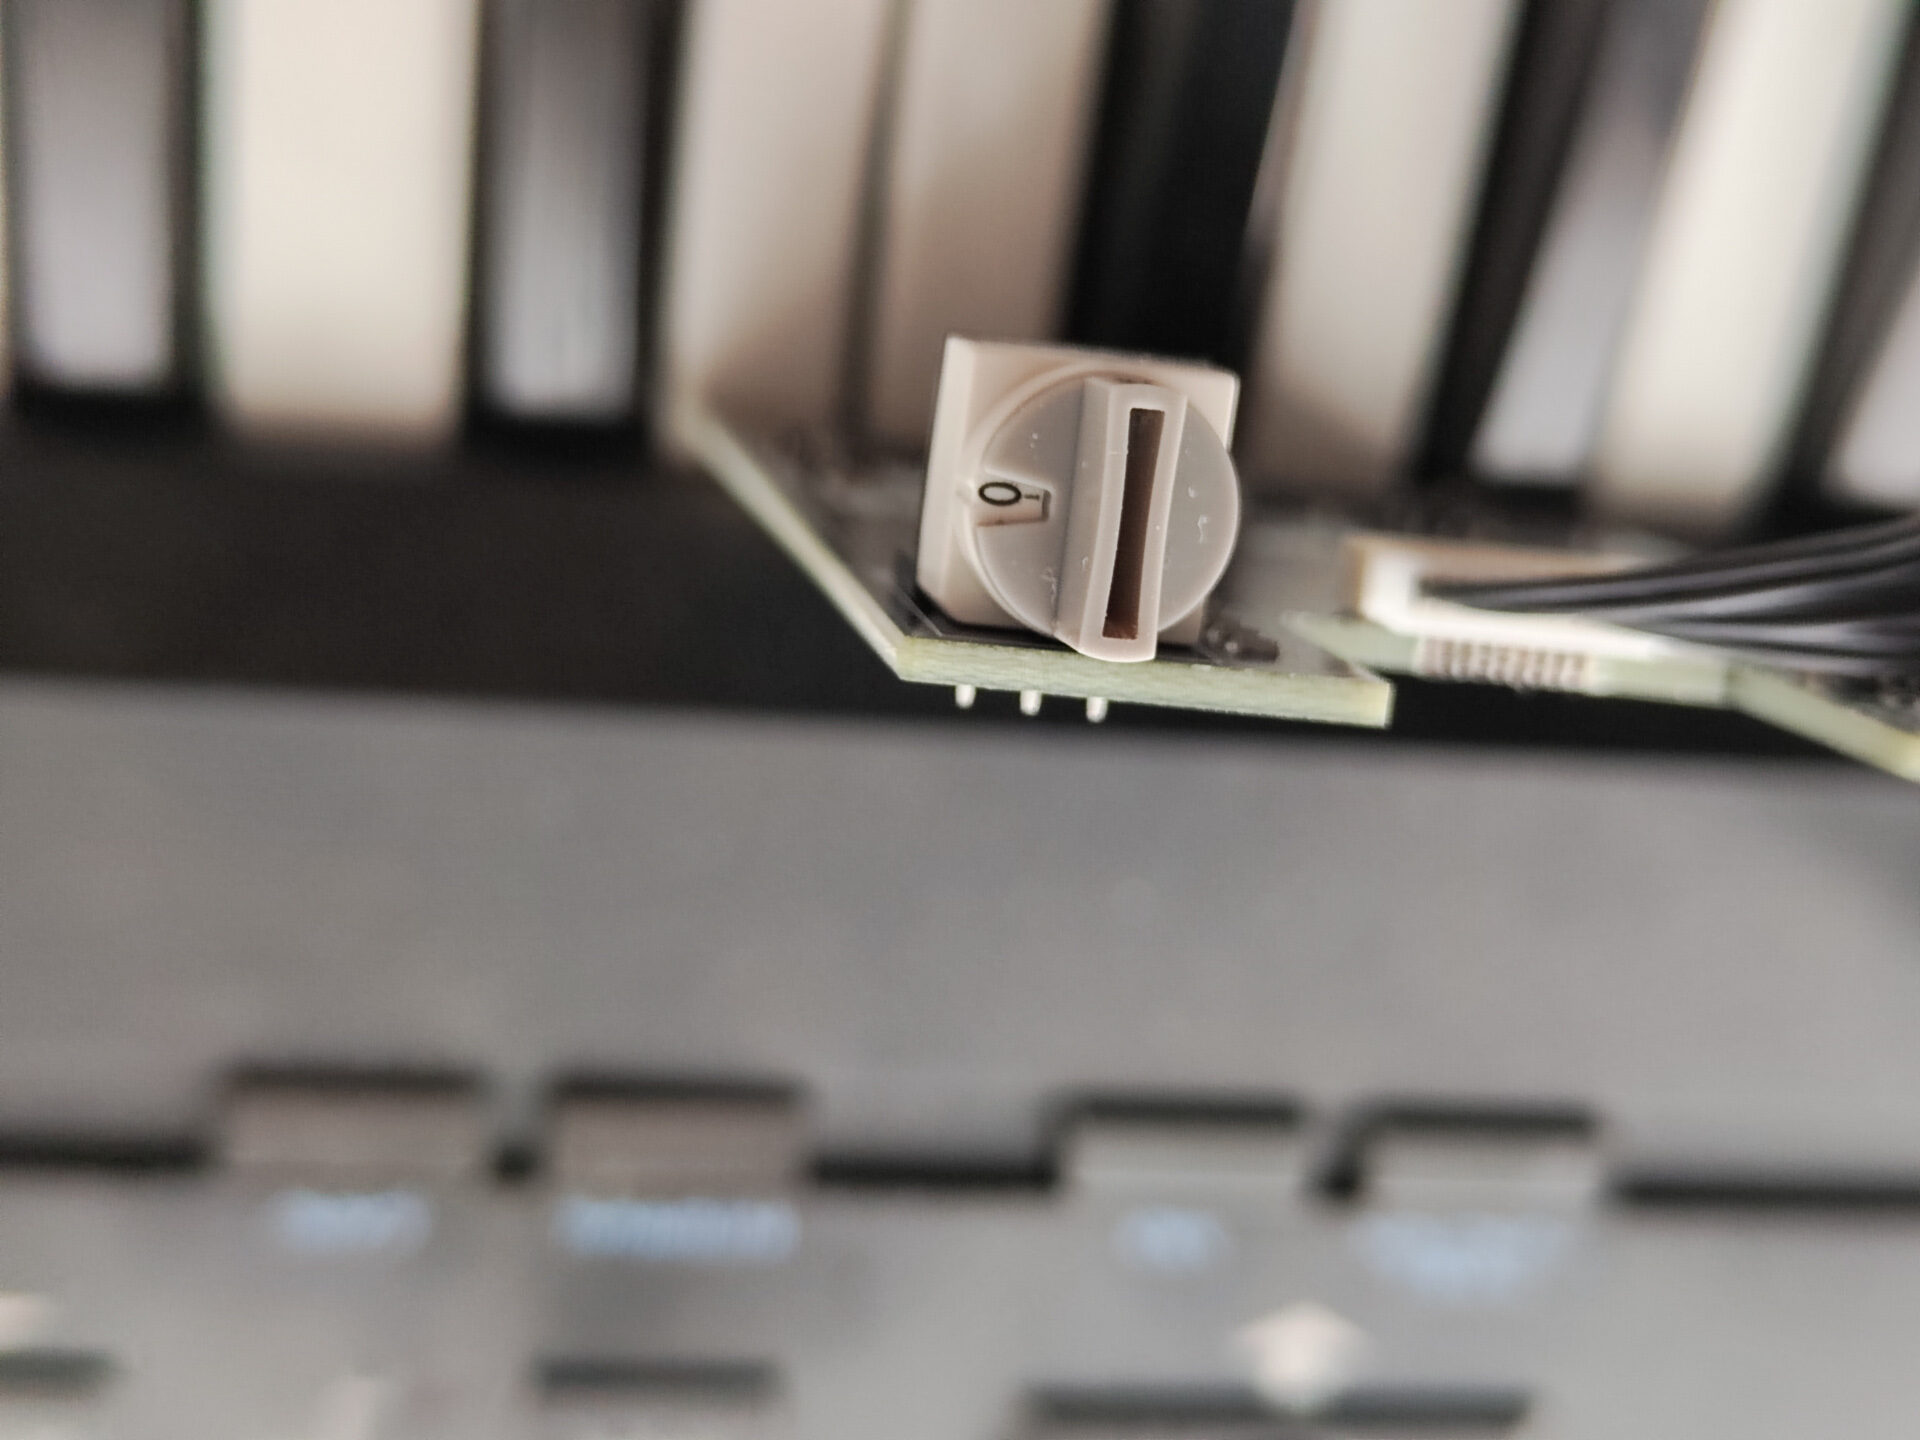
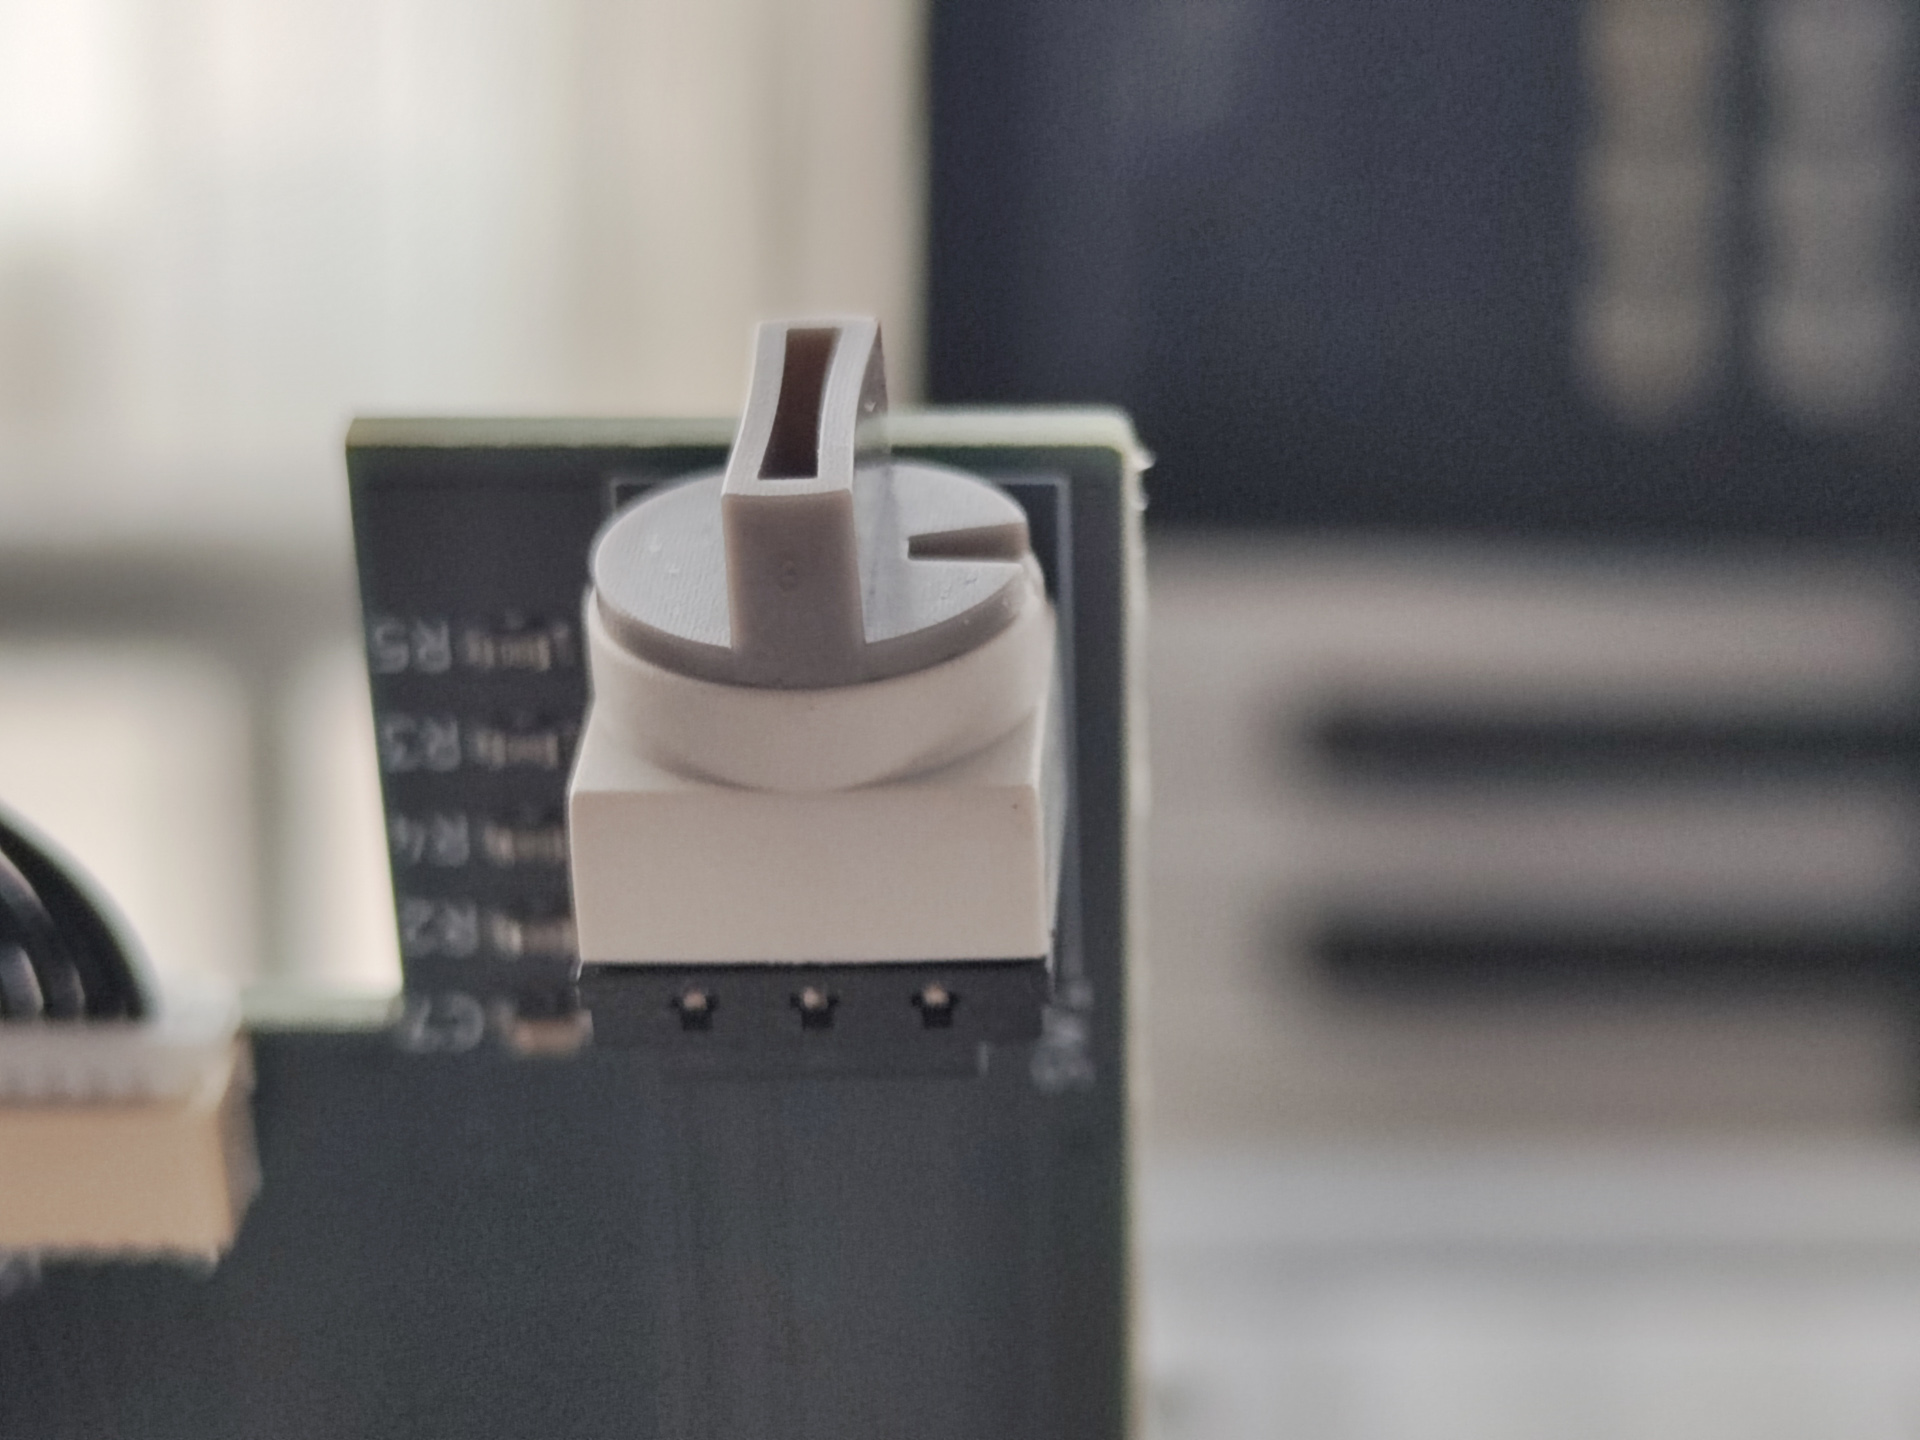
To avoid shipping damage the handle of the rotary switch is not mounted and you’ll need to mount it before using the card. To mount the handle, align the notch on the handle with the digit currently indicated with the arrow on the switch itself and push the handle firmly in until it sits flush.
Optional: Split Display Installation
Warning: Fiberglass content
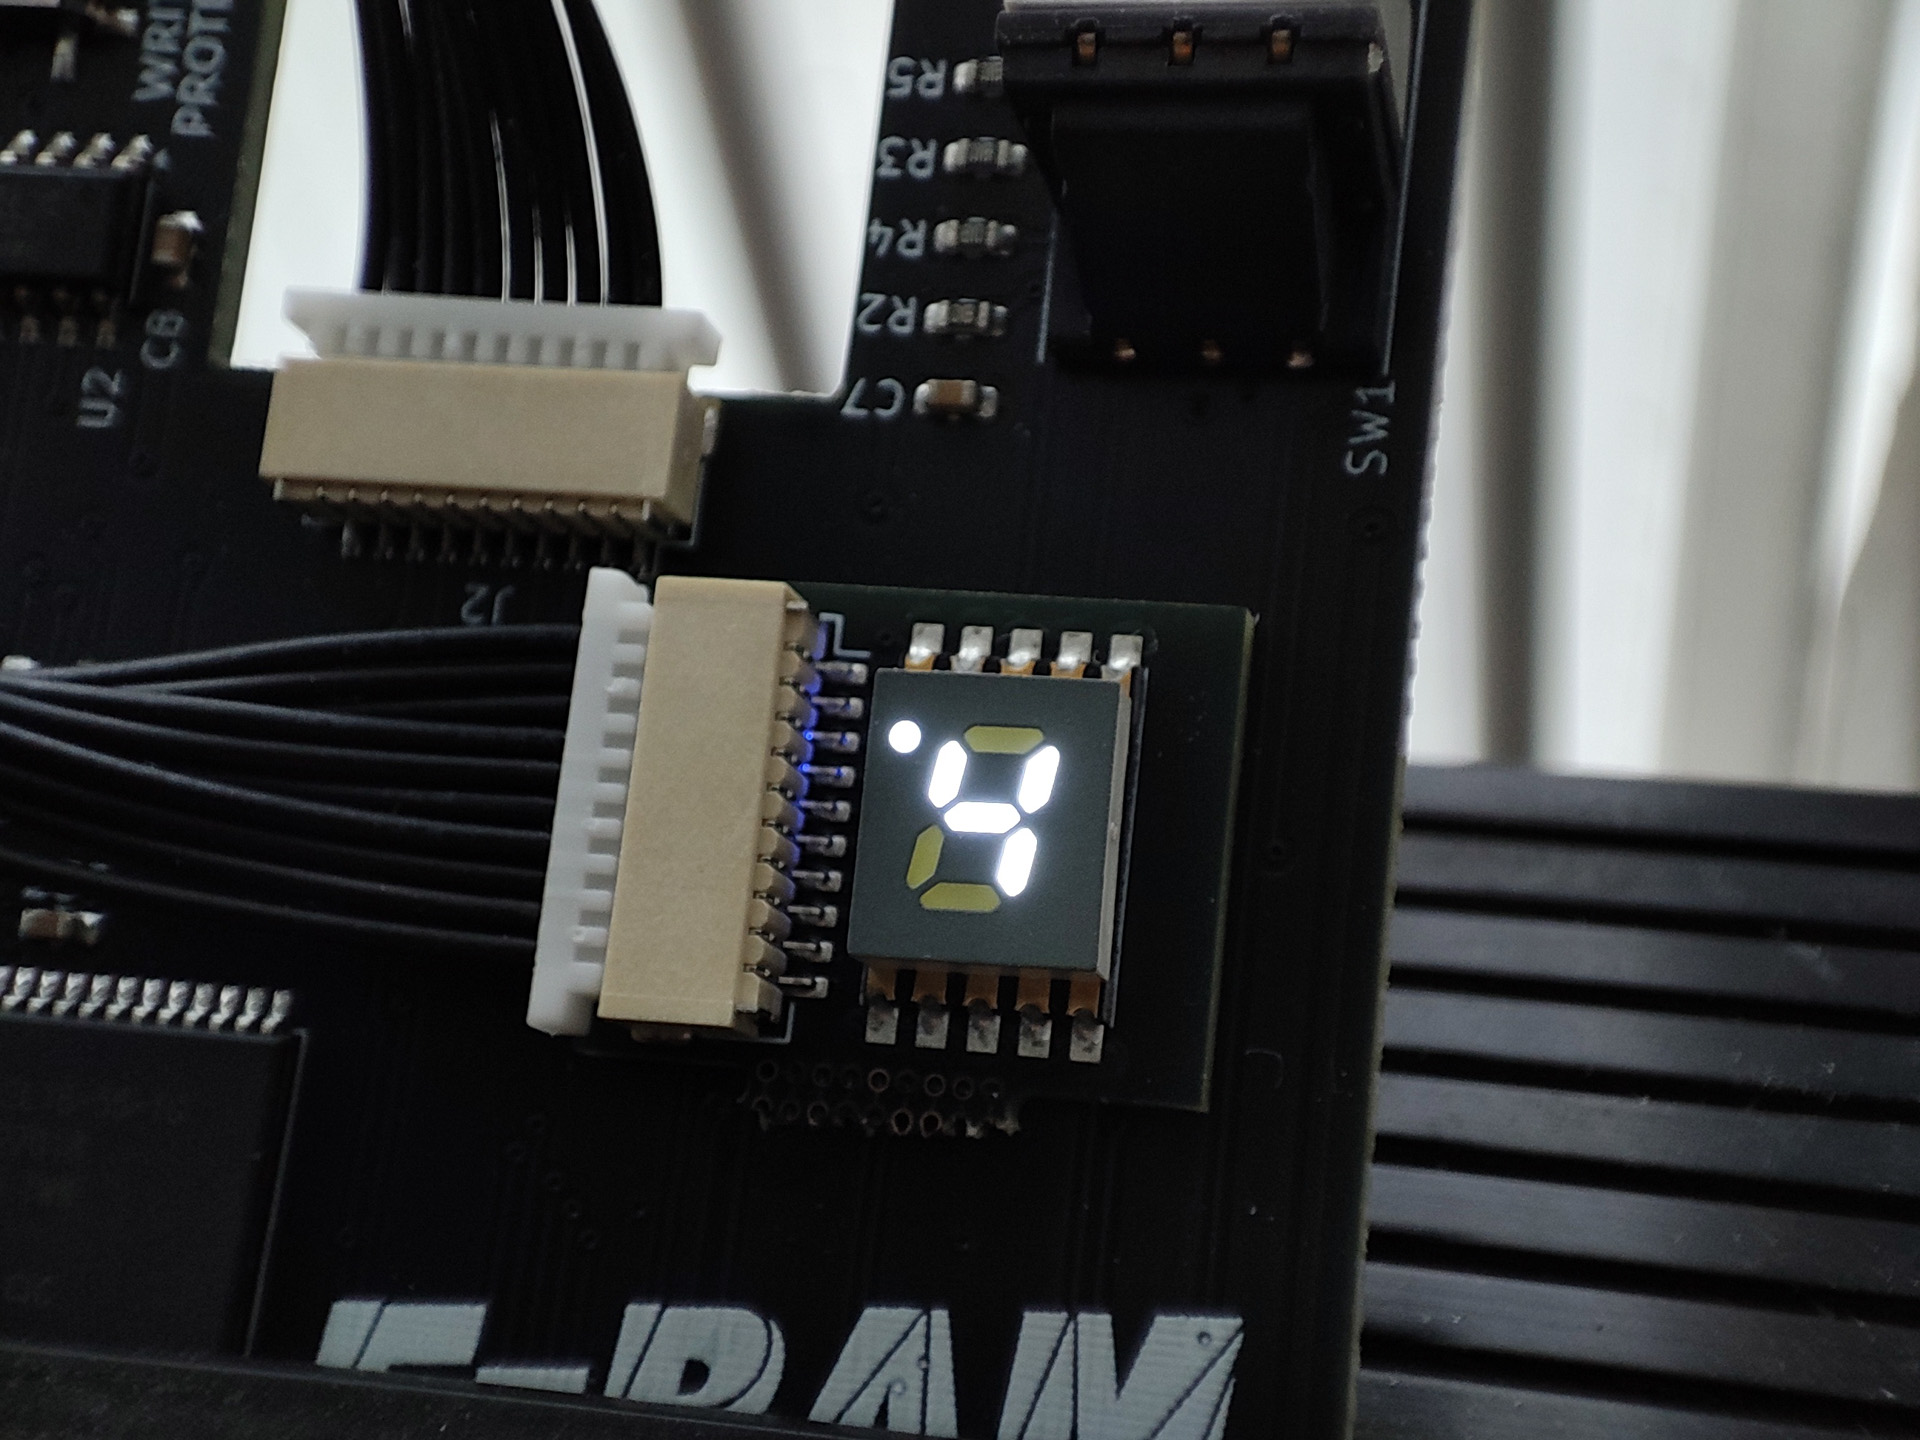
If you want to install the display onto your equipment, you can snap off the display section, connect it to the card by using the supplied cable, and tape it to the front of your equipment by using the supplied double-sided tape.
The supplied tape is 3M 300LSE. Do not stick onto silkscreened part to avoid damaging printed patterns. 300LSE provides high bond strength to most surfaces, including many low surface energy material. However you may want to supply your own higher or lower strength tape.
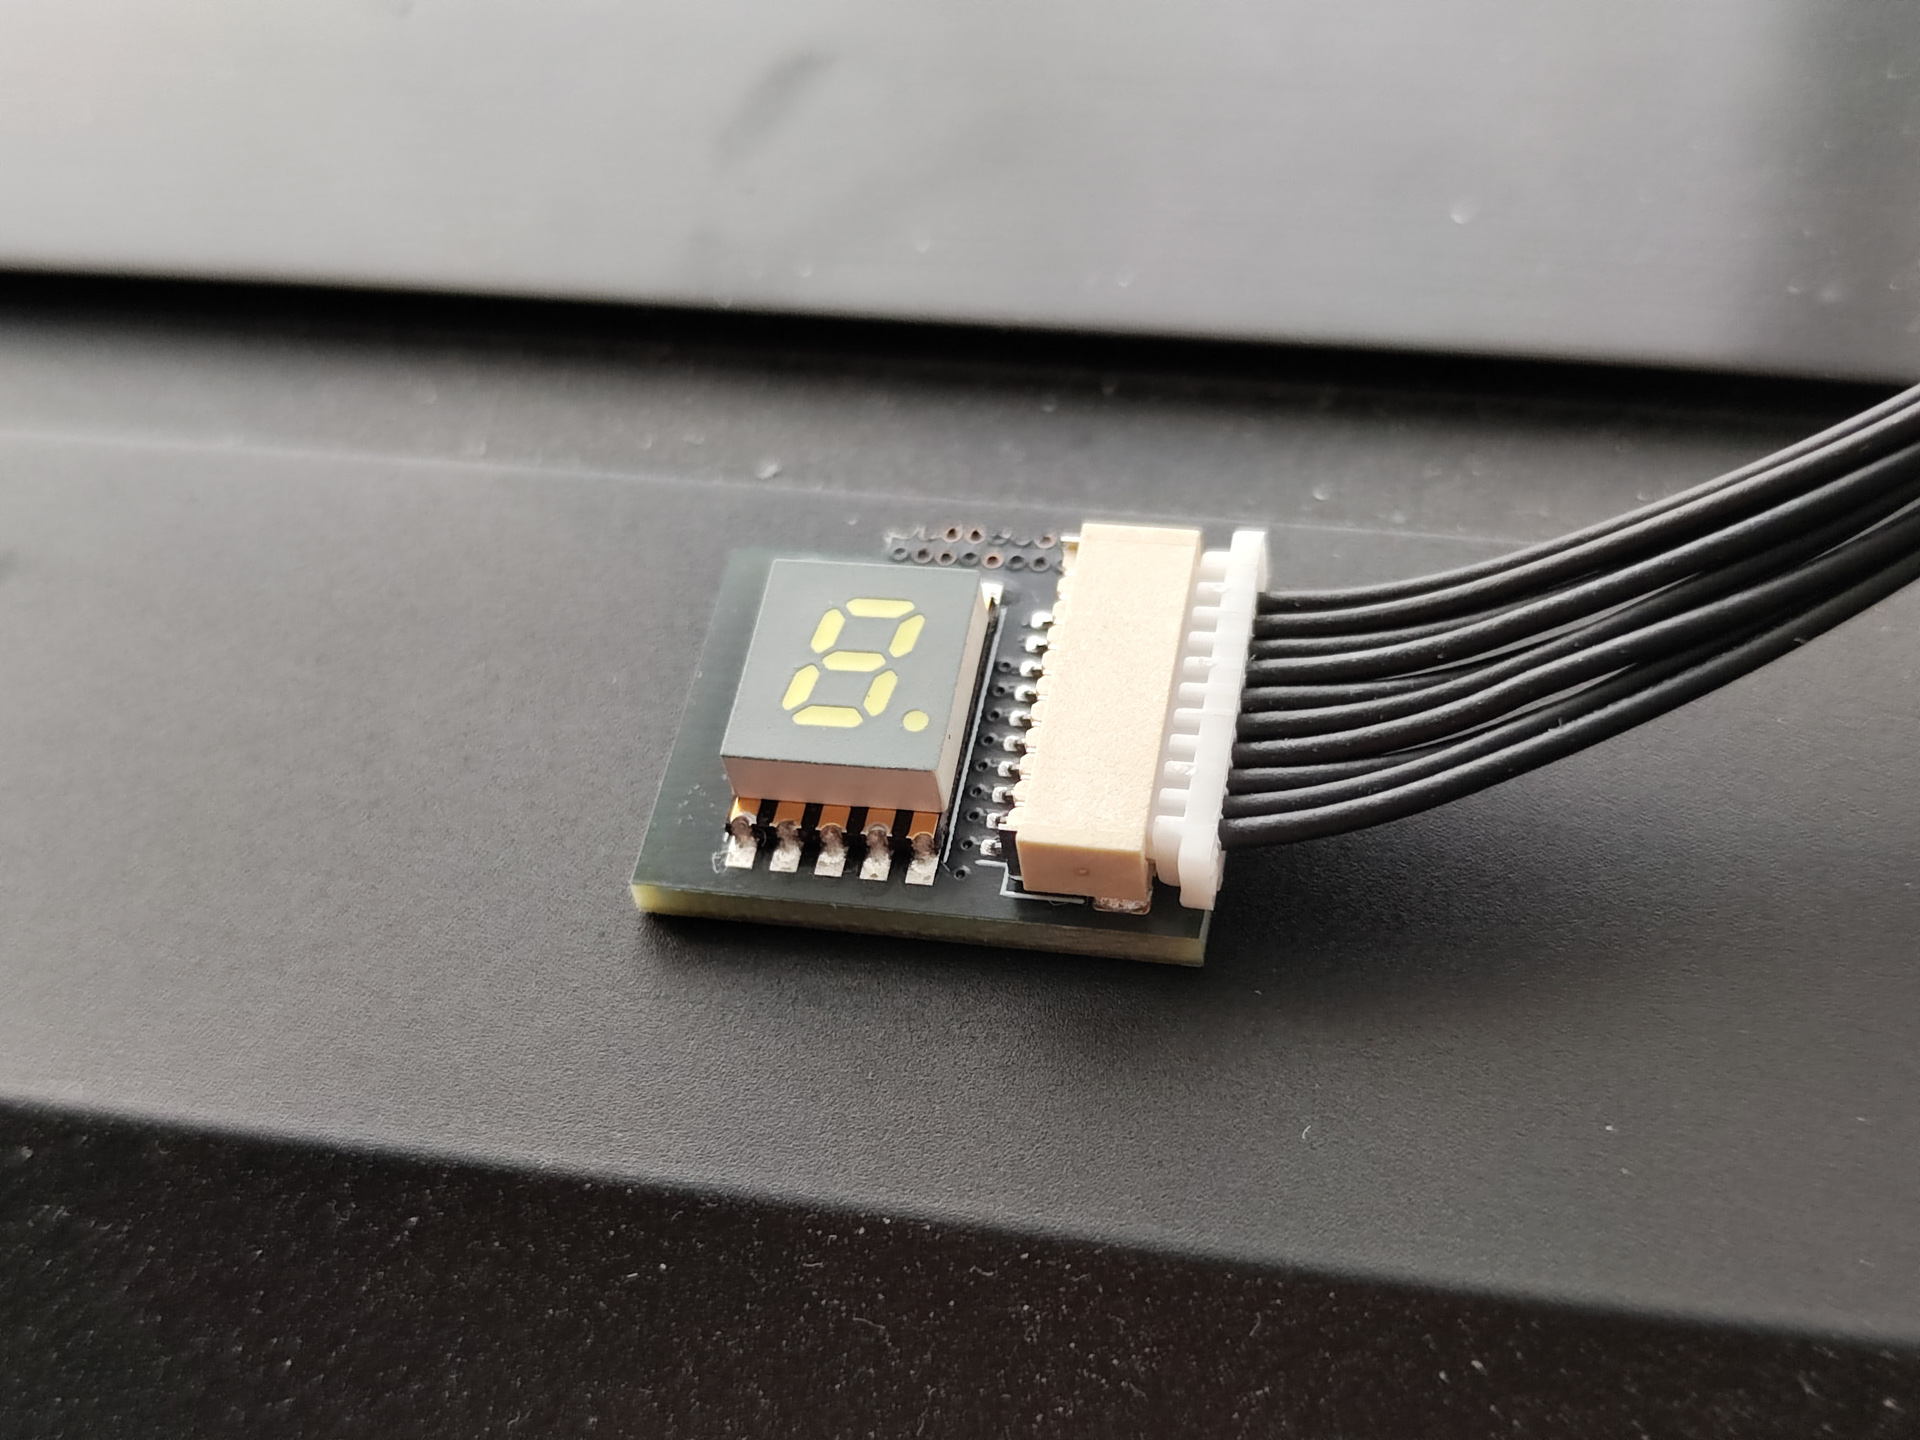
Note: Please wear glove to avoid cutting yourself. If you would like to trim the excess from snapping, please wear glove, mask and eye protection. Wet the area with water to avoid fiberglass escaping. Use vacuum cleaner to clean afterwards.
Optional: Flip Display Orientation
Delicate craft work and soldering is required.
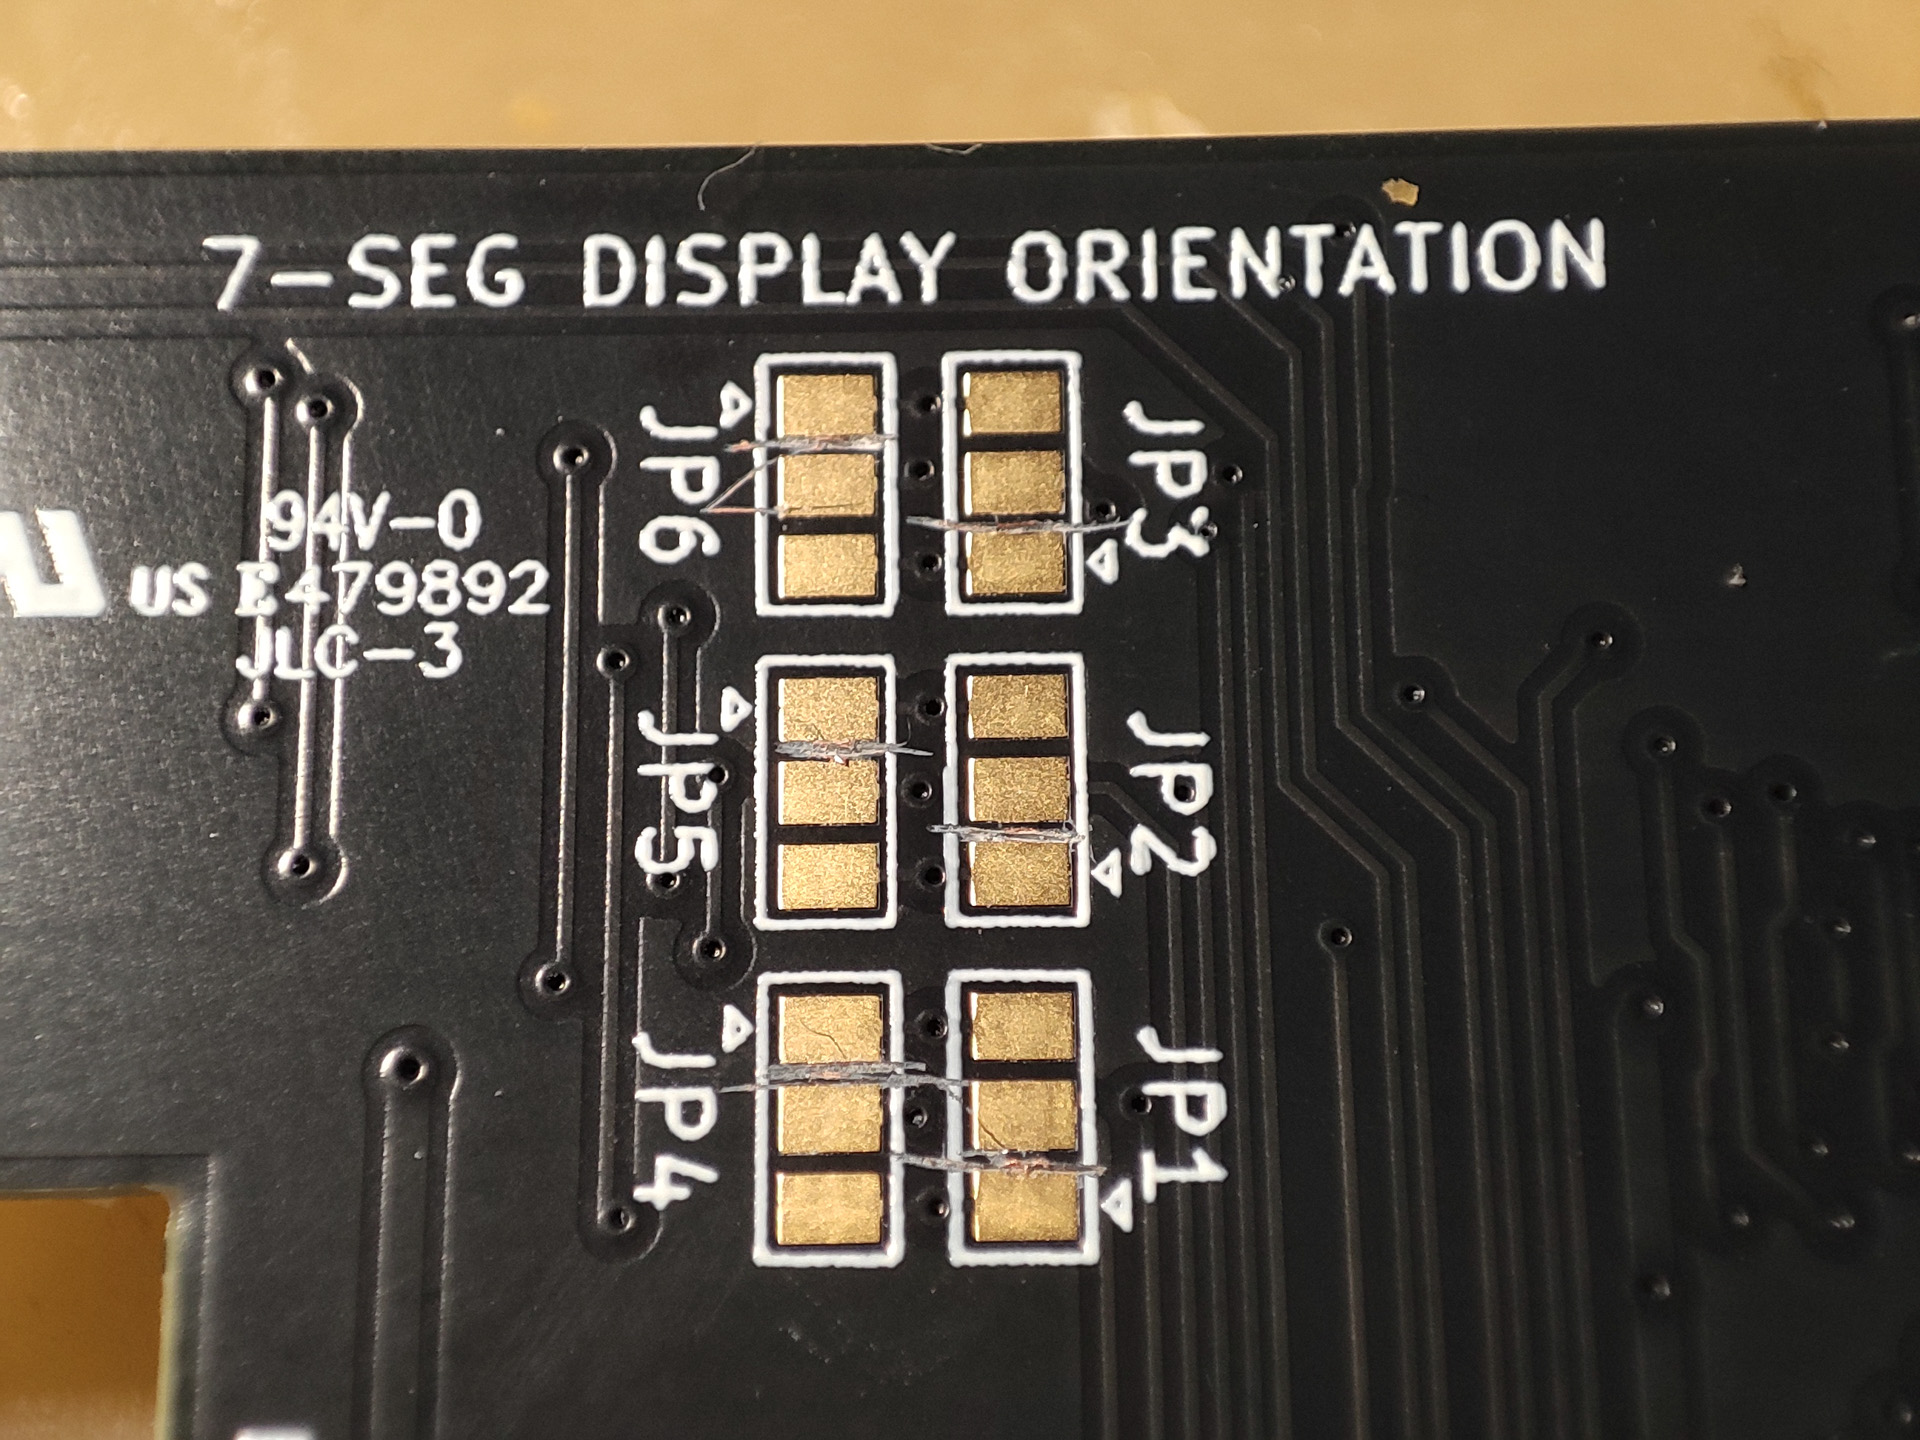
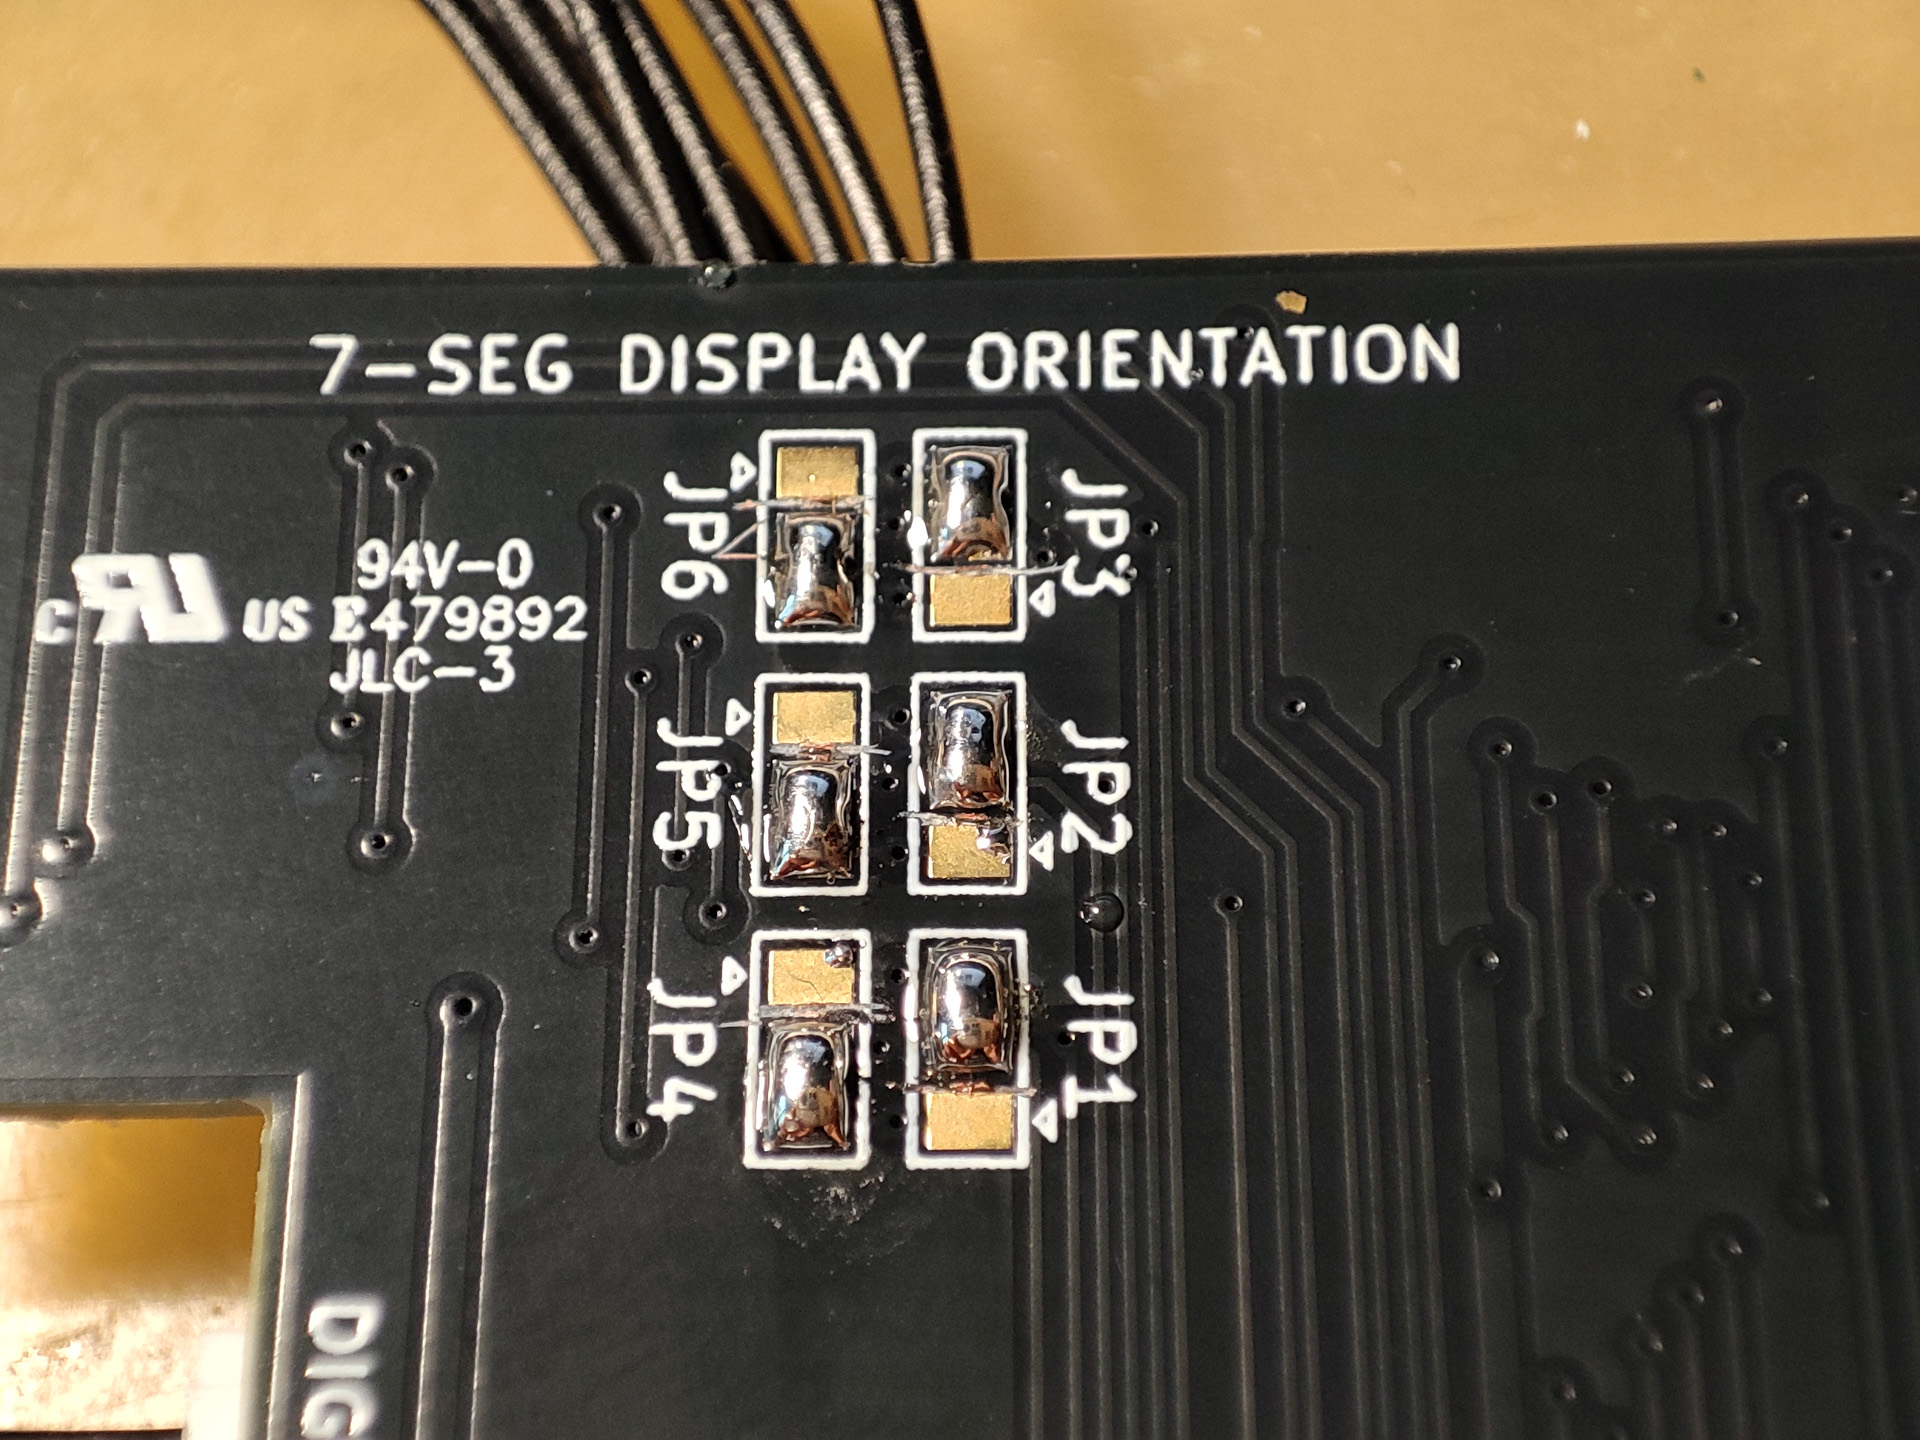
If you want to flip the display orientation (for keyboarded synth use), there are 6 solder jumpers on the back side of the card. The center pad and default pad (indicated by little triangle) are connected by copper trace. To flip the display, you need to cut the trace (with x-acto knife or similar), and then connect the center pad with the other pad (not indicated with triangle) with solder. This will flip the display 180°.
Configuration and Usage
Selecting Card Size
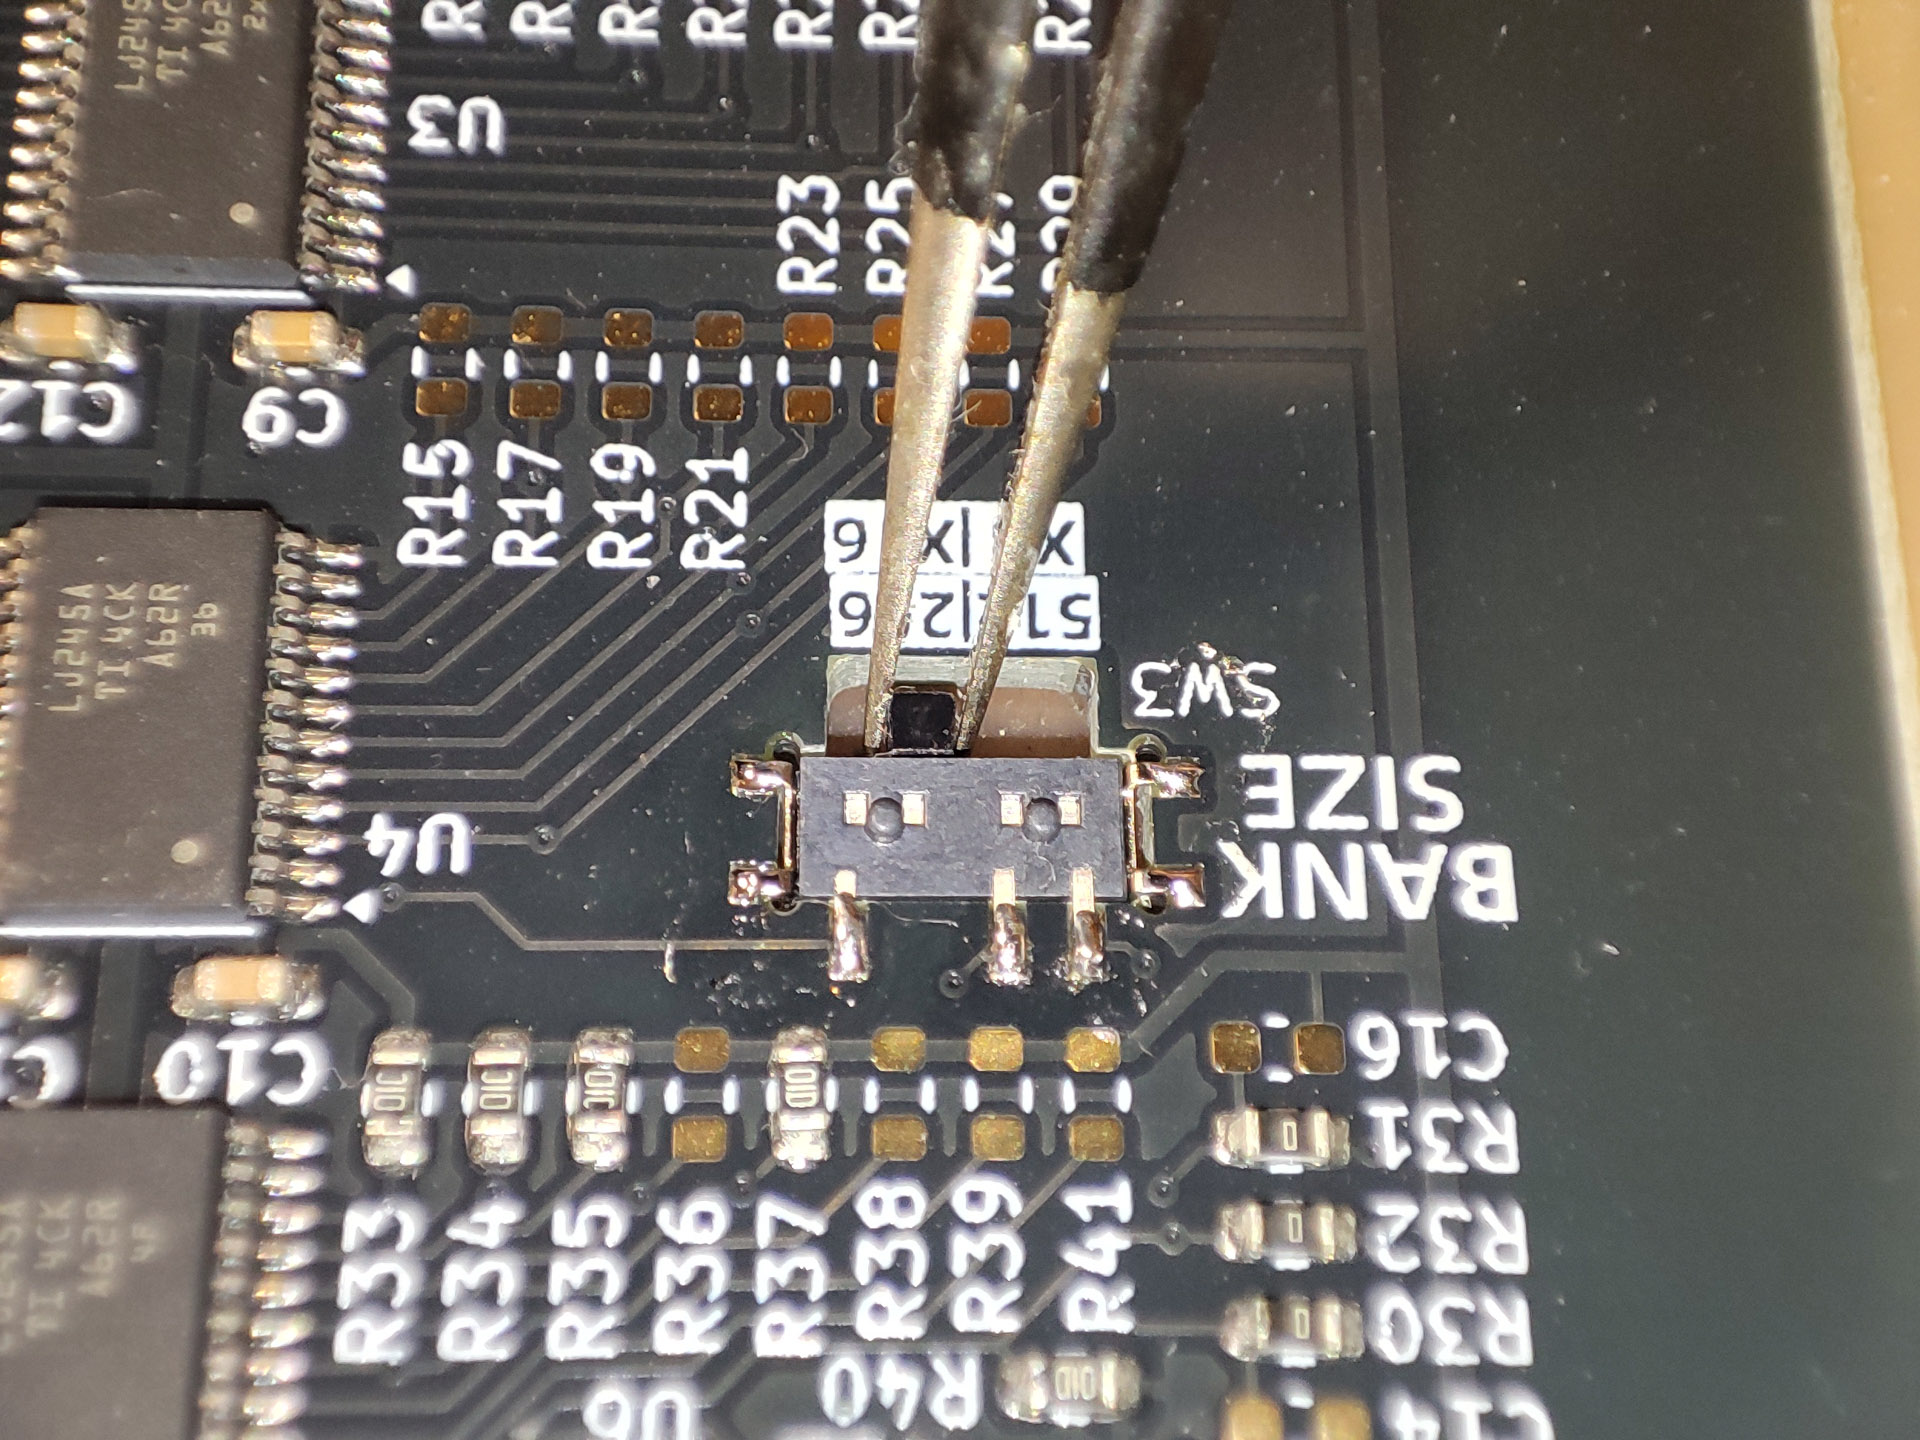
You can select between 16 x 256 (M-256 equiv.) or 8 x 512 (M-512 equiv.) size bank. To change bank size you need to use an appropriate, point-headed tool to move the switch handle.
Write Protection
Whenever you would like to prevent writing to the card, you can move the “WRITE PROTECTION” switch to “WP” position.
Please note: same as original Roland RAM card, the card does not actually inhibit writes to the card and it relies on your host synthesizer “respecting” the write protection signal. If the signal cannot be transmitted due the connector is dirty or other reasons, the write protection will fail. So try this function first.
Selecting Card
The 7-segment display use 0~7 along with the dot to indicated 16 positions. To change bank, rotate the rotary switch.
- In 256 mode, each detent represents a card, and the dot on the display is to be included.
- In 512 mode, every 2 detent represent a card, and the dot on the display is ignored.
| Switch Position | Display | Card No. in 256 mode | Card No. in 512 mode |
| 0 | 0 | 0 | 0 |
| 1 | 0 . | 1 | 0 |
| 2 | 1 | 2 | 1 |
| 3 | 1 . | 3 | 1 |
| 4 | 2 | 4 | 2 |
| 5 | 2 . | 5 | 2 |
| 6 | 3 | 6 | 3 |
| 7 | 3 . | 7 | 3 |
| 8 | 4 | 8 | 4 |
| 9 | 4 . | 9 | 4 |
| A | 5 | 10 | 5 |
| B | 5 . | 11 | 5 |
| C | 6 | 12 | 6 |
| D | 6 . | 13 | 6 |
| E | 7 | 14 | 7 |
| F | 7 . | 15 | 7 |
Usage
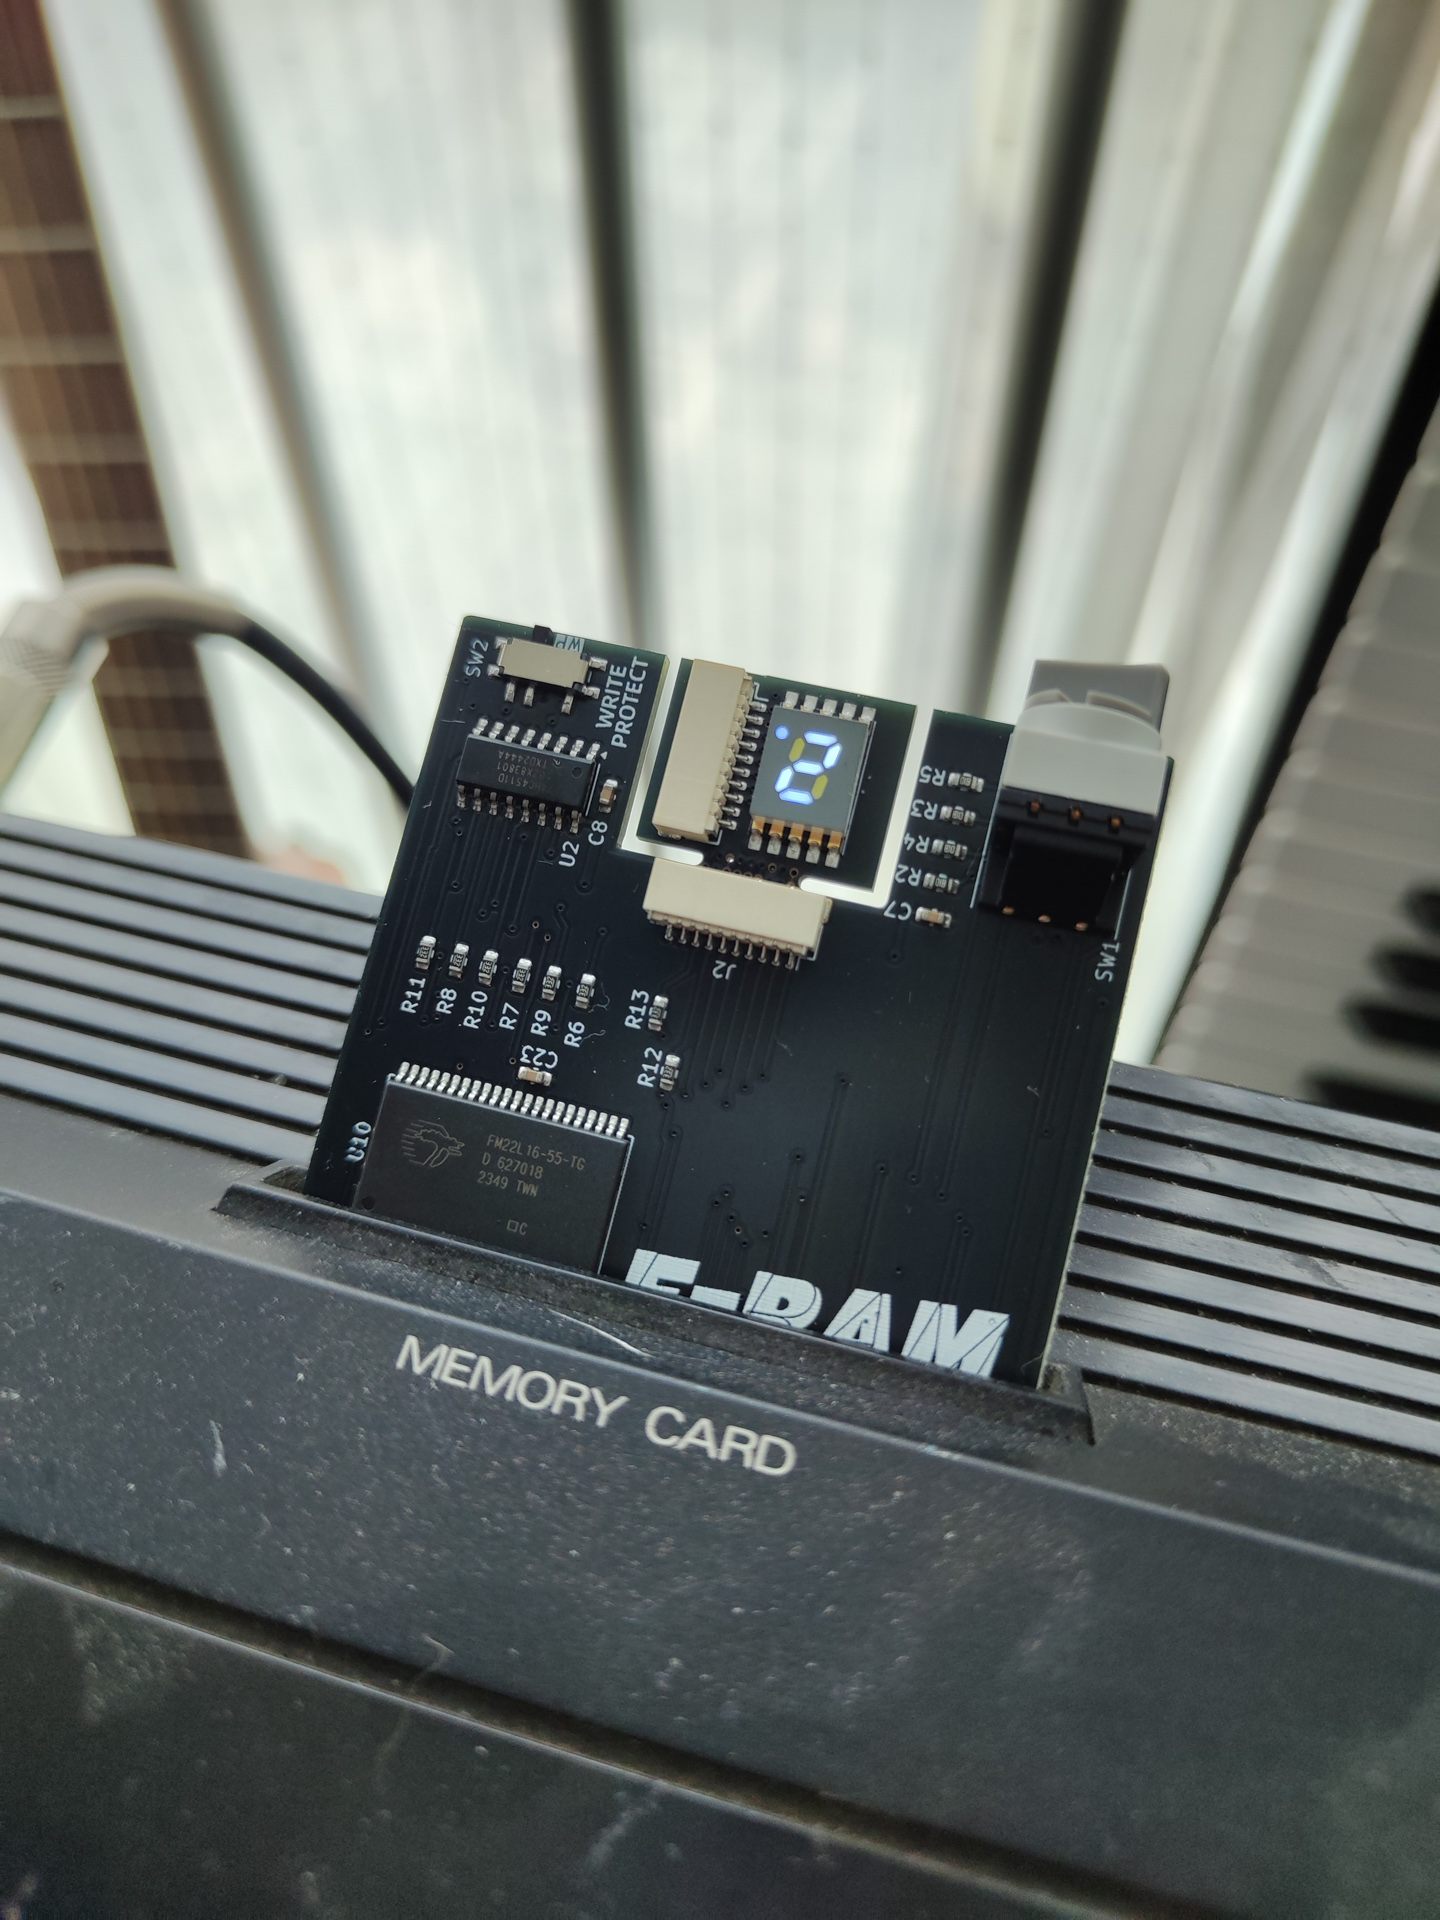
Insert the card into the RAM card slot and start using the card. On certain synths it can be difficult to insert the card as the card slot has degraded and warped due to its age. Do not force it, instead slowly and firmly push the card in. It’s recommended to replaced or repair the slot plastic part if possible, or you can file either the chip on the card or the slot.
Open Source Hardware
https://github.com/connorzheng97/d50-fram
This design has referenced dojoe’s design of the M-RAM card. I’ve reused the card outline and the contact footprint. You can find the original dojoe design here: https://github.com/dojoe/roland-mram-card and the product info page for the original dojoe card here: https://sagamusix.de/other/roland_memory_cards/
Buy-now
In stock.
1 Unit – USD 6.00 Base shipping cost and VAT now included (see shipping for detail):
Providing a phone number is REQUIRED for destination: Angola, Bahrain, Brazil, Bulgaria, Canada, Croatia, Ghana, Greek, Israel, Jordan, Kenya, Kuwait, Malaysia, Mexico, Nigeria, Pakistan, Peru, Philippines, Qatar, Romania, Rwanda, Saudi Arabia, Singapore, Sweden, Tanzania, Thailand, Turkey, Uganda, United Arab Emirates, Vietnam (and any other destination that requires it, should this happen I’ll email you to ask for your phone number) and optional for other destinations. The phone number input is a “customization option” of the PayPal button and the value is not disclosed to any third party except for the express company. By submitting an order you agree to the terms listed in this section.
View cart and checkout:
Payment and Shipping
Payment is processed by PayPal. PayPal offers a secure payment process whilst keeping your payment details private. PayPal WILL NOT disclose your Card Payment Information to me. Details such as Card Number, Expiry Date, and CVV number will only be known to PayPal. PayPal WILL send information such as your PayPal Email Address and the Shipping Address you have registered to your PayPal account. It is up to you to keep this information up-to-date as this is the email contact and shipping address we will use to contact you and where to ship your purchase. It is strongly advised that you email us with your current Contact Email and Shipping Address after you make a purchase to confirm these details.
I will combine and ship as many items as possible in one package if you purchase more than 1 item, as long as multiple items can be fitted in one package. Please pay first, I will refund you the shipping cost once I have handled the package (Usually, packages going to the EU will not have shipping refund due to VAT).
We can ship to almost all countries except for warzones and conflict regions. If your destination is not listed, it means I don’t have a contract for your destination with my primary express service but I have other service providers that I can use. please contact me first.
United Arab Emirates, Angola, Austria, Australia, Belgium, Bulgaria, Bahrain, Brazil, Canada, Switzerland, Cyprus, Czech Republic, Germany, Denmark, Estonia, Spain, Finland, France, Ghana, Greek, Croatia, Hungary, Ireland, Israel, Italy, Jordan, Japan, Kuwait, United Kingdom, Korea, Kenya, Lithuania, Latvia, Malta, Mexico, Malaysia, Nigeria, Netherland, Norway, Peru, Philippines, Pakistan, Poland, New Zealand, Portugal, Qatar, Romania, Serbia, Russia, Rwanda, Sweden, Singapore, Slovenia, Slovakia, Thailand, Turkey, Tanzania, Uganda, United States, Saudi Arabia, Vietnam, South Africa
All shipment originate from China, are handled by Yuntu Express and are by air. Shipping usually takes 3 to 10 days depending on where you are.
Return and Refund
If you need a refund before the package has been picked up by express service, send email with detail of your purchase. Shipping cost is non-refundable.
If you receive a faulty unit, you are eligible for refund or exchange of a new unit. Please contact using email so that we can work something out. By submitting a order you confirm that you are aware of: a return and refund may not be possible depending on the location.
Turnaround Time
- An email will be sent to you to confirm your order, once you have paid the bill. Please allow up to 24 hours for me to respond and confirm your order by email.
- An email will be sent to you with shipment tracking number and method of tracking. Handling time is usually 3 to 7 days before I can email you with a shipment tracking number. Sorry for any inconvenience as I don’t work full time on this.
- Tracking info will also be updated in PayPal
As Yuntu Express does not have a collection service in my city, I gather packages and send them as bulk package to the service. I send out bulk packages at least twice may be 3 times per week.
Purchasing-related Contact
For purchase related issue and/or to confirm your address/email, please mail to: [email protected]. In case of urgent matter, an email may be sent to contact you from either my personal email listed in the about page, or from an @sa1tech.com email address. All of these described email addresses are legit.
We may use old stock of packaging material from other products. You may receive material with “Yanyu” or “StrictFish” marking/packaging. You may receive material sent by SA1 Technology Co., Ltd.. “Yanyu”, “StrictFish” are trademarks of SA1 Technology Co., Ltd.. SA1 Technology Co., Ltd. is an affiliated company. All packages are packed under video/still image recording and weighted before shipment. Any scam activity will be recorded and reported to law enforcement agency local to the buyer.