I have been wanting to build a NAS for a long time. My main goal is to provide some reliability improvement to the data safety issue I have been facing, where I’m constantly running out of storage space and a lot of my data does not have a local backup.
For this build, I used TrueNAS Scale which is a fairly new addition to the TrueNAS portfolio. I choose this version over traditional BSD-based TrueNAS since I’m a lot more familiar with Debian.
To safely use ZFS, ECC memory is required.
The Motherboard
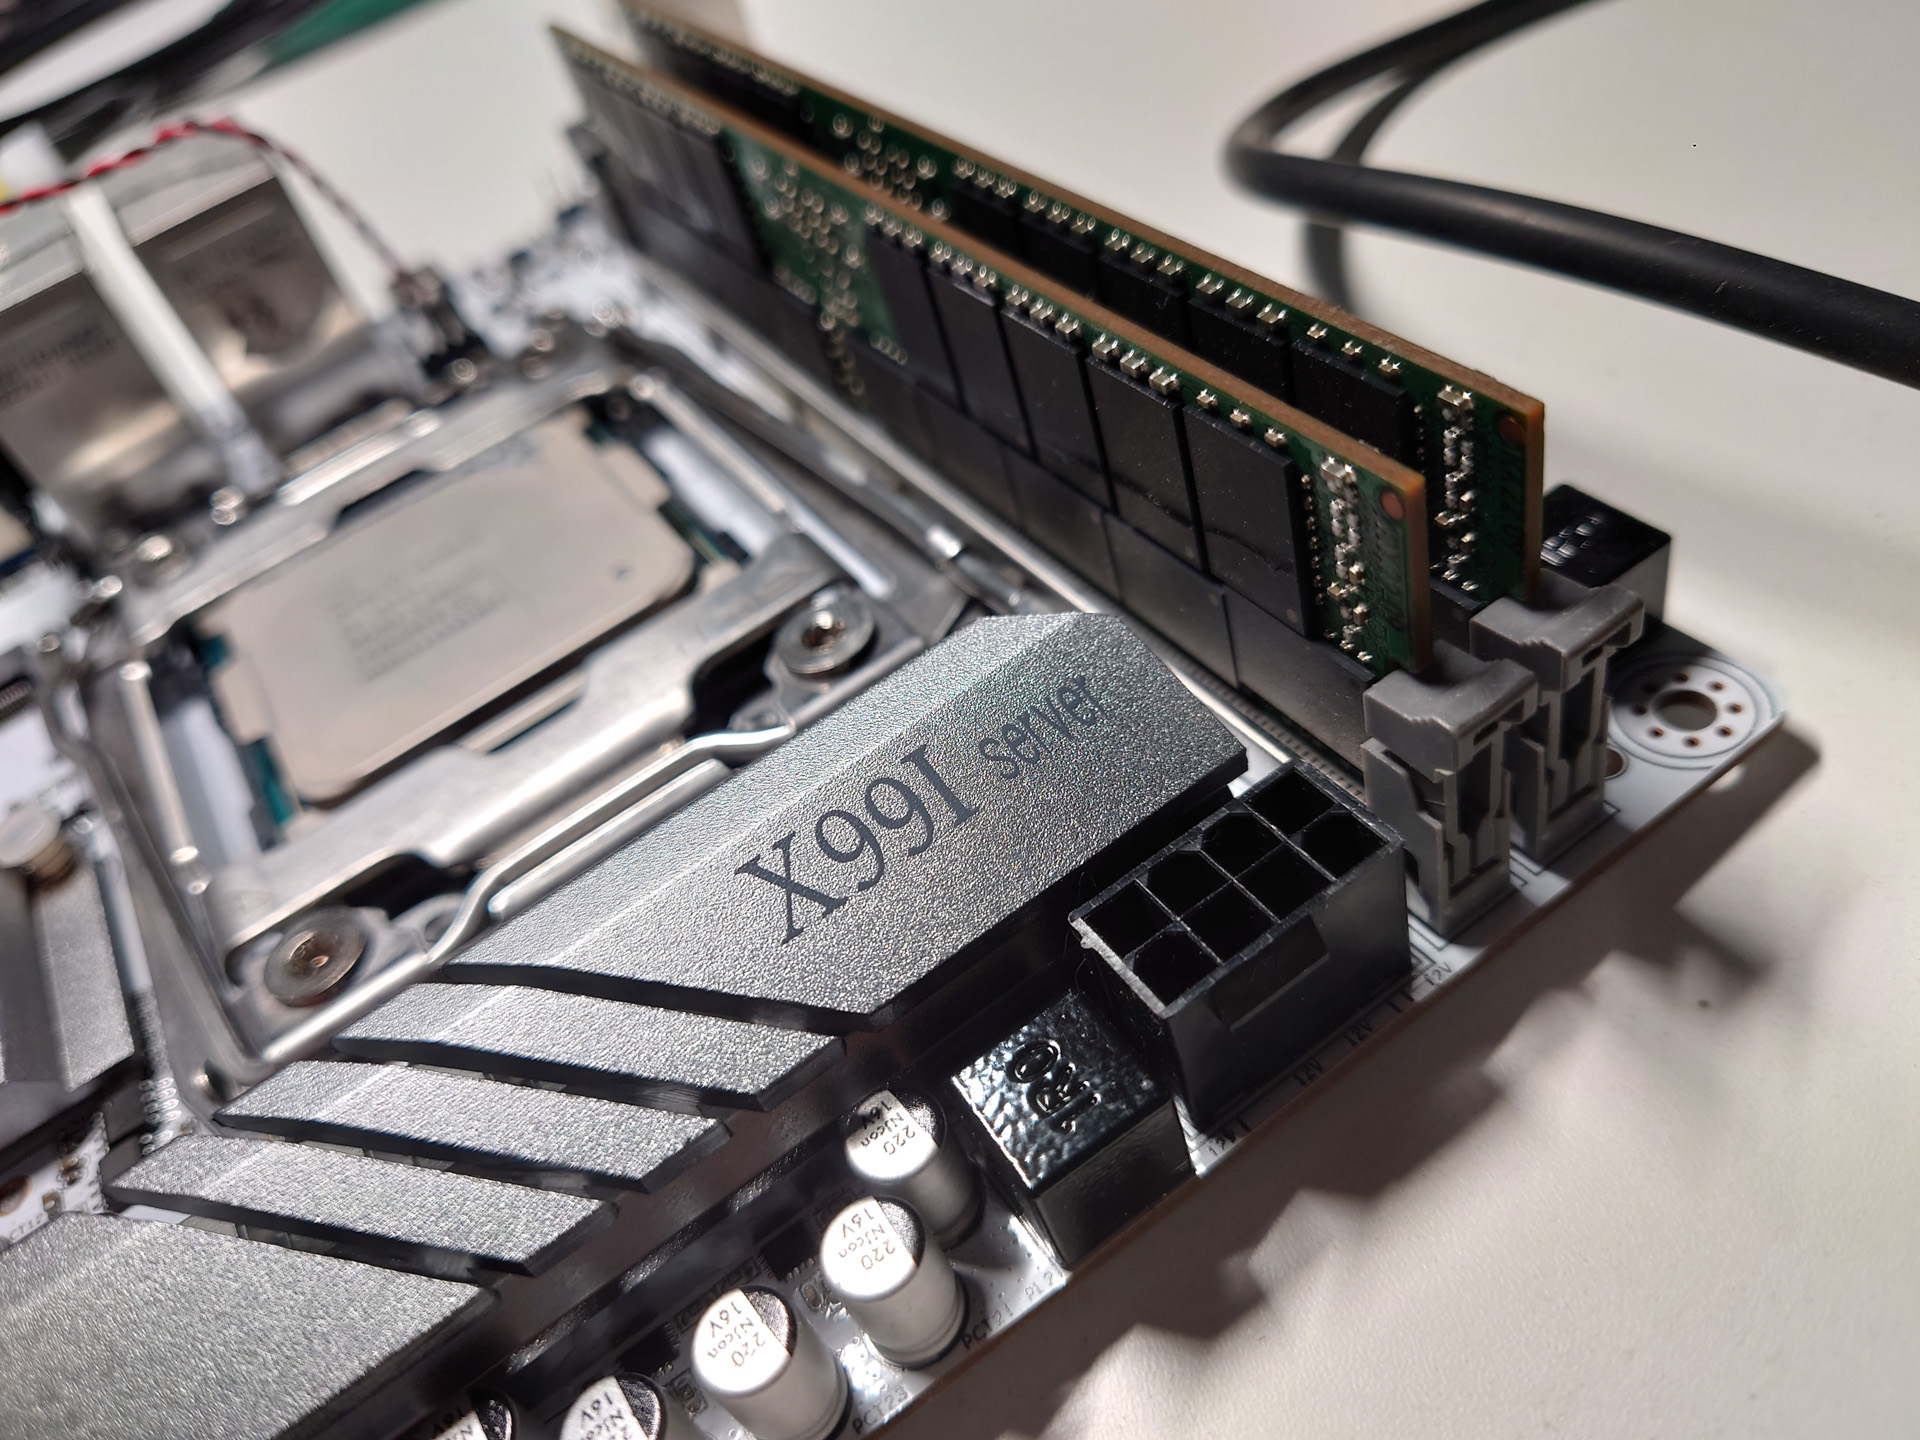
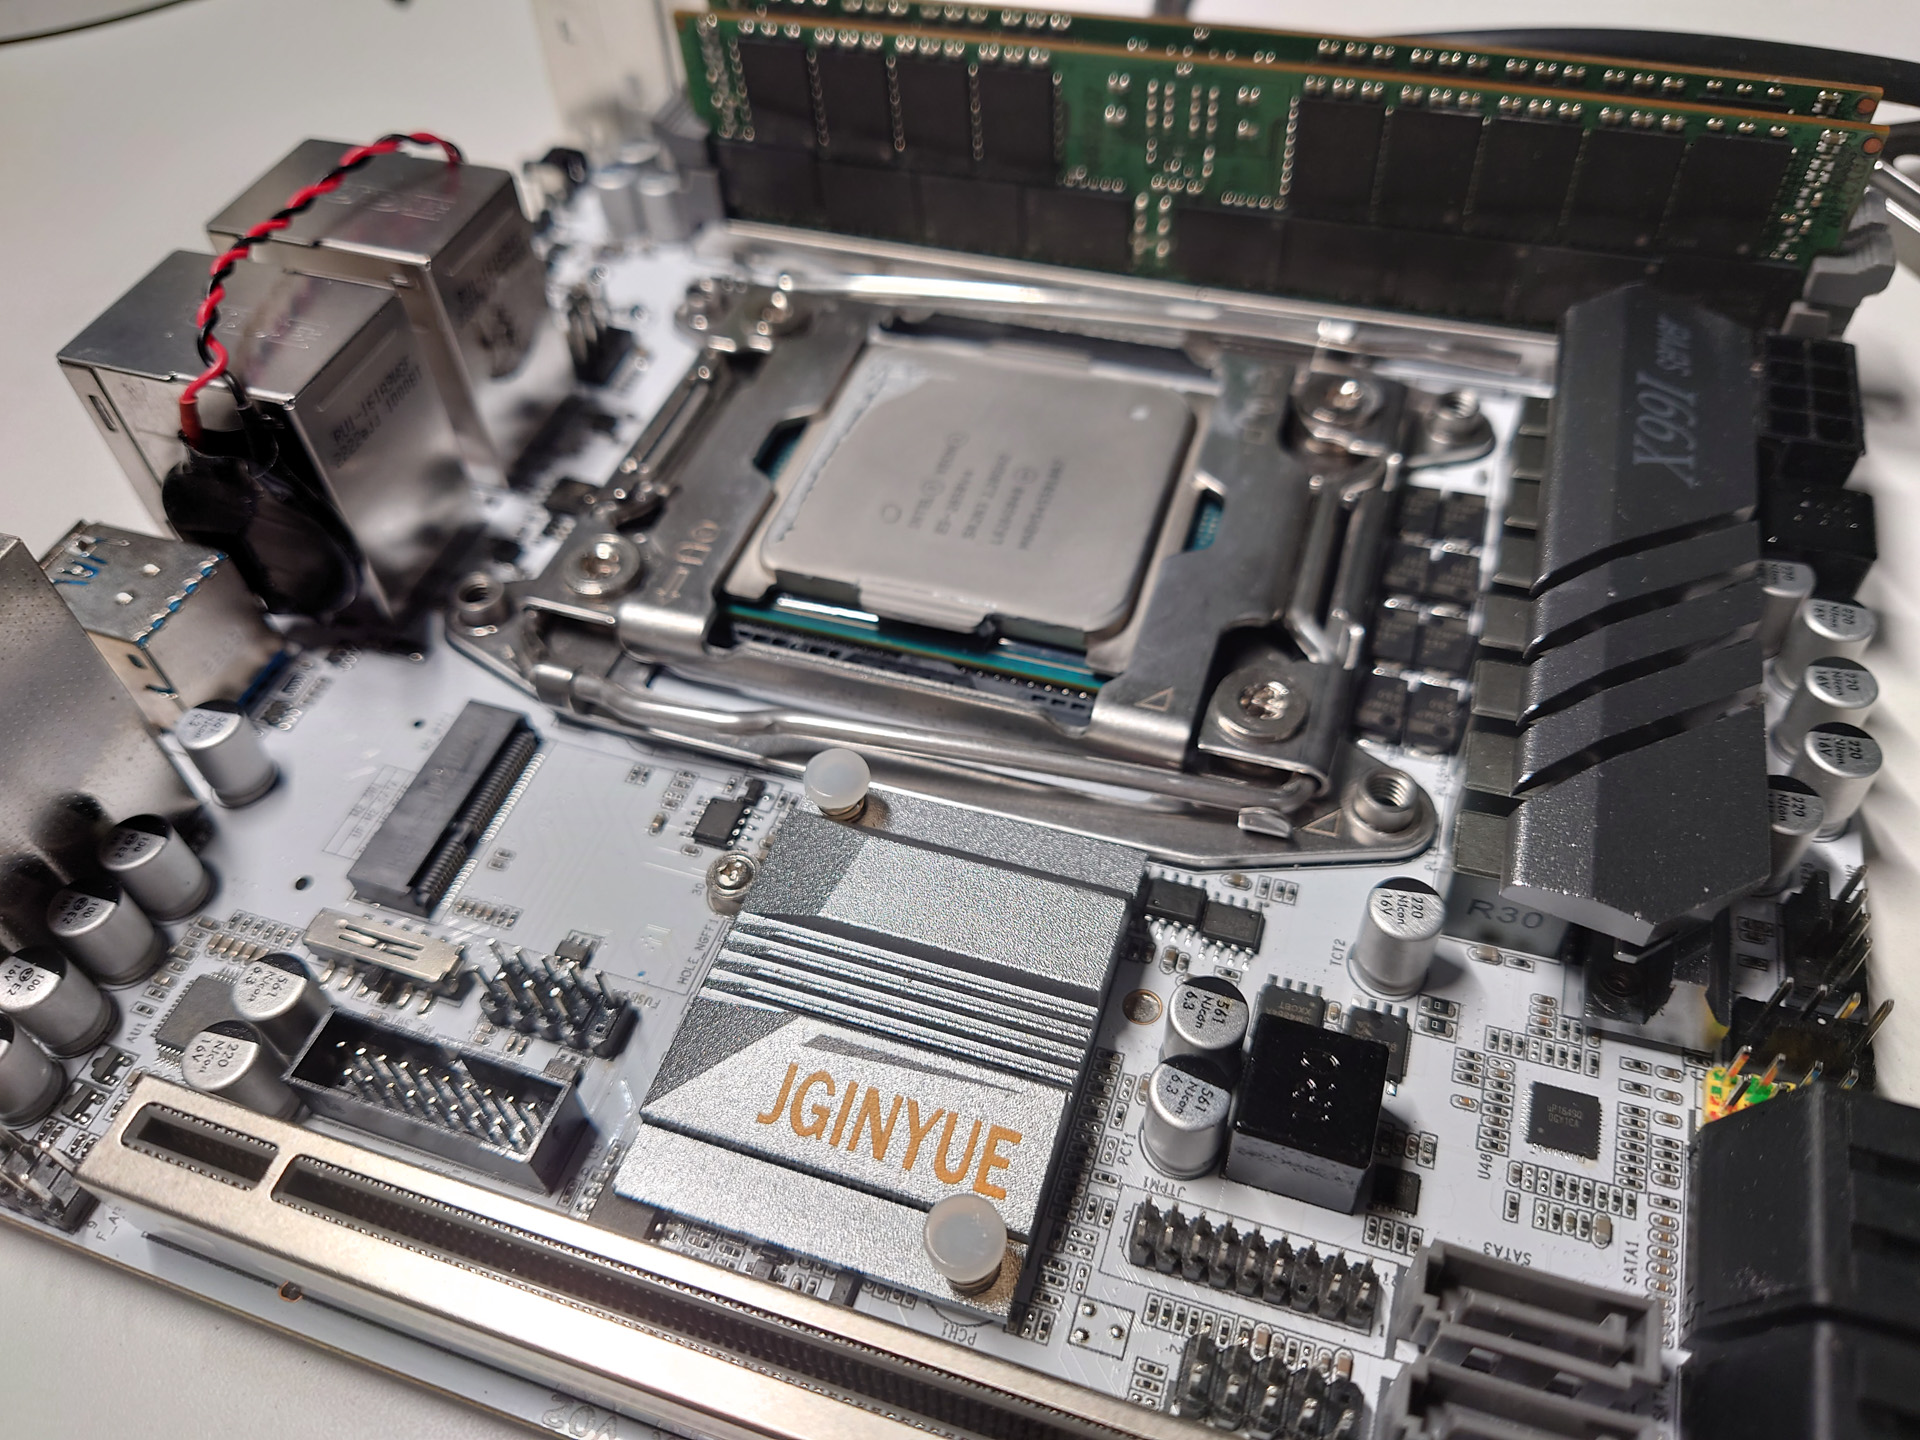
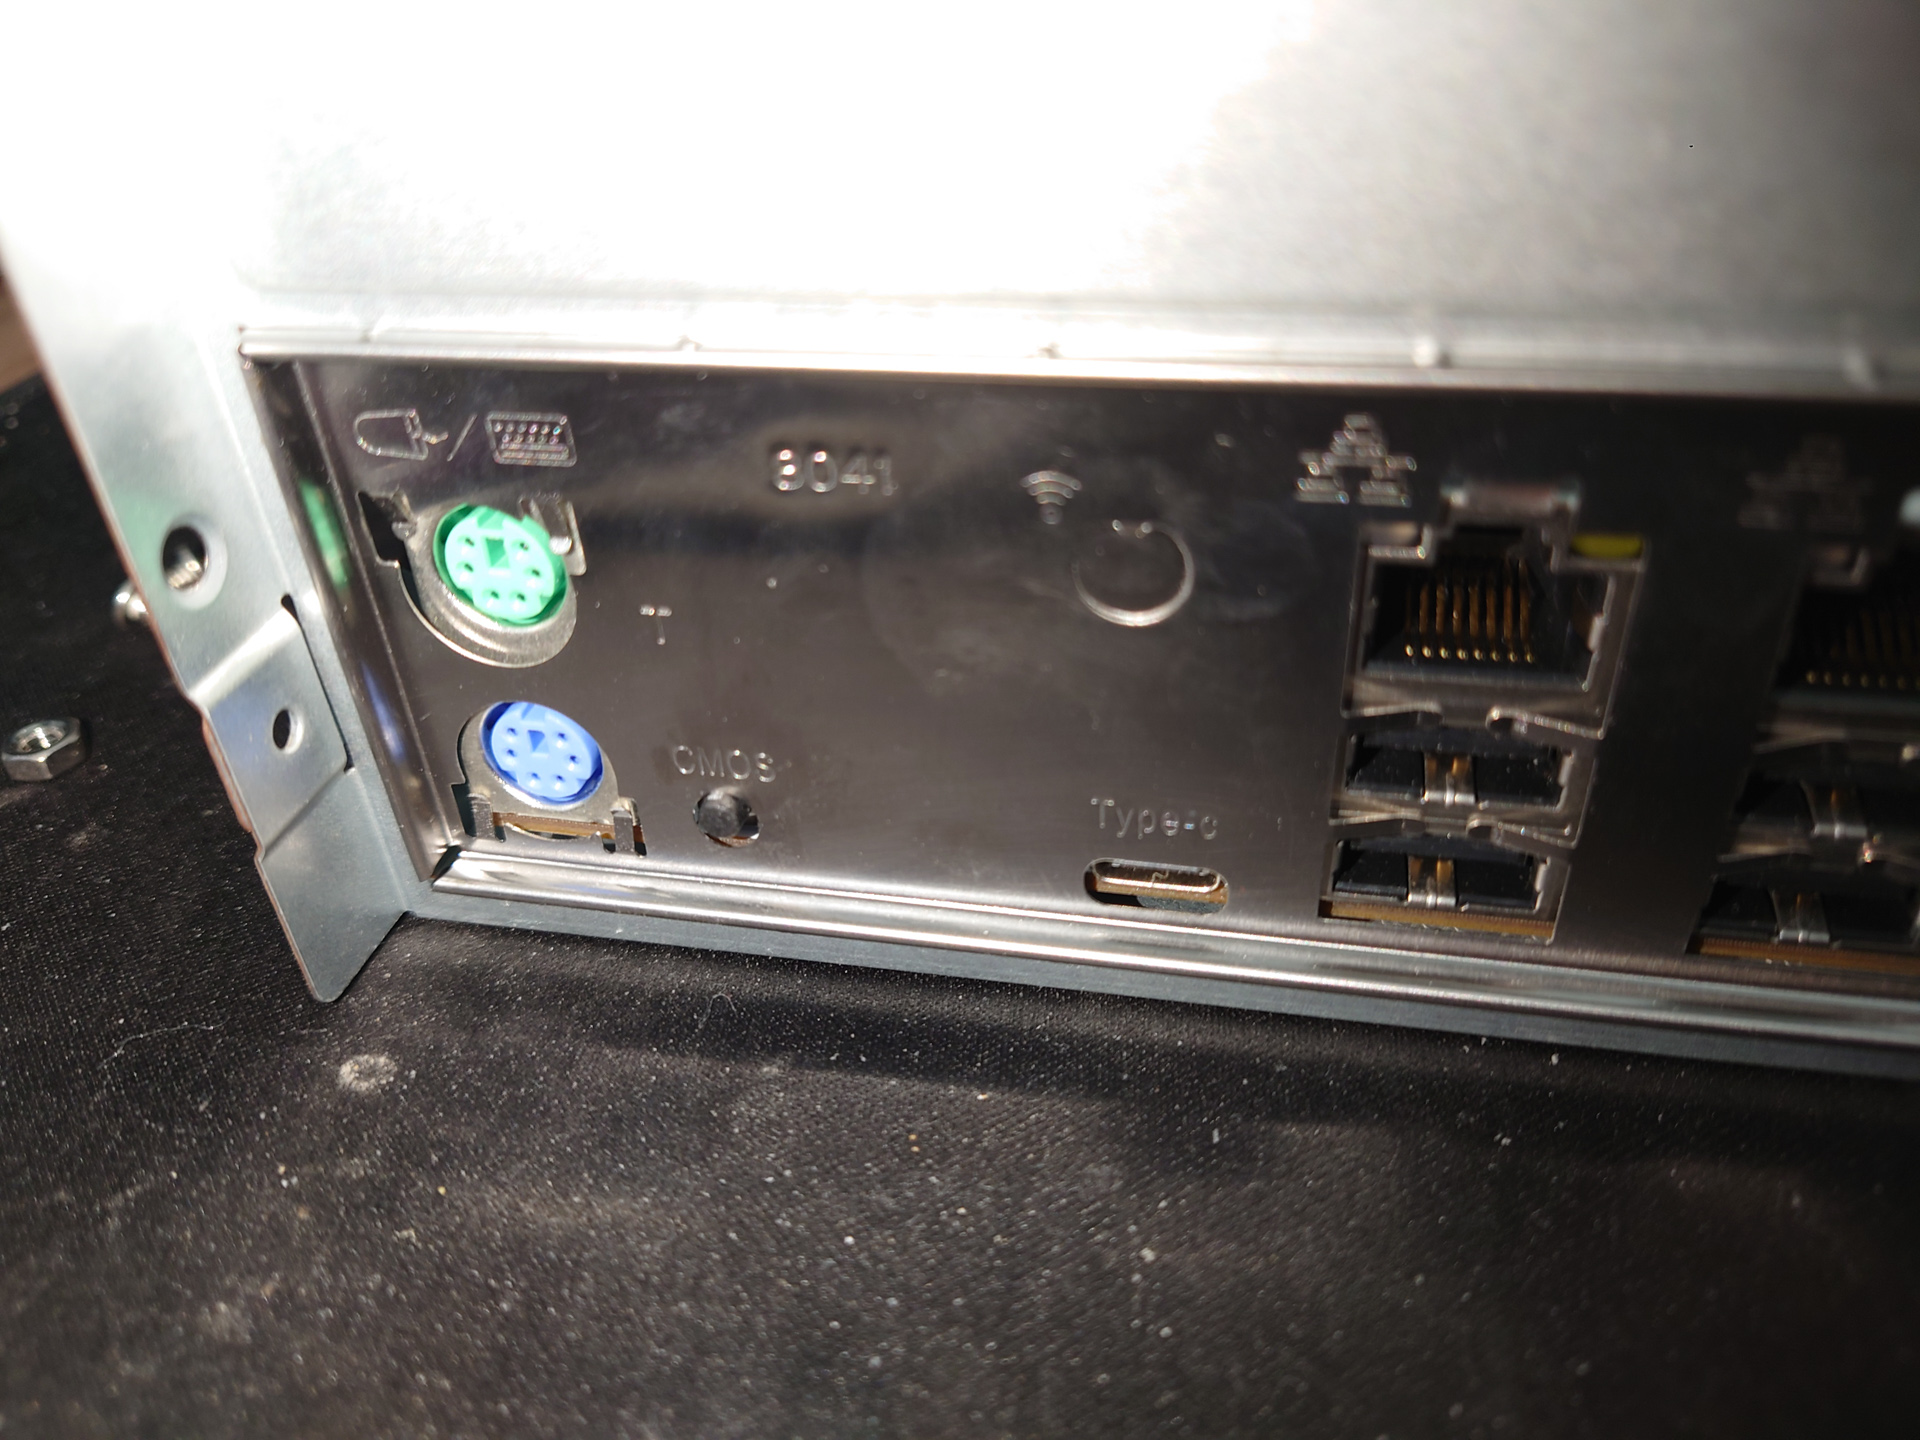
The motherboard is a JGINYUE(精粤) X99I-SERVER, a new ITX motherboard with x99 chipset and dual 2.5GbE. I acquired this set from a friend, it cost me ¥1400 or about $200, which includes the motherboard, a Xeon E5-2650v4 CPU and a pair of Kingston DDR4 2400 32G REG-ECC memory.
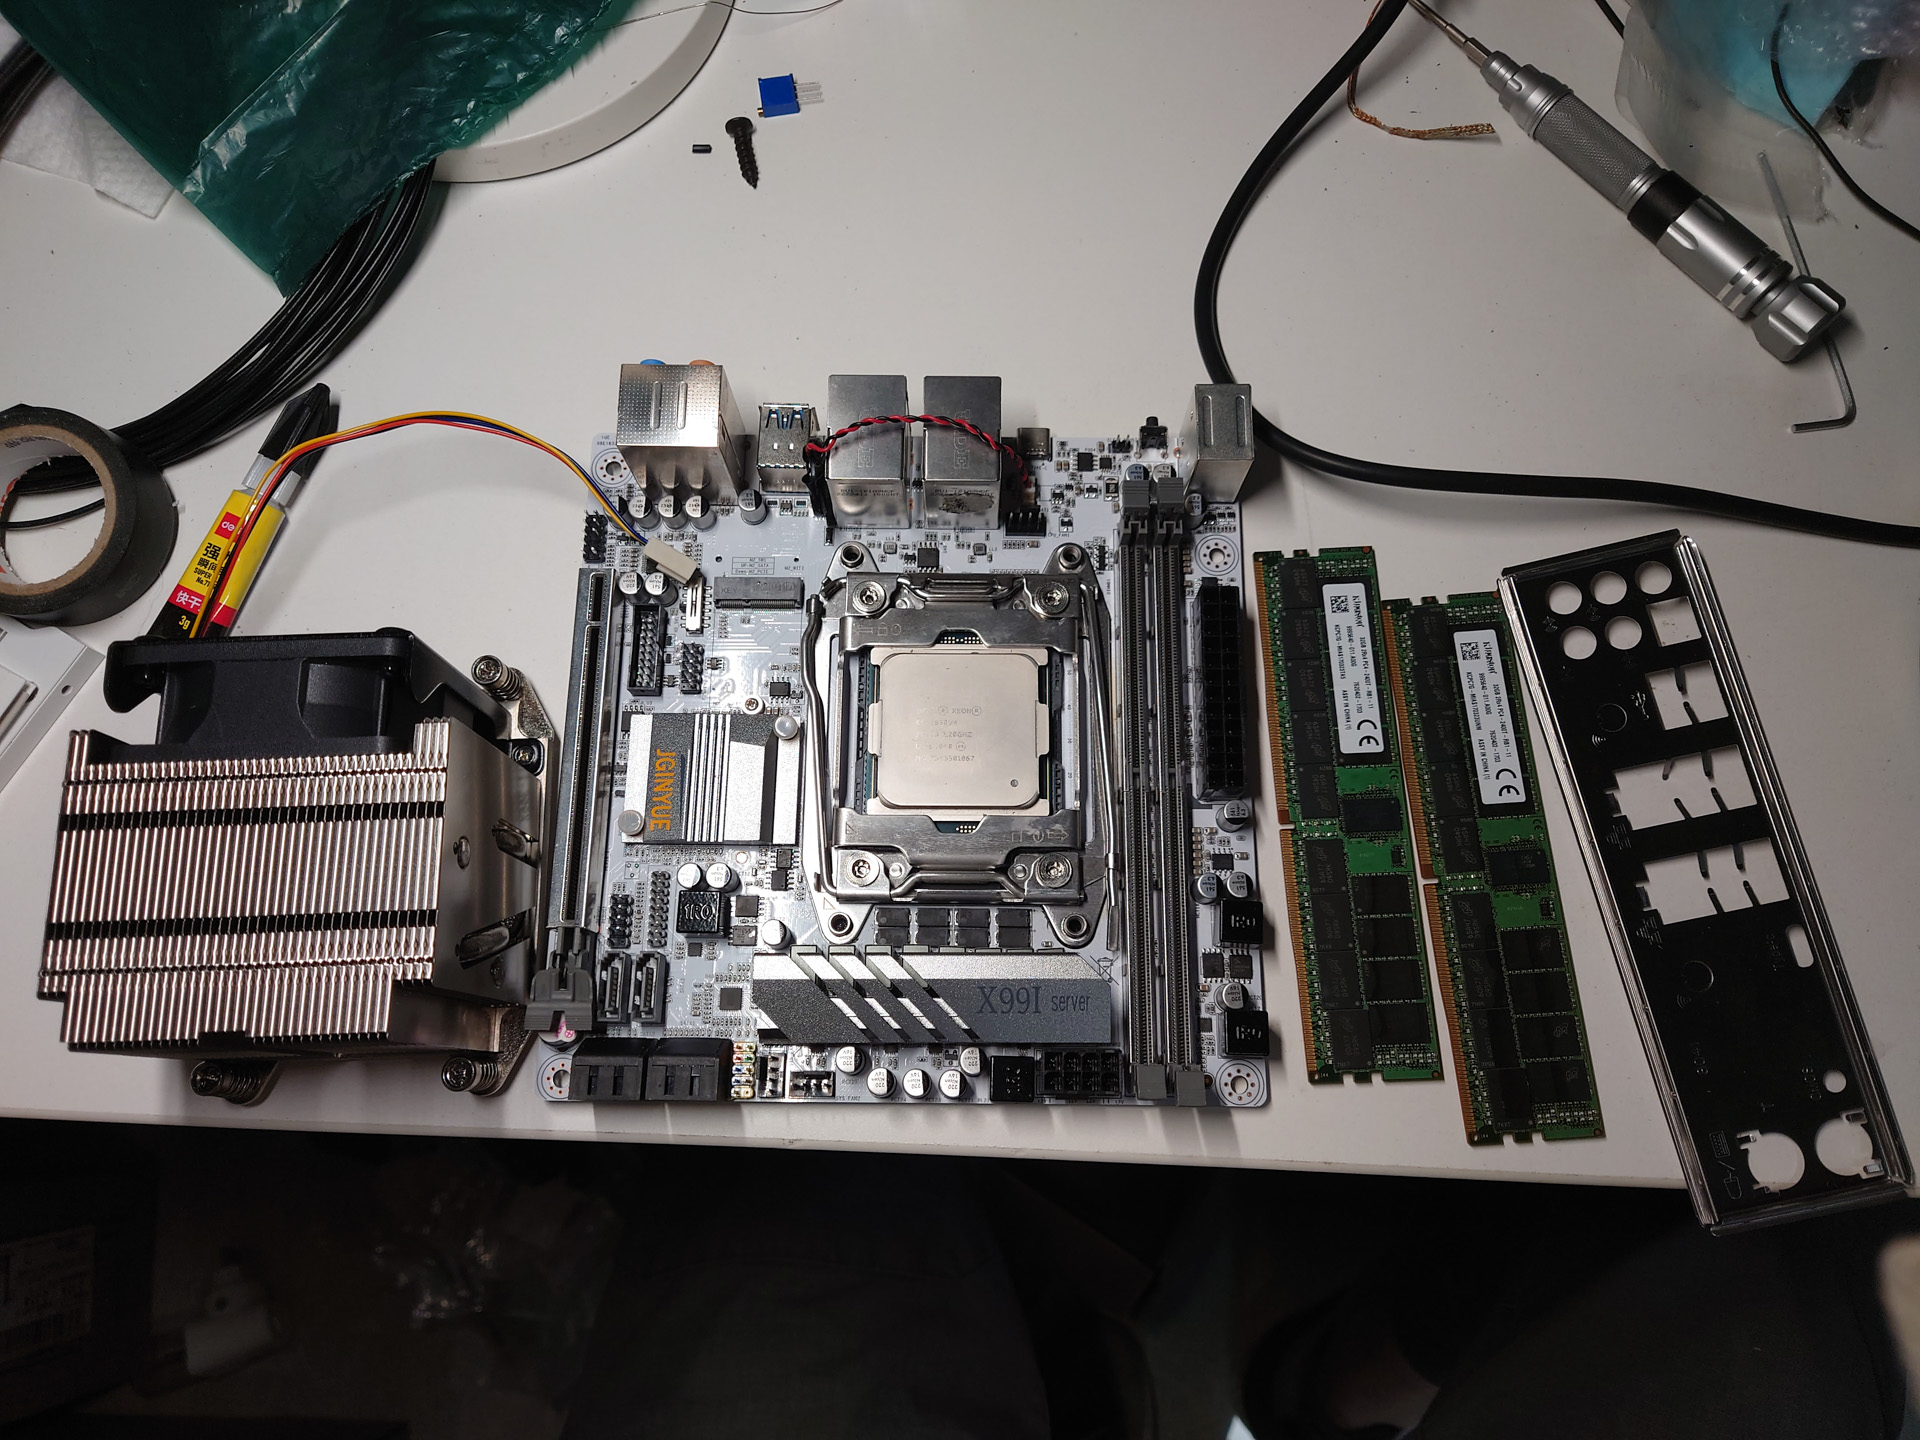
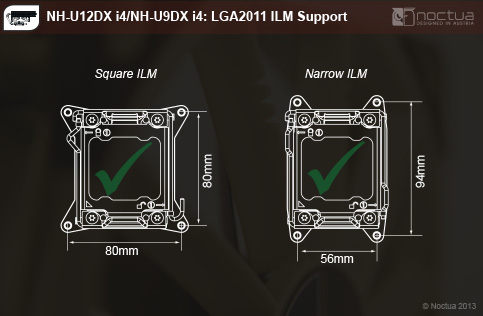
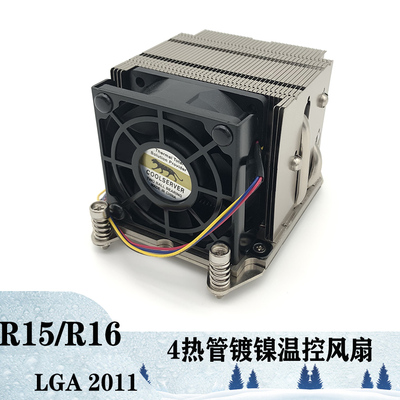
The heatsink is a COOLSERVER(金钱豹) R16 with 6cm fan for LGA2011. One thing to remember for LGA2011 is that it has two types, square and narrow.
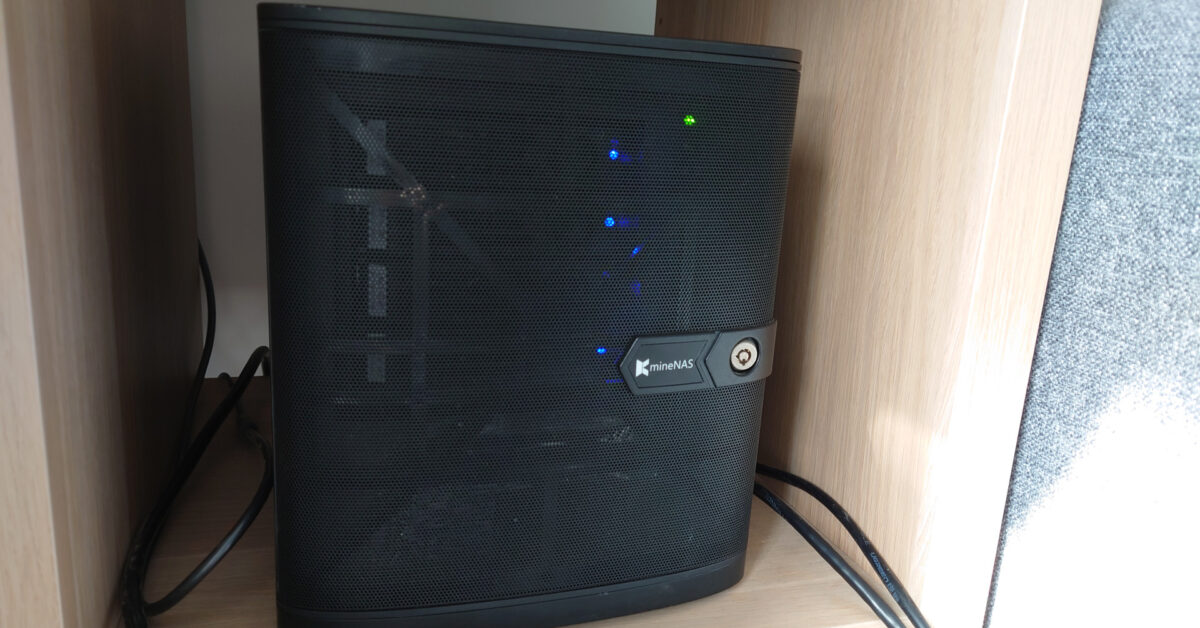
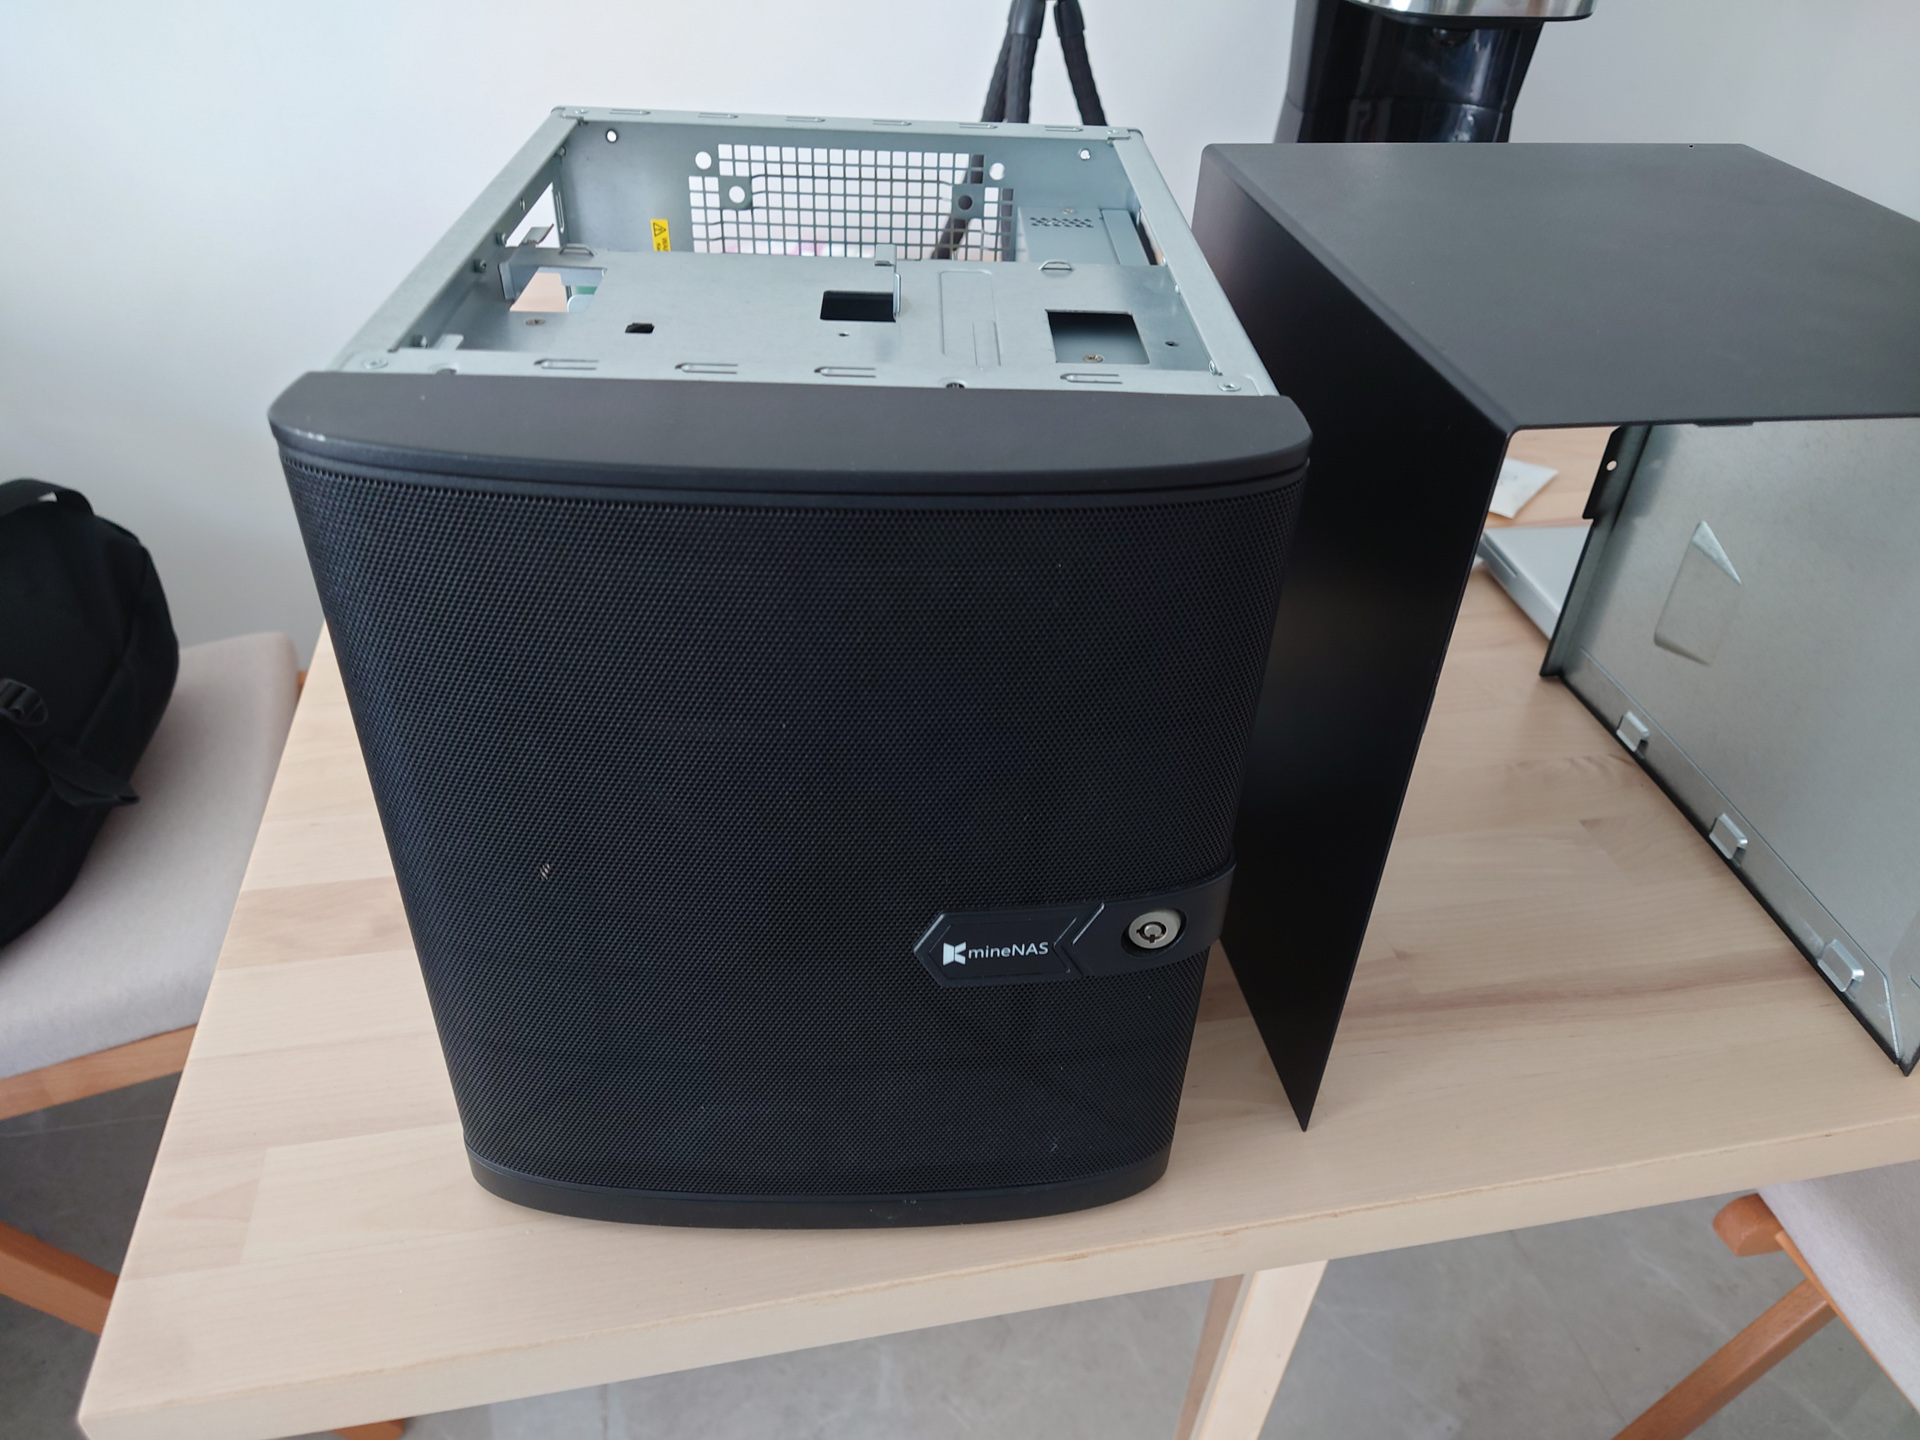
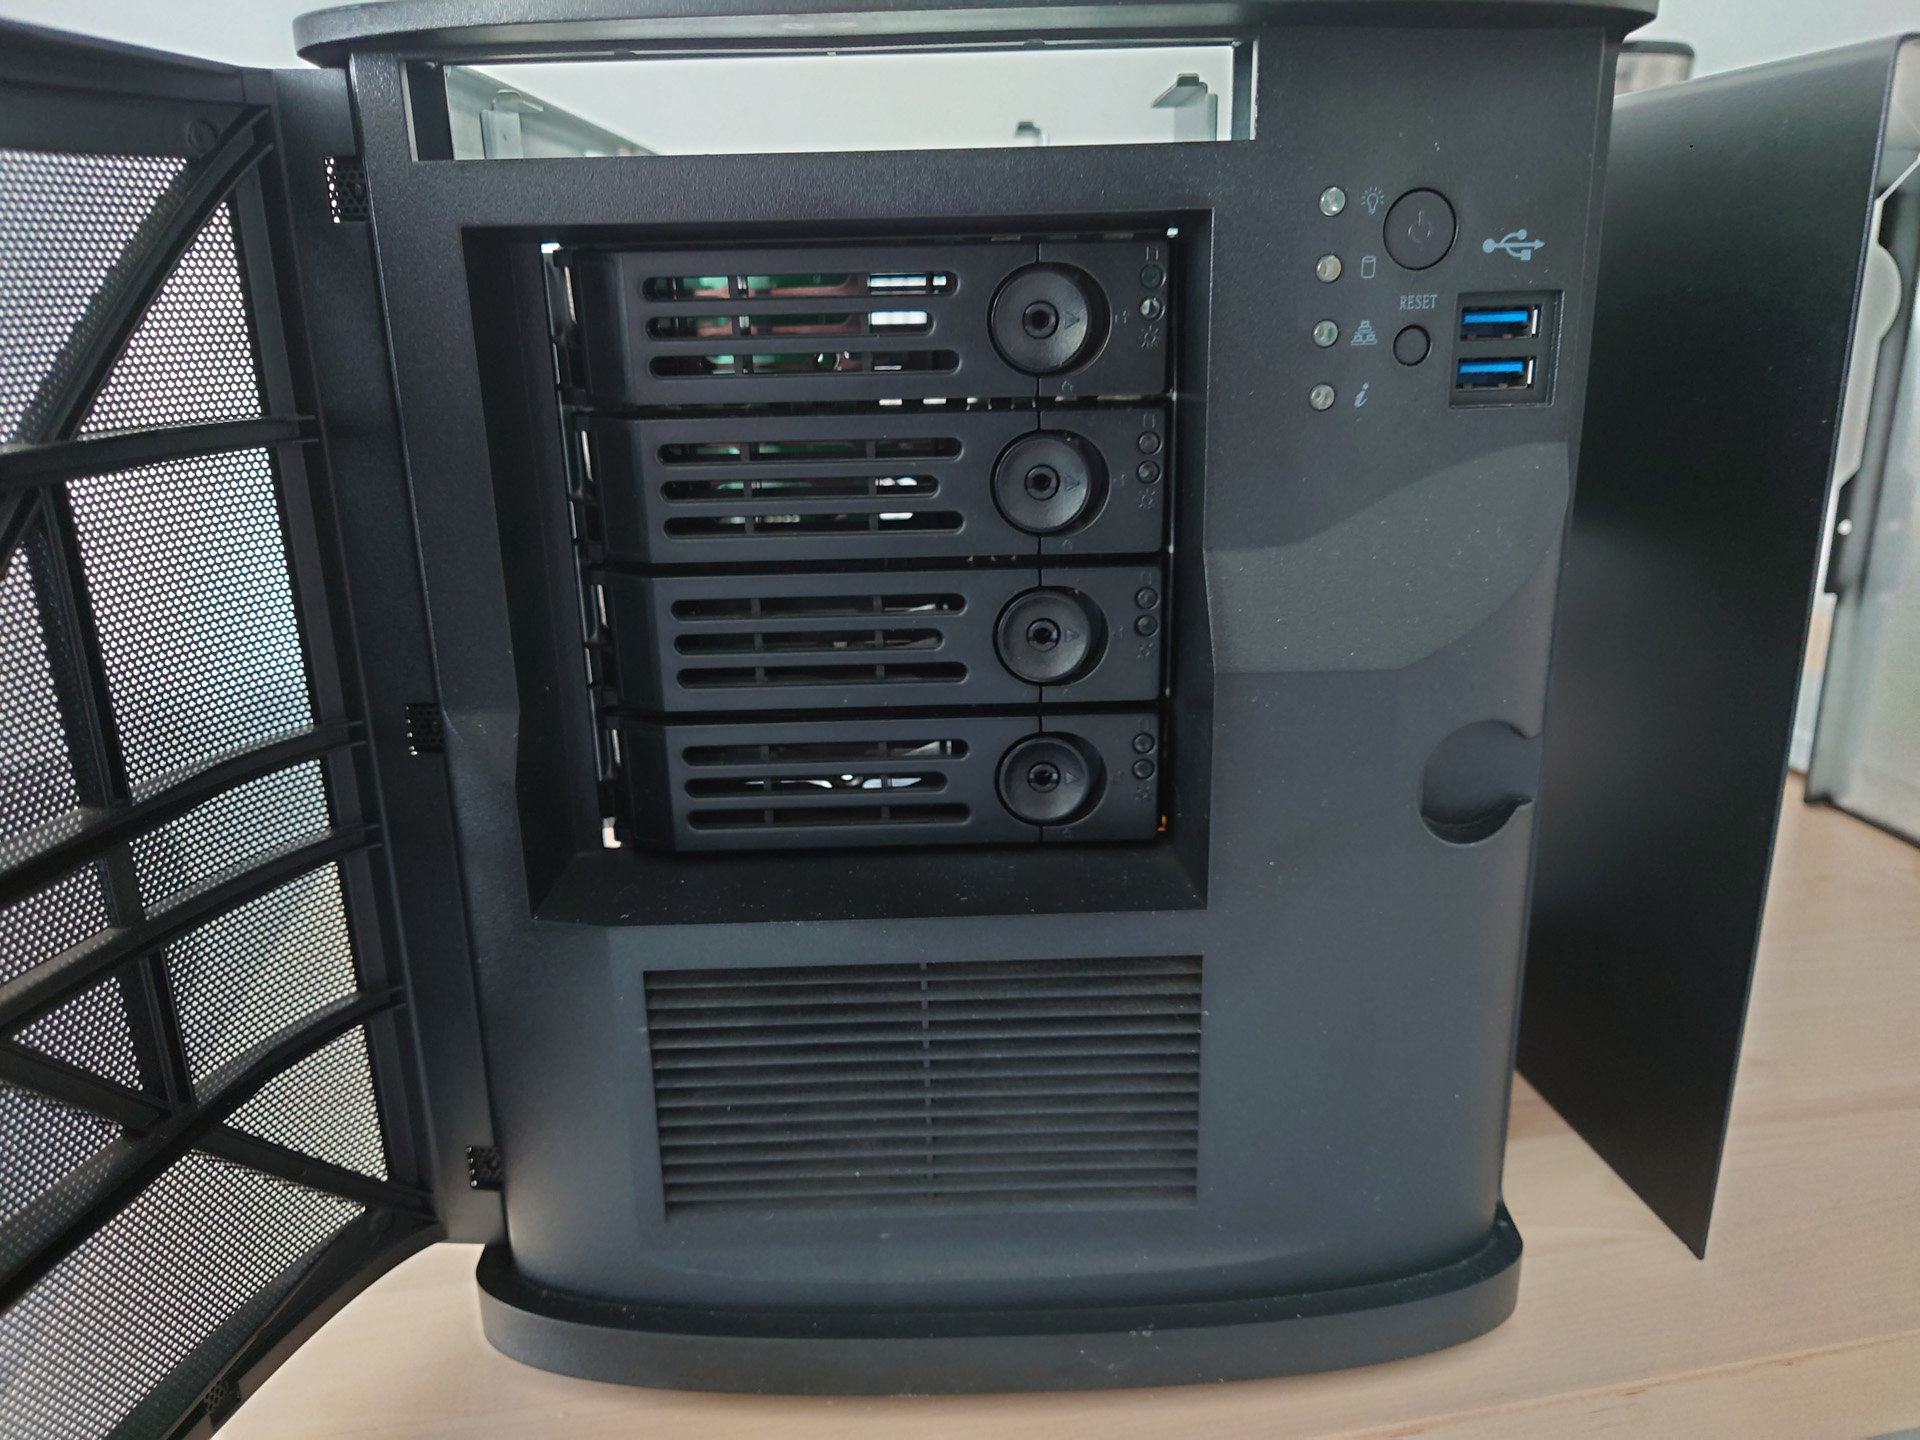
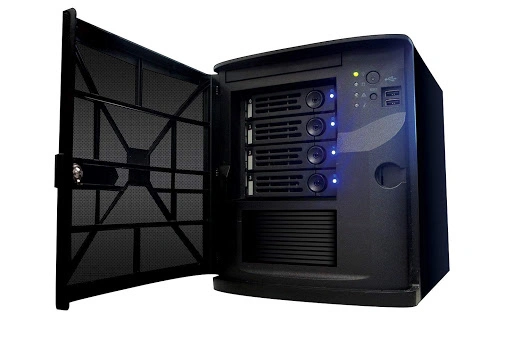
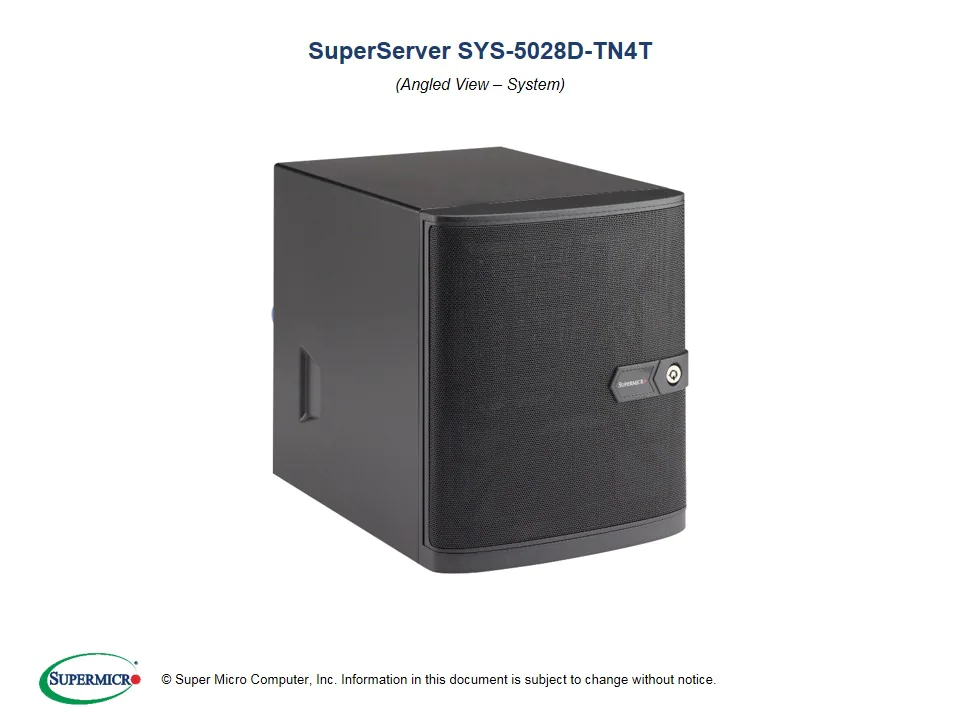
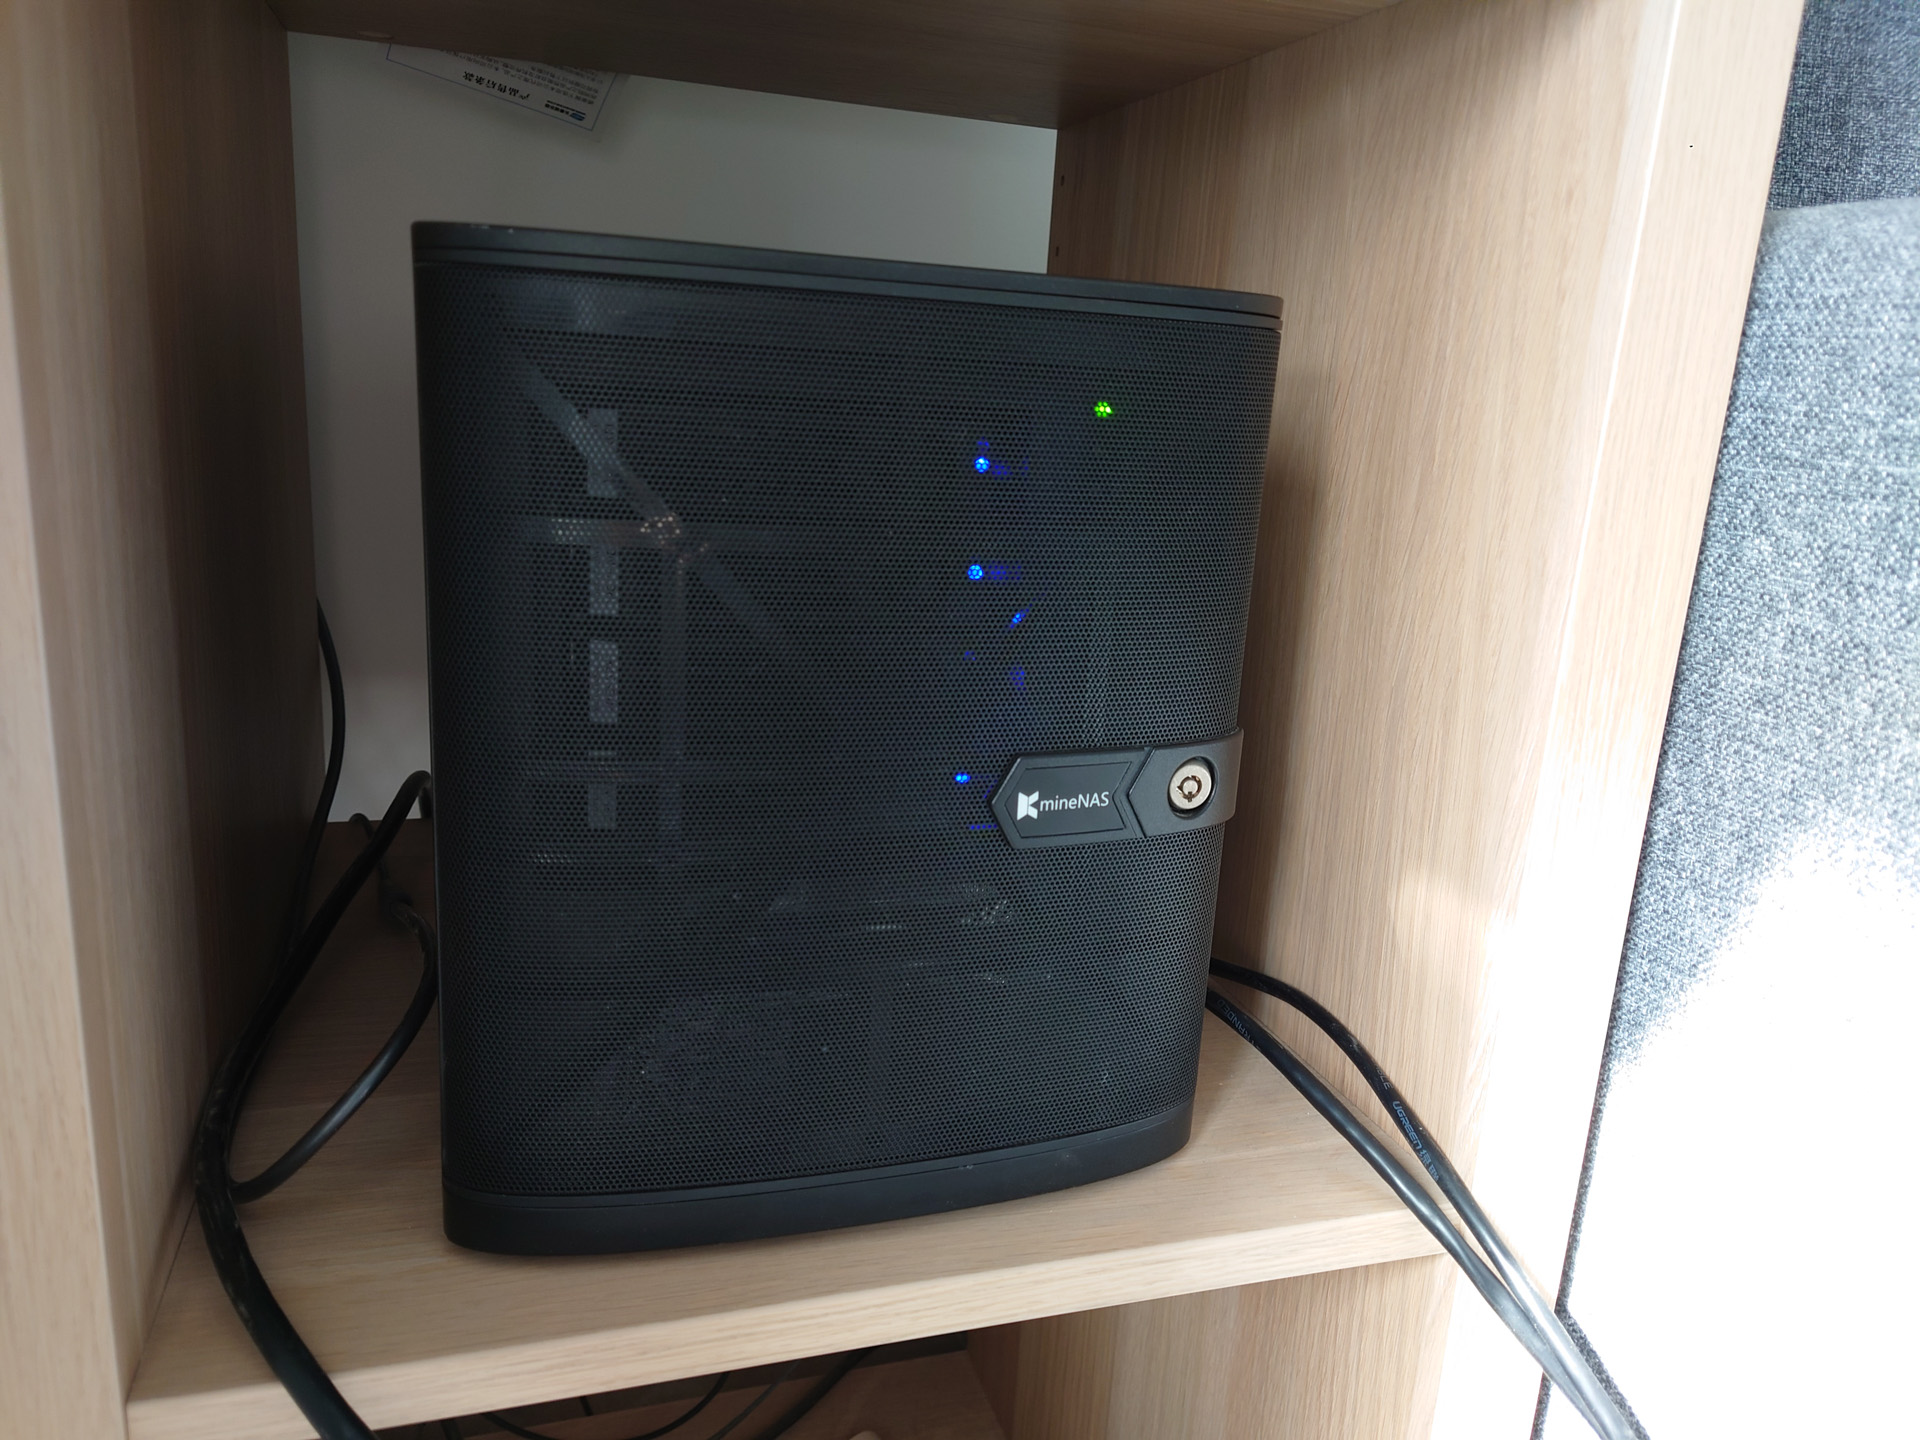
The Chassis
The chassis I used is a 4-bay NAS chassis, branded as “MineNAS”, which is a lower trim version of the TrueNAS Mini E or Supermicro 5028D-TN4T. I bought it second-hand on Xianyu (闲鱼) for ¥350 including the original 250W PSU.
Storage
For system disks 2 Toshiba MLC SATA SSD were used in a mirrored fashion.
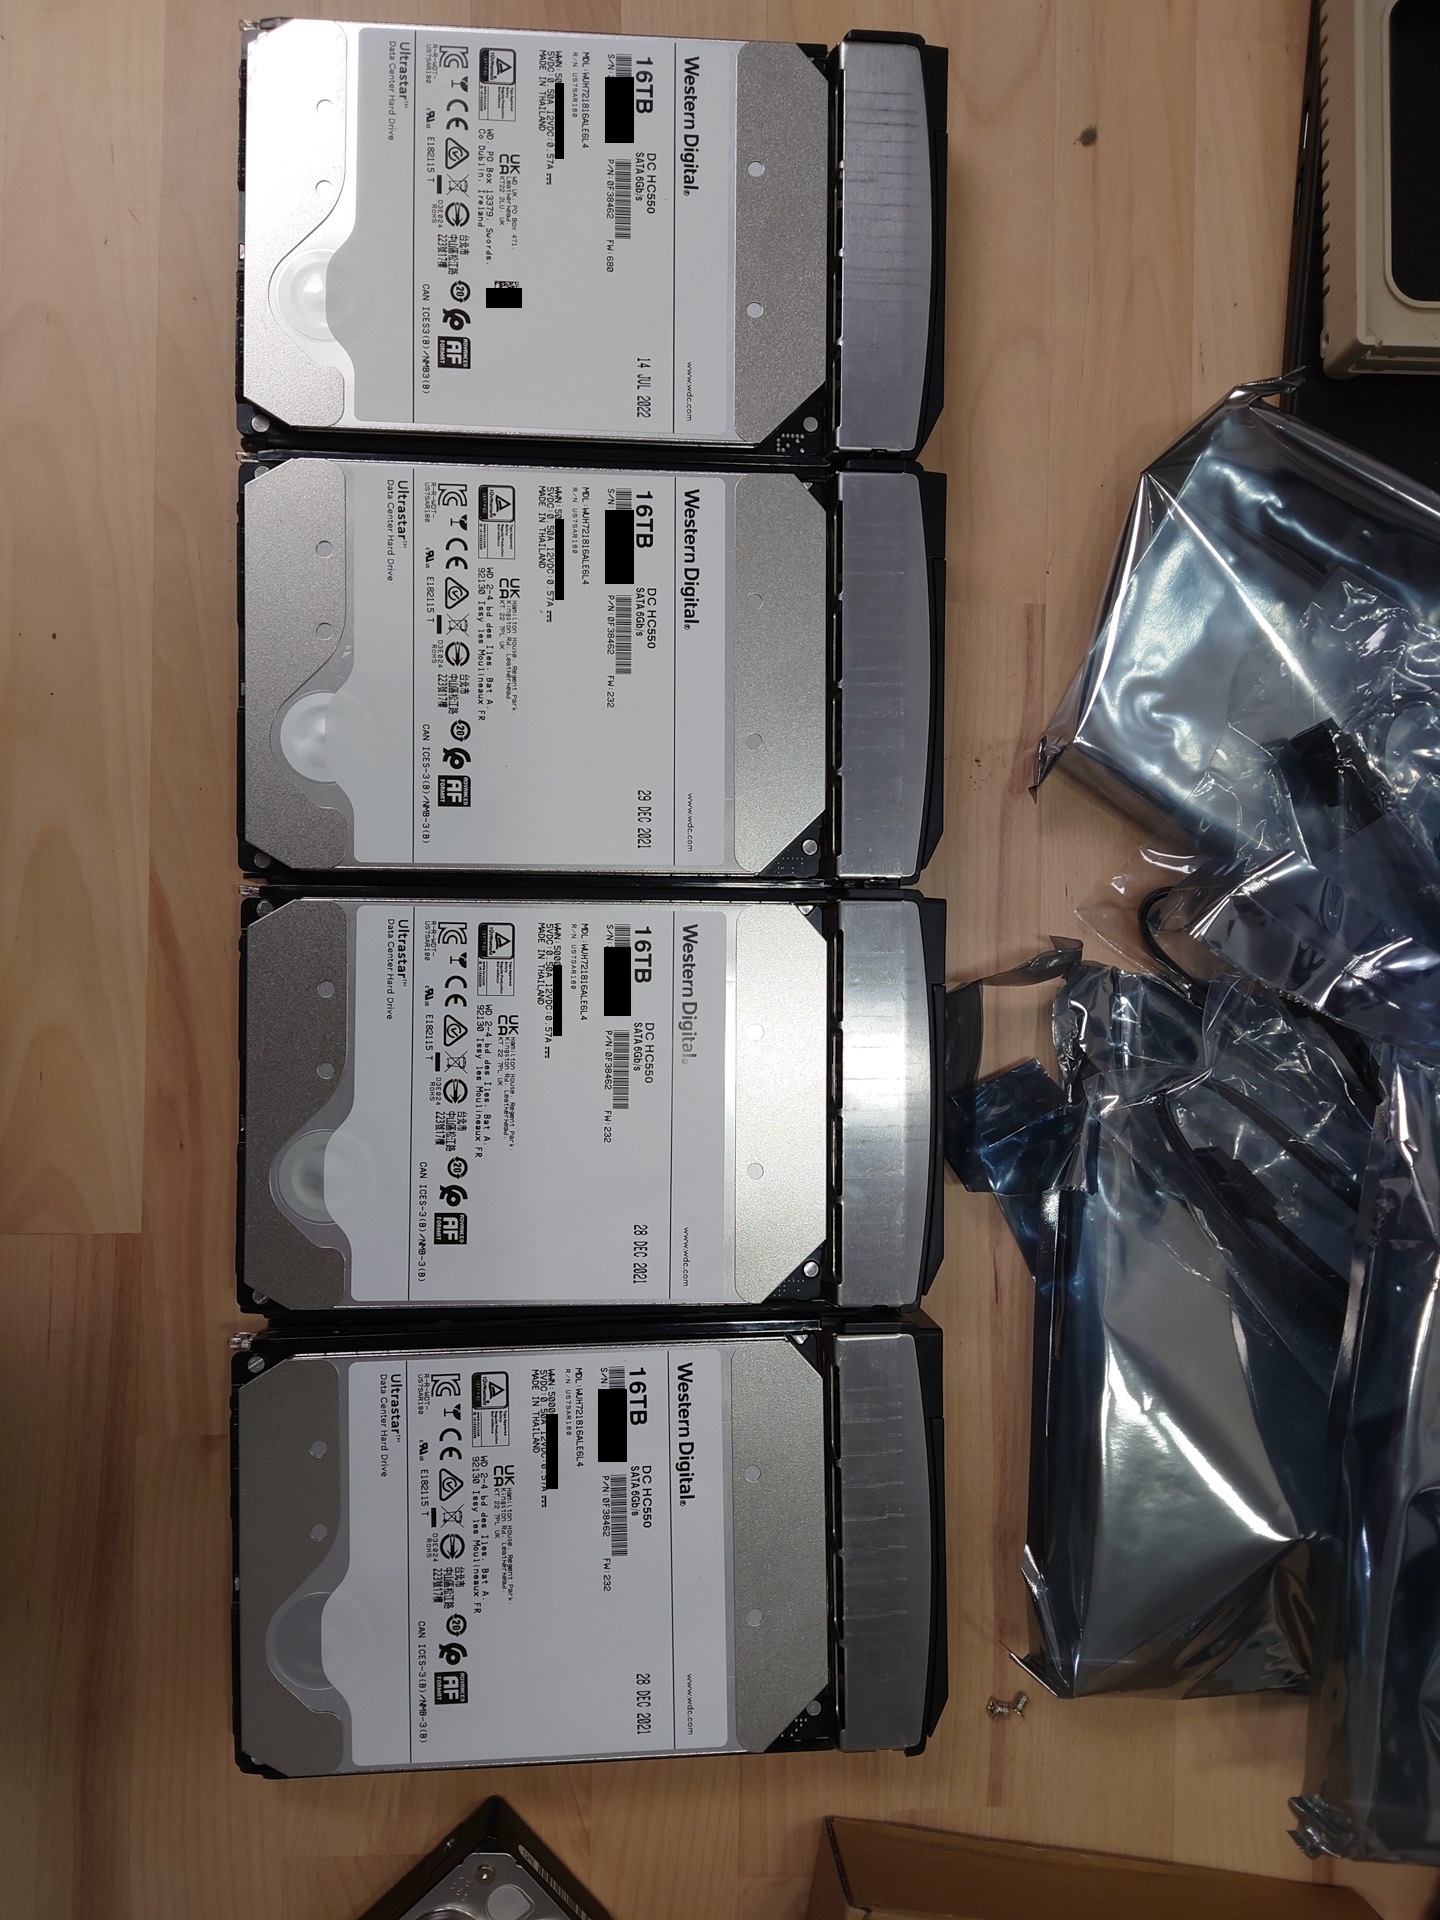
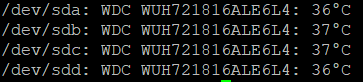
For actual data storage, I used 4 Western Digital (formerly Hitachi, HGST) 16TB HC550 datacenter hard drives.
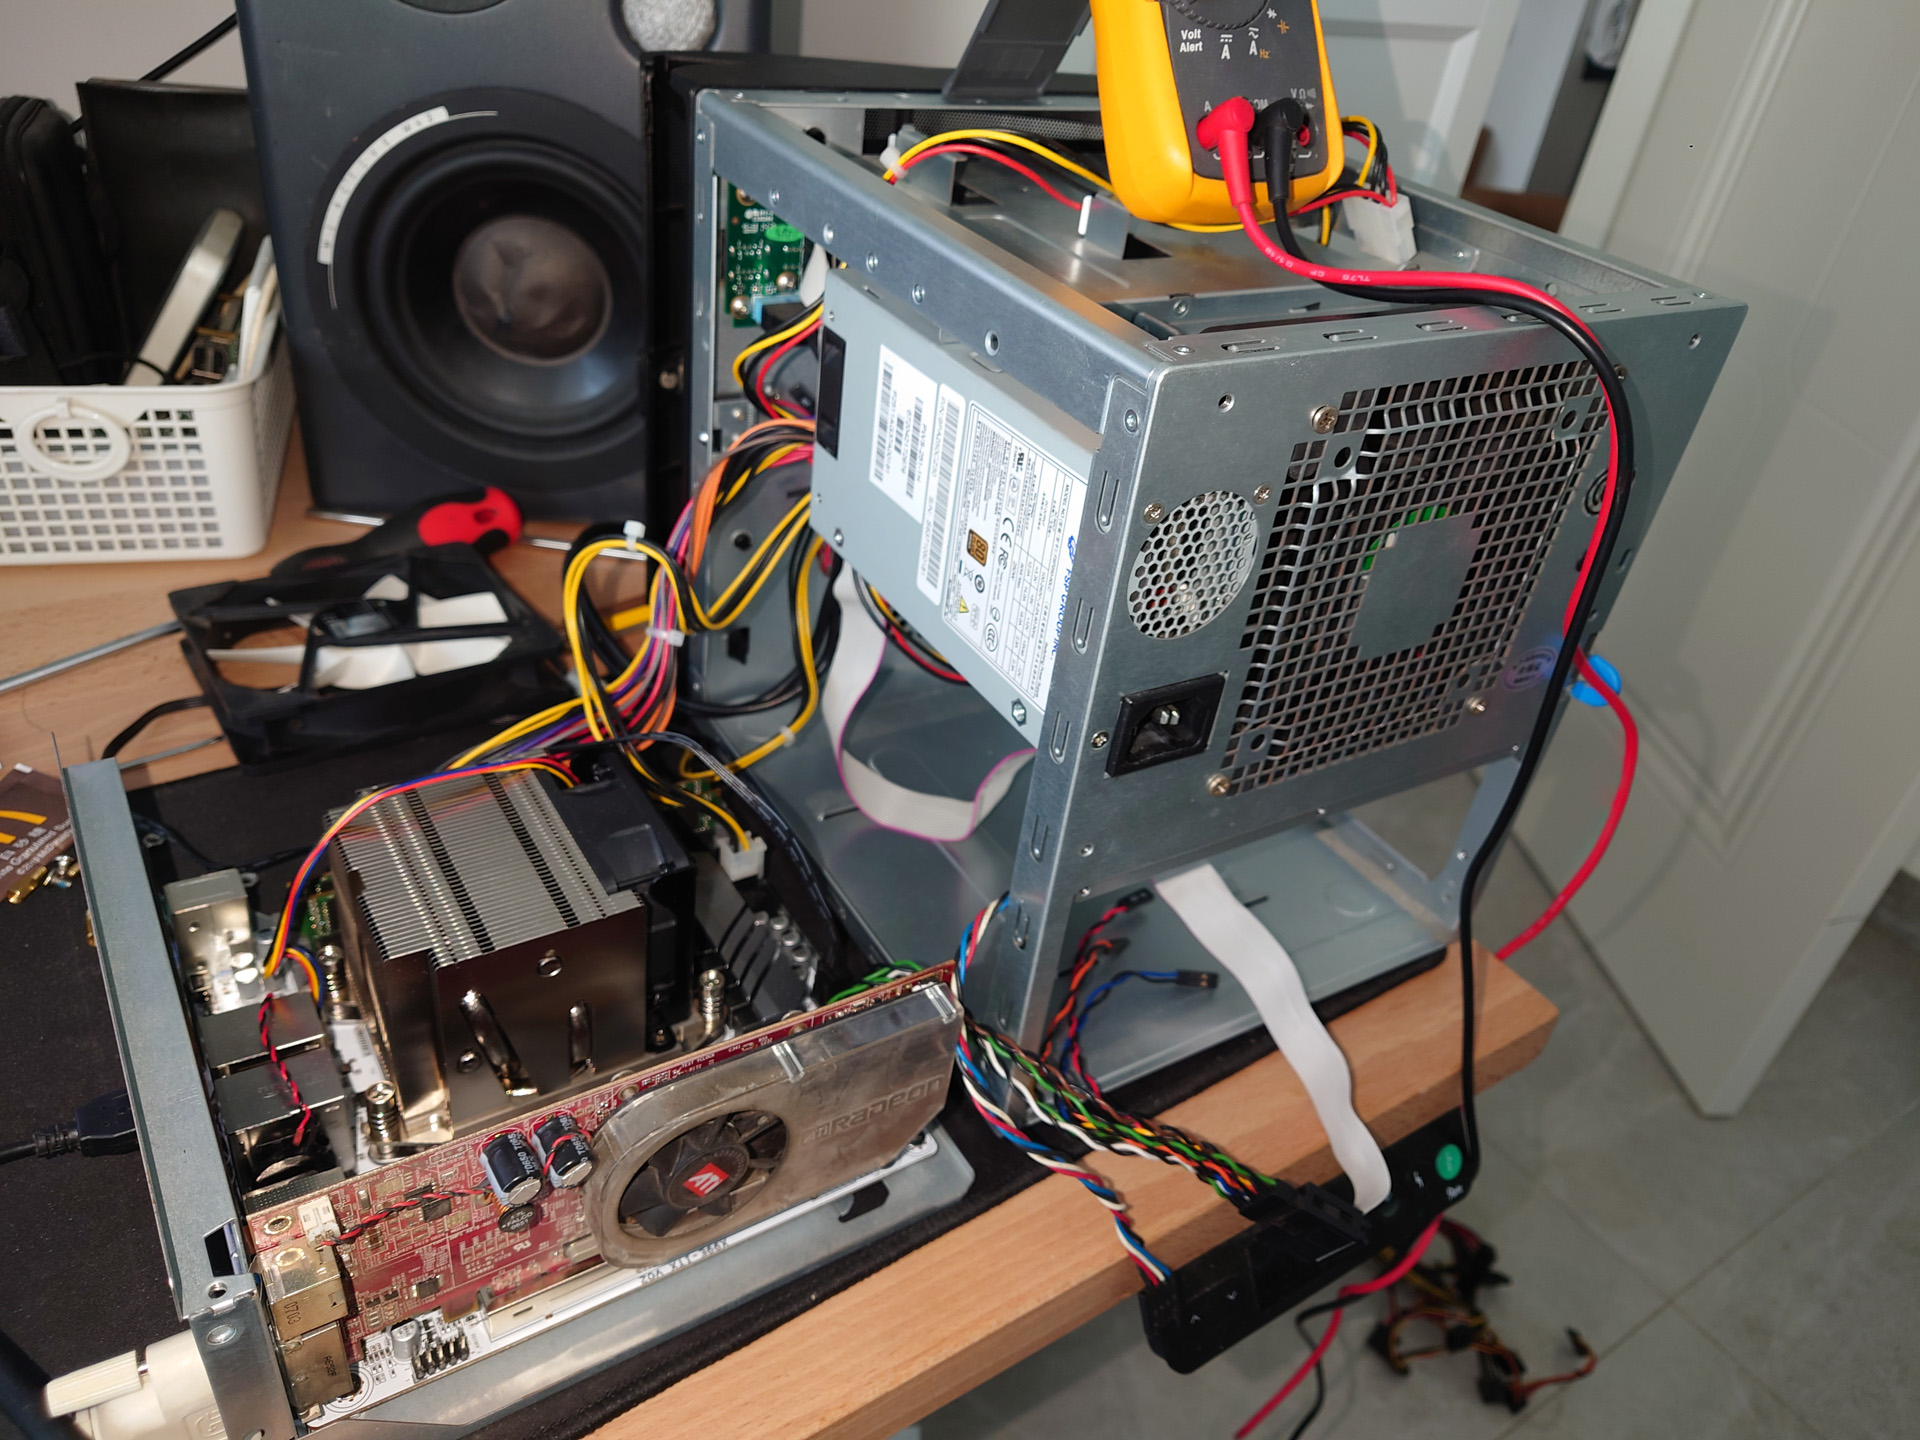
Hardware Assembling
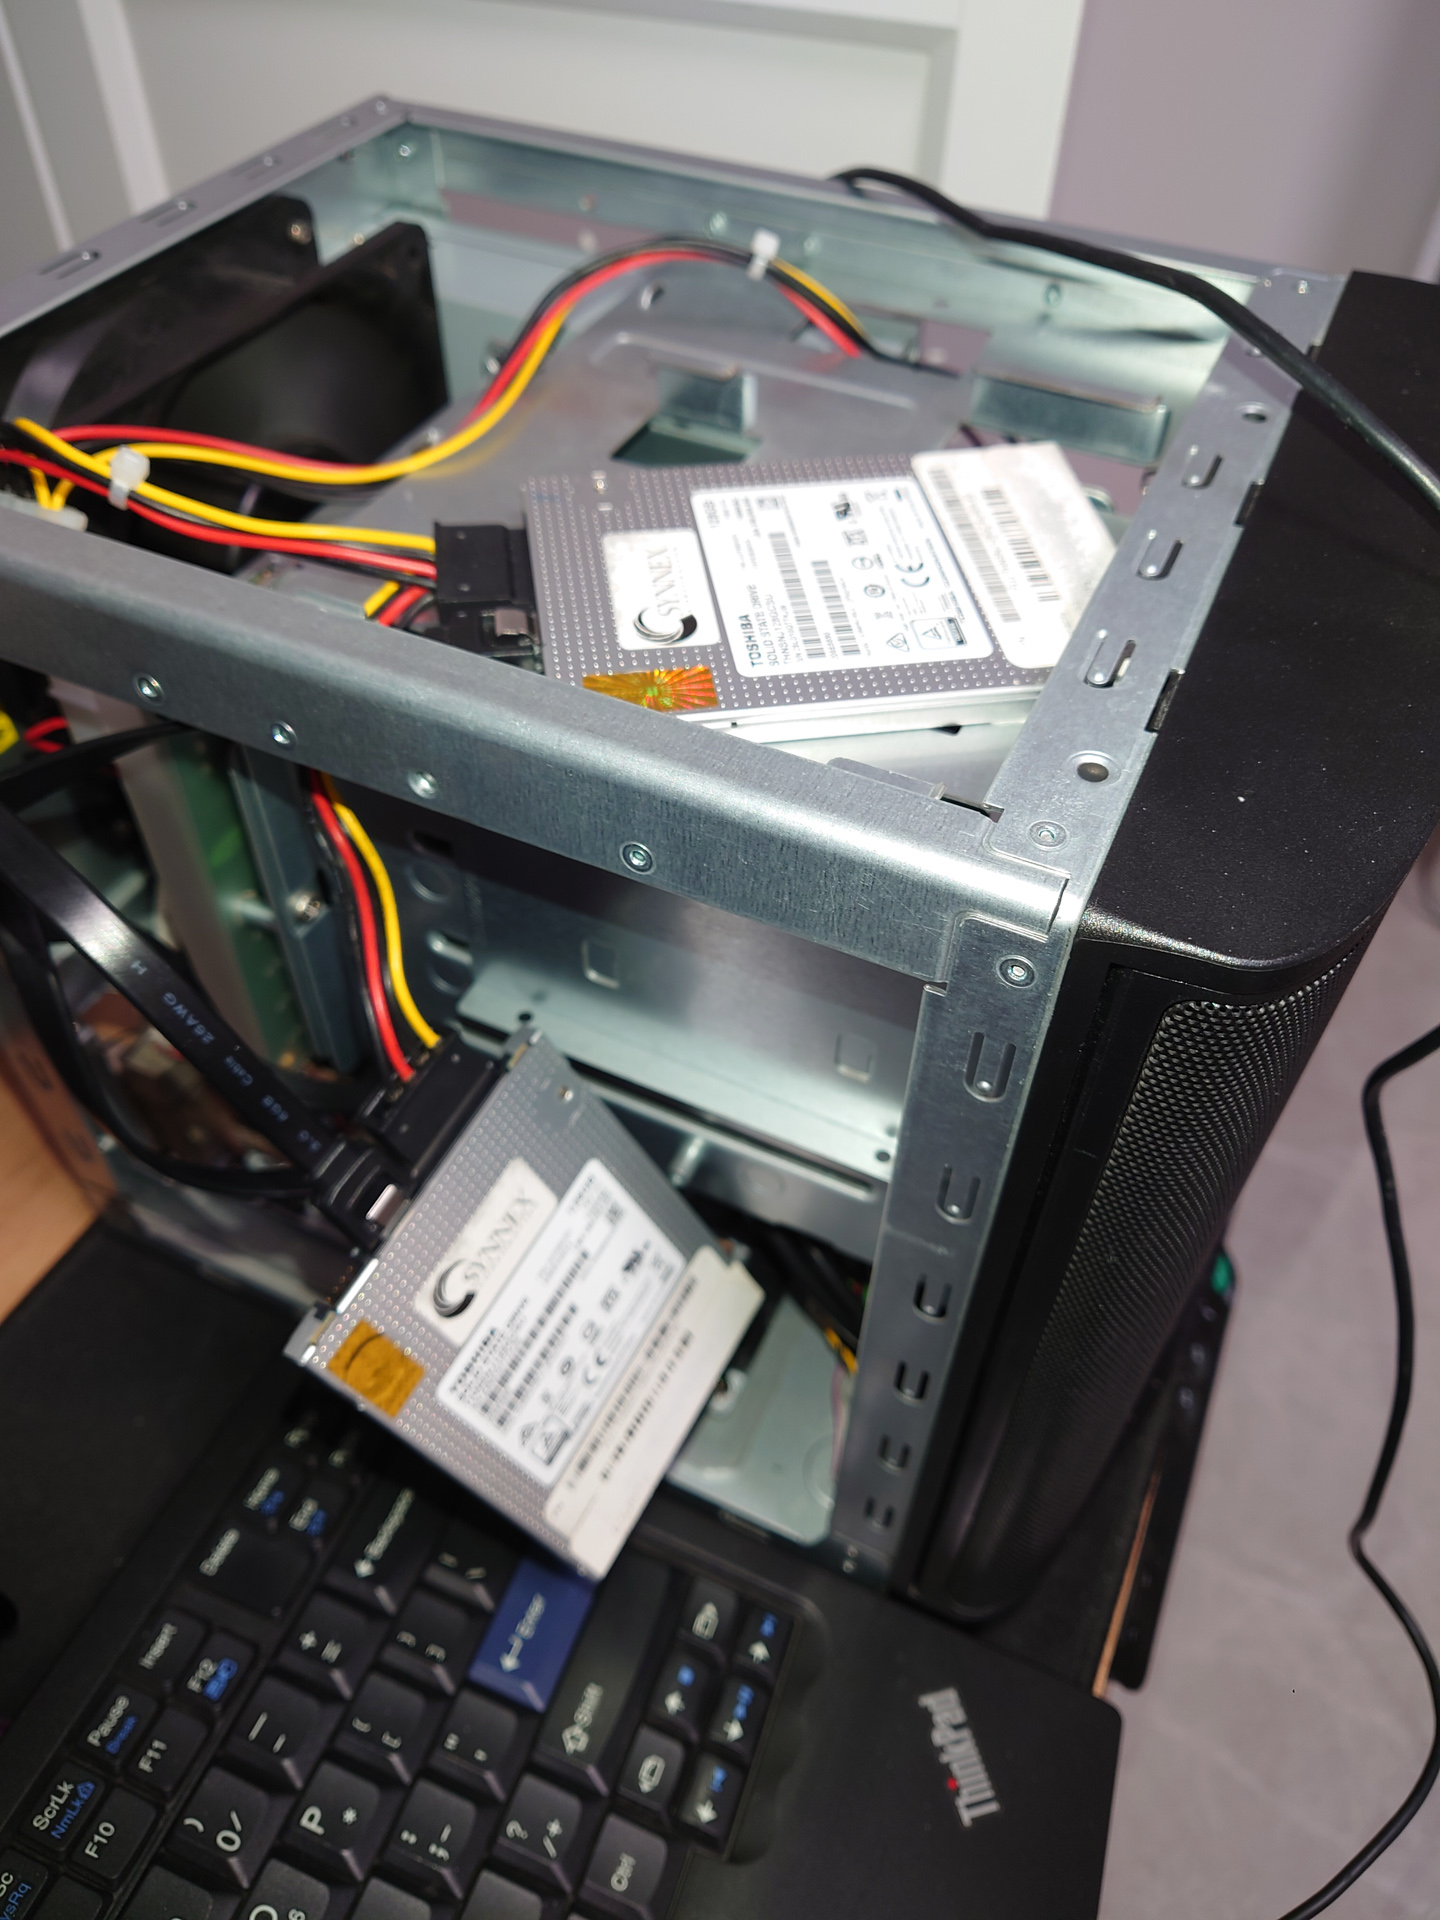
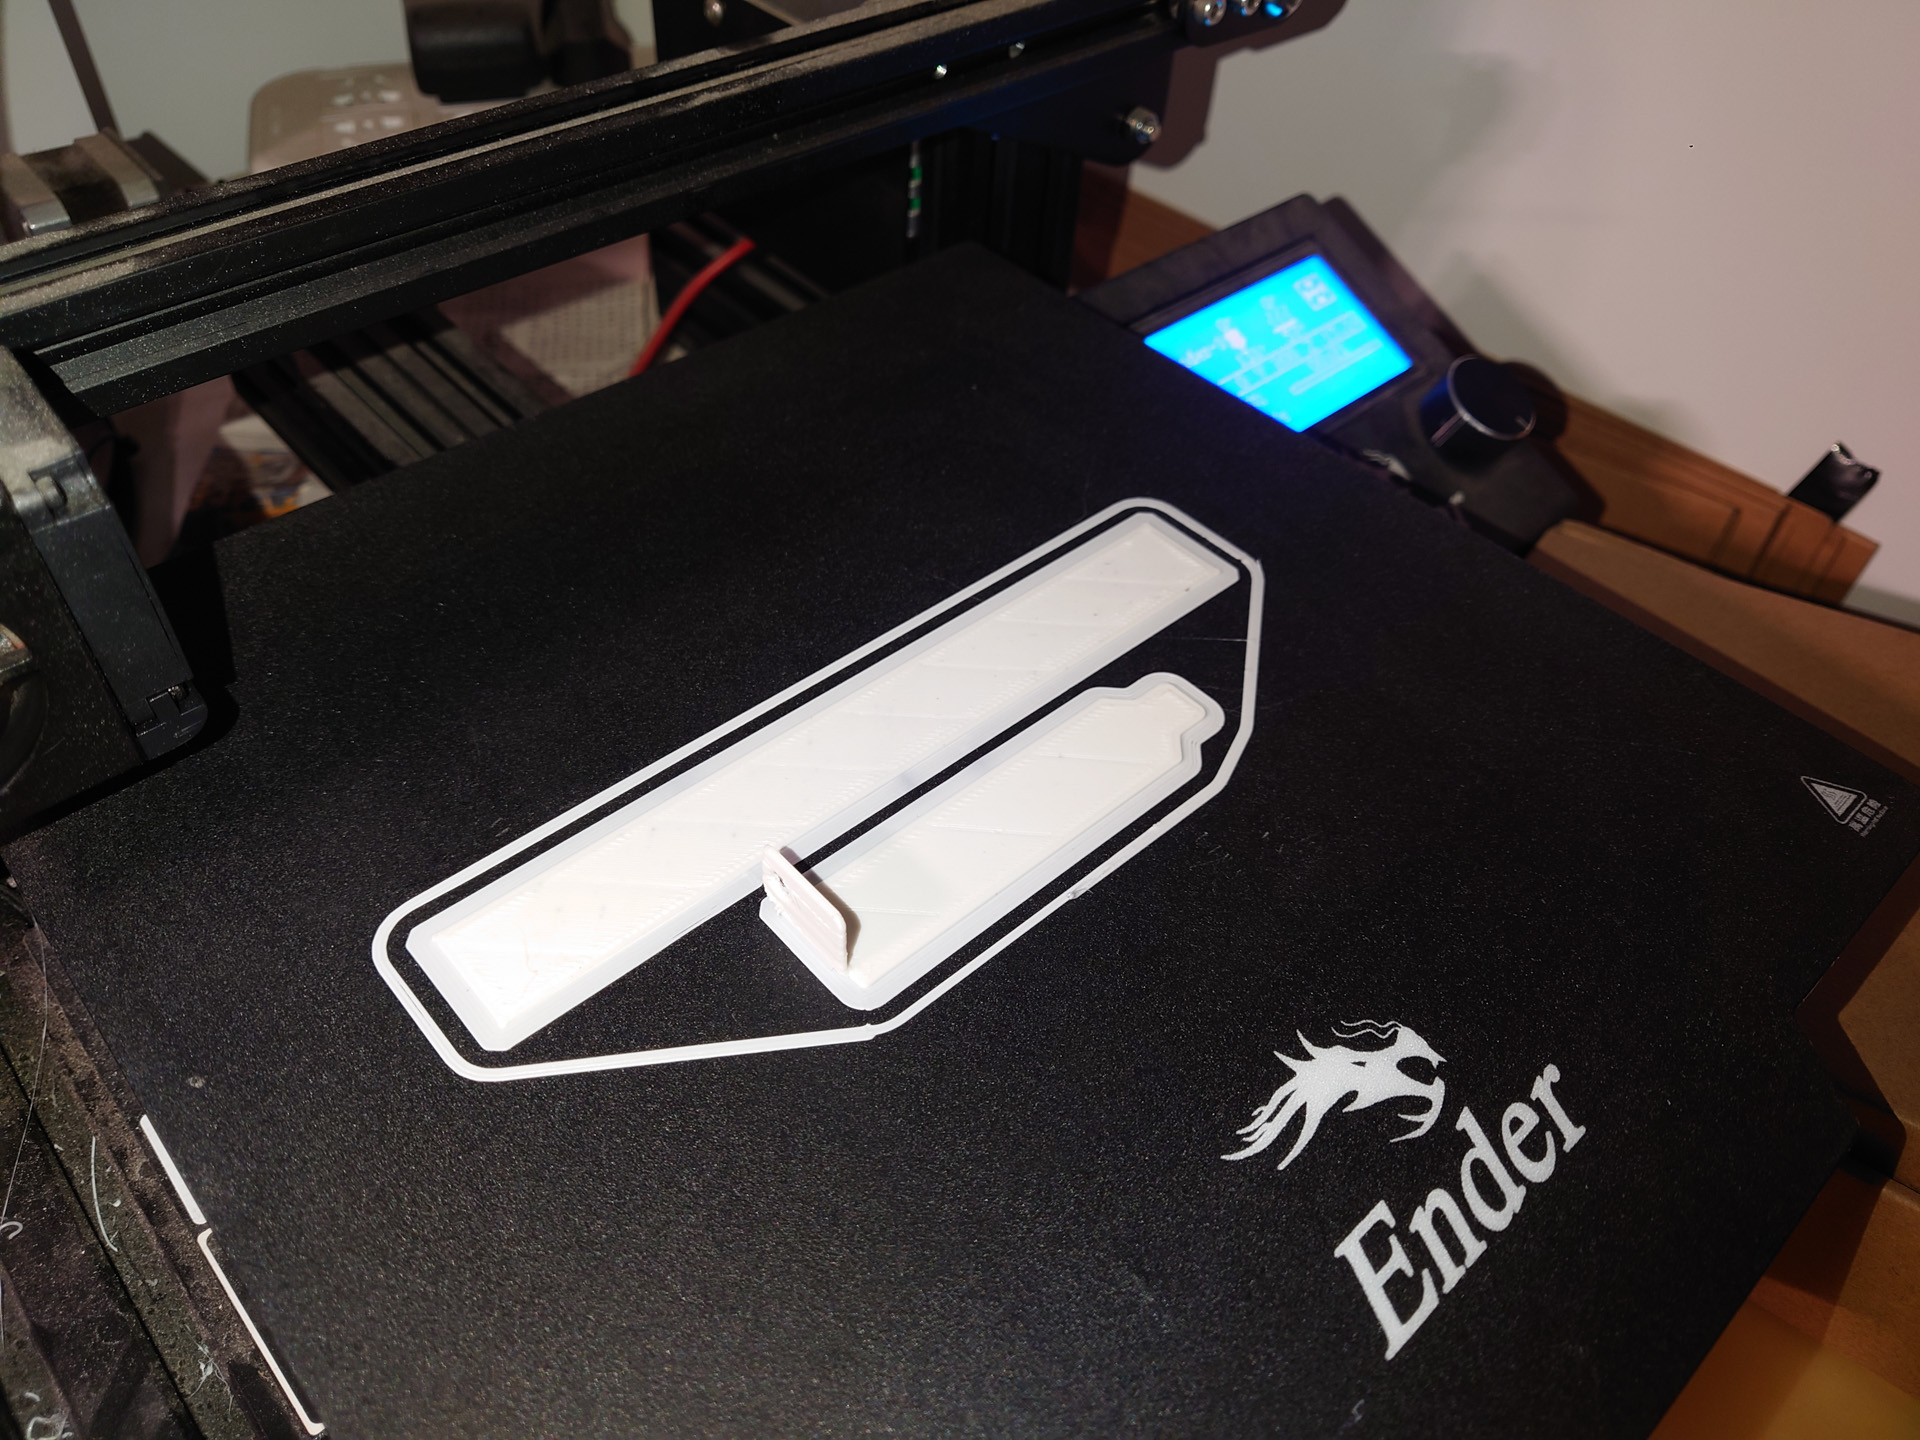
Assembling was mostly easy, but there were also quite a few annoying quirks. Firstly the chassis is missing the front optical drive panel, and the PCI-E slot cover, which I solved by 3D printing.
The chassis fan supplied by the former owner was complete garbage. I dug through my component bin and found a mighty Nidec TA450 fan which has 160 CFM, rated at 12V 1.4A.
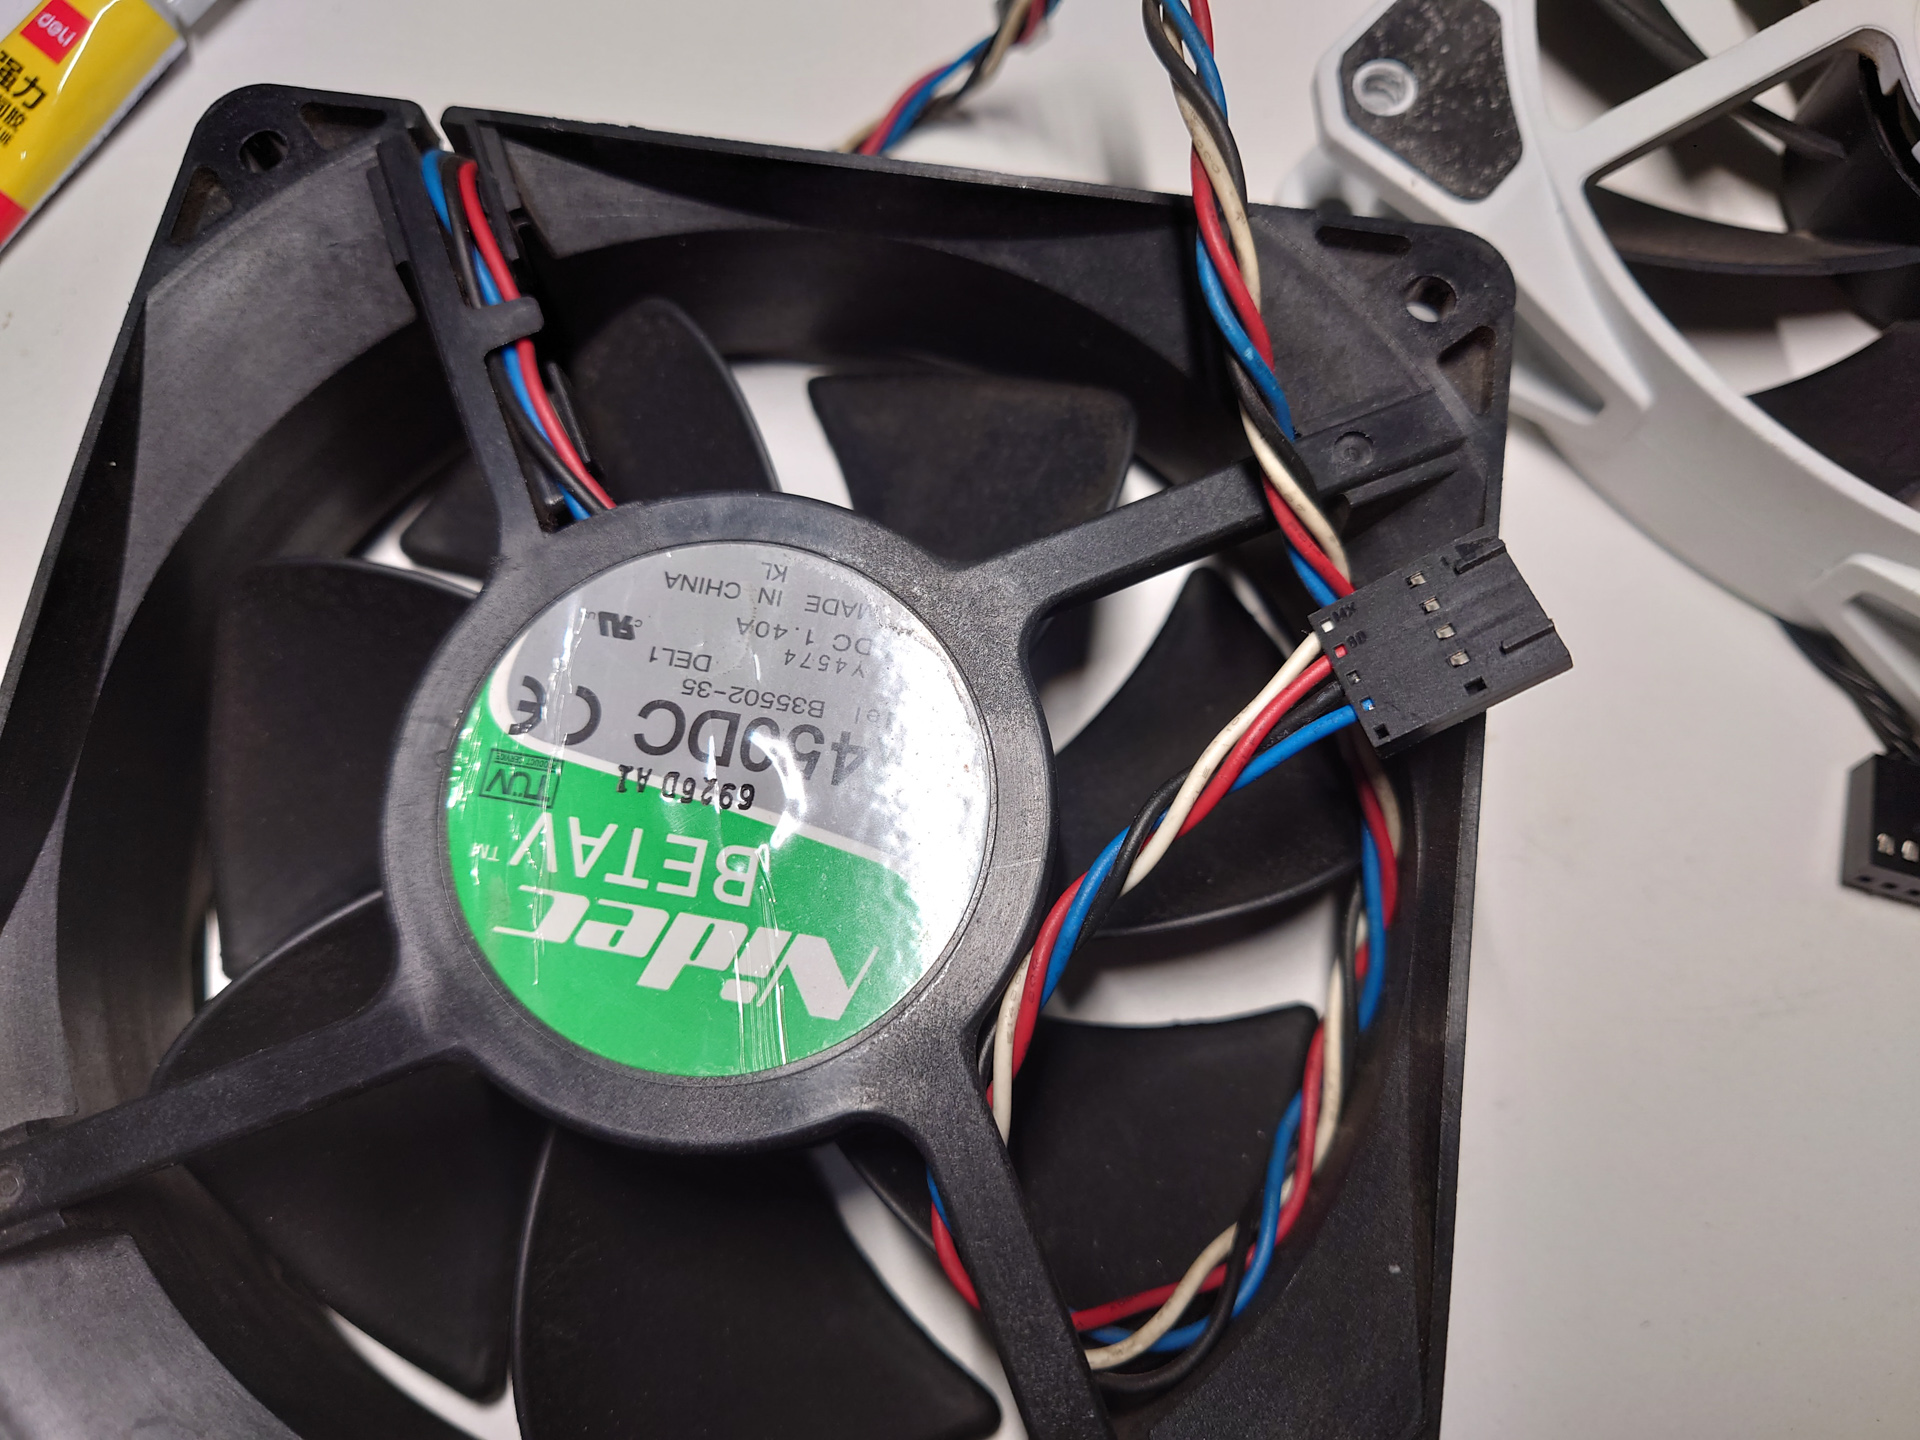
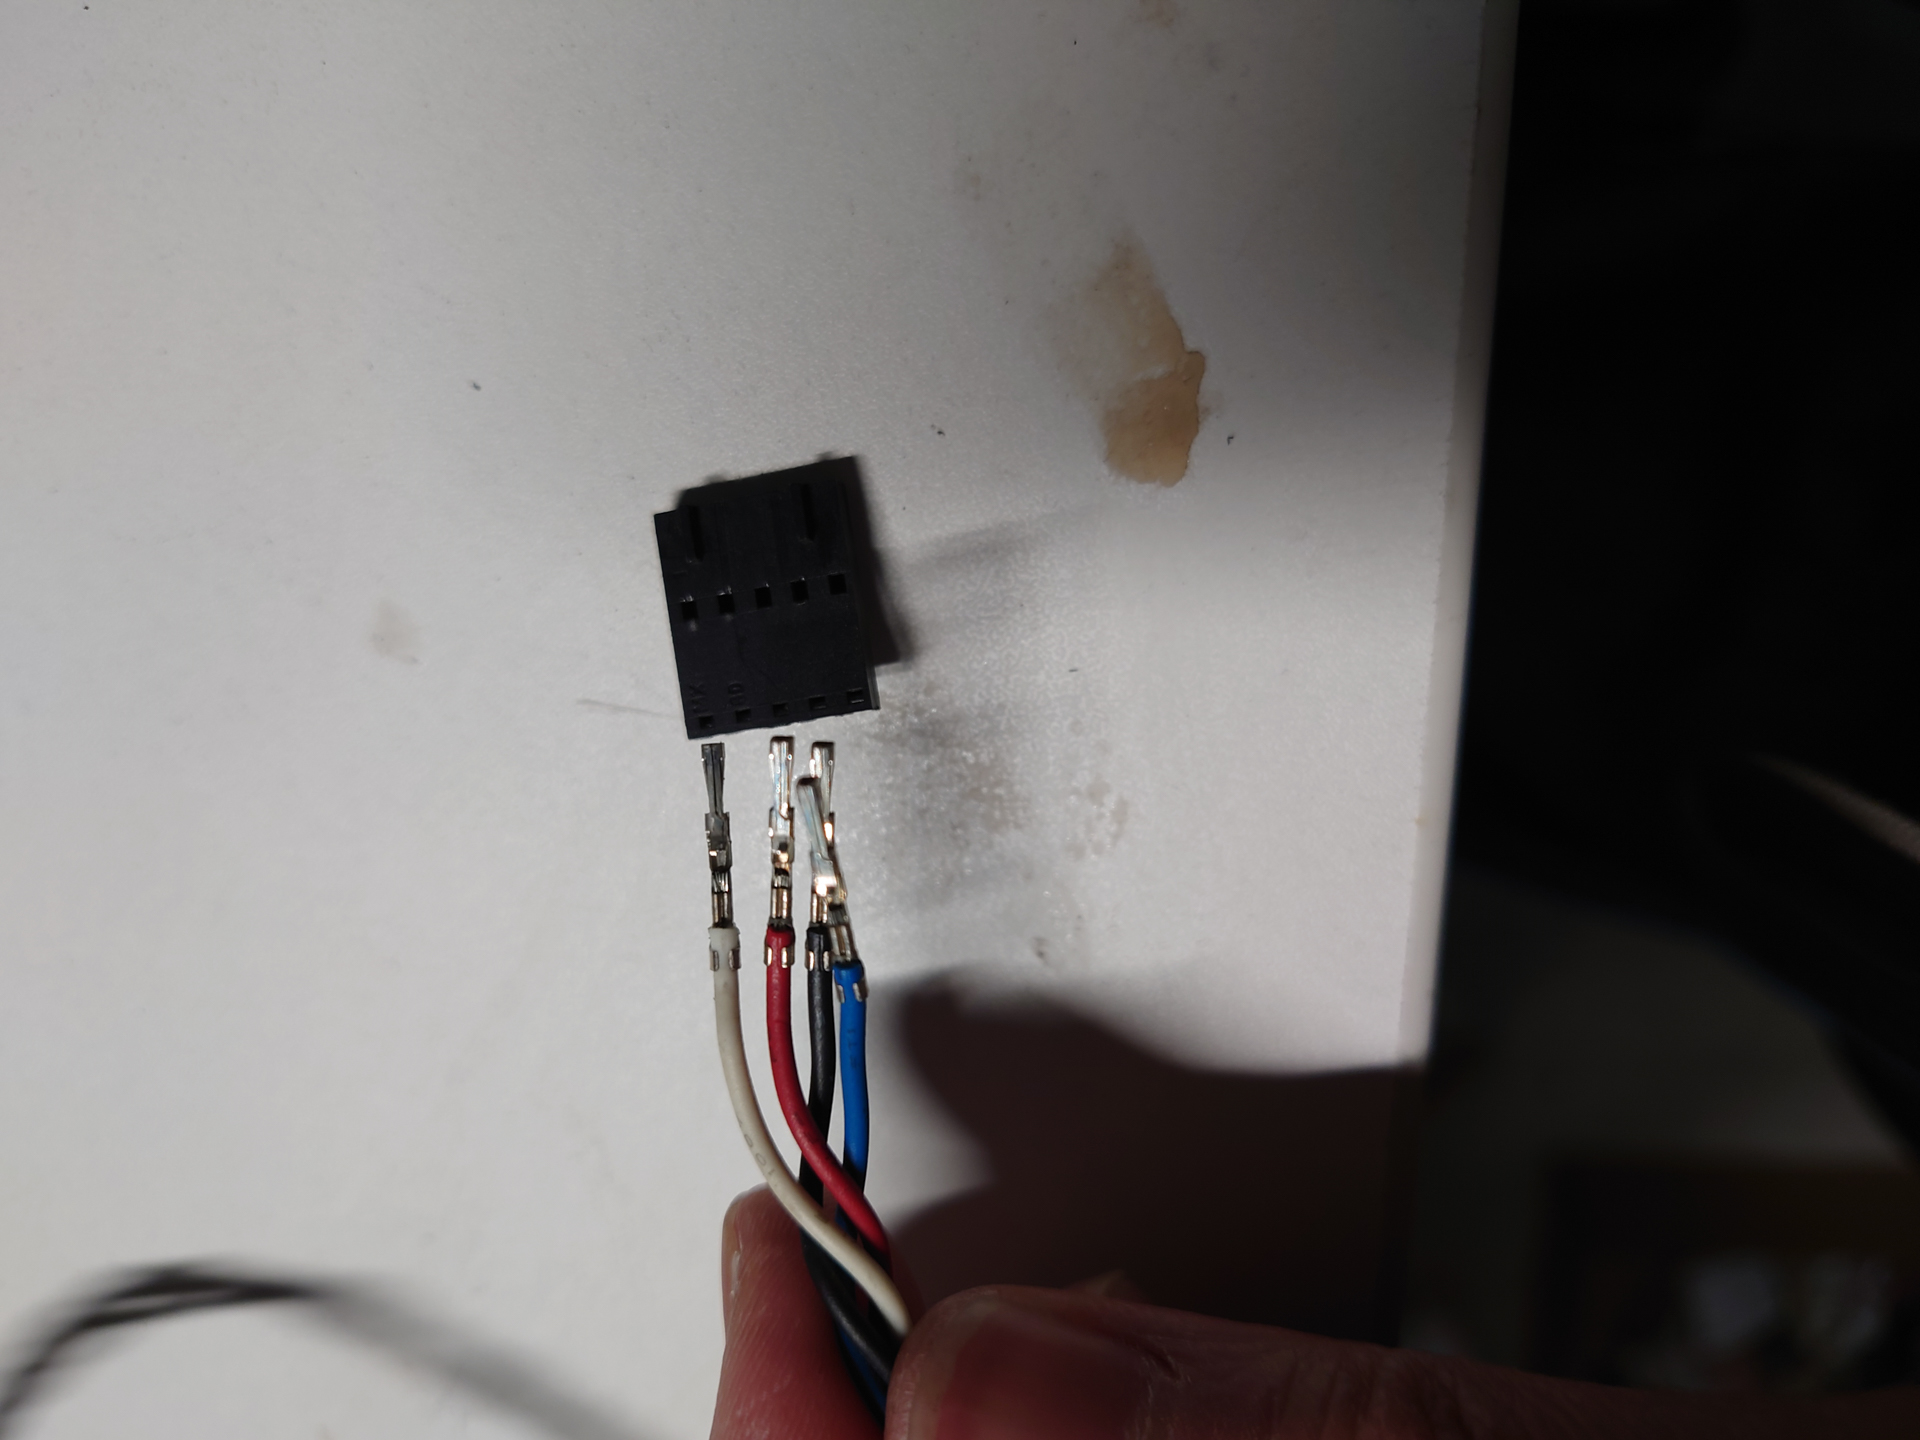
The problem with this fan is that it was ripped out of a Dell Optiplex, and has Dell fan connector. Luckily, the pitch of that connector is the same as normal fan connector, so I only had to change the pin order.
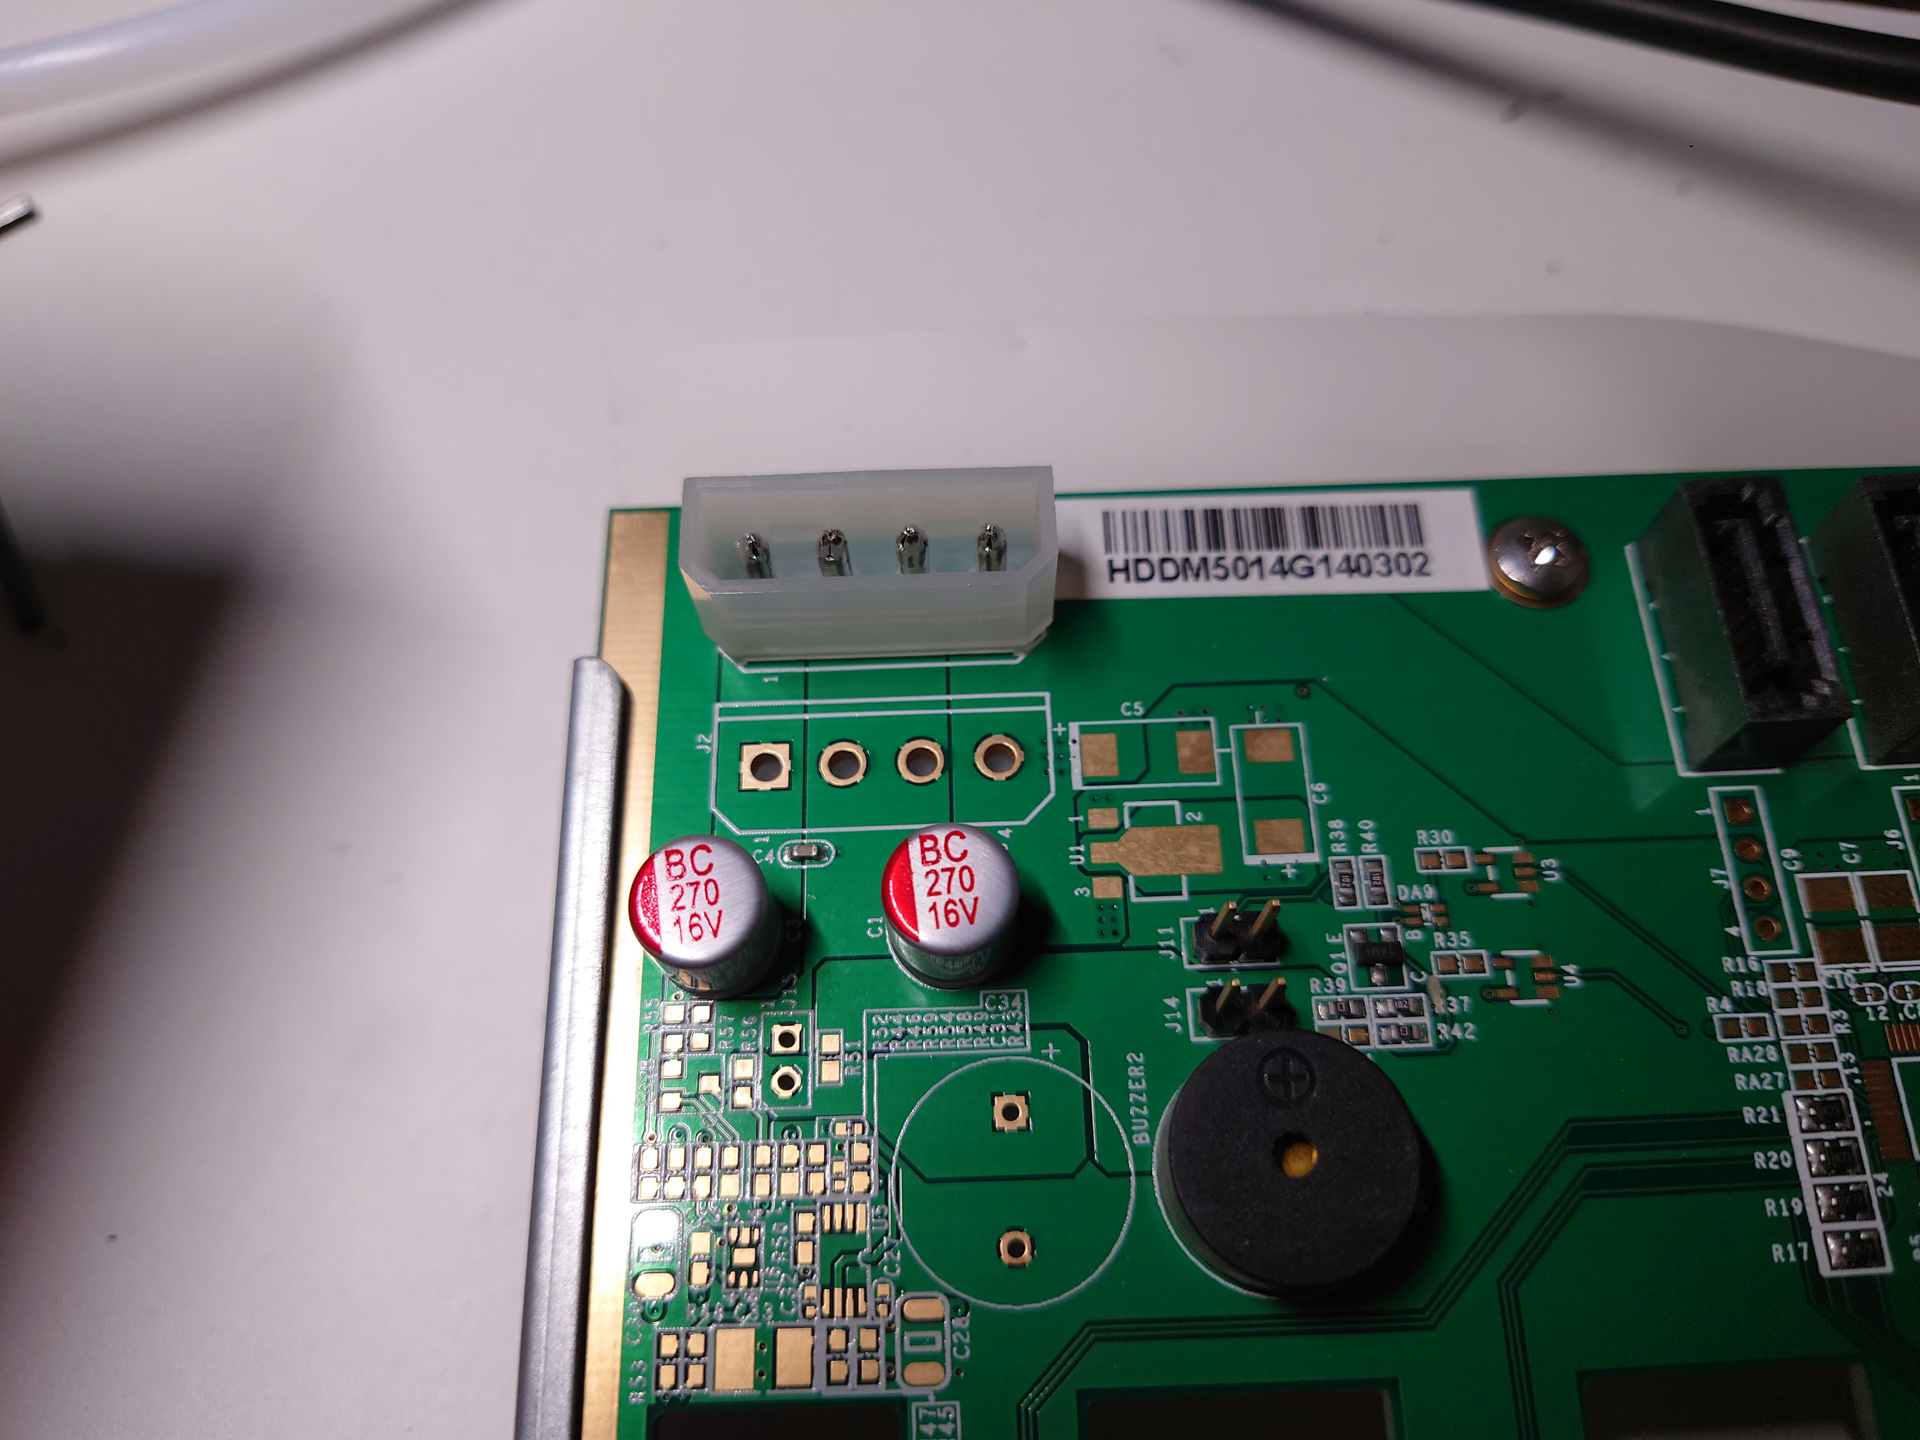
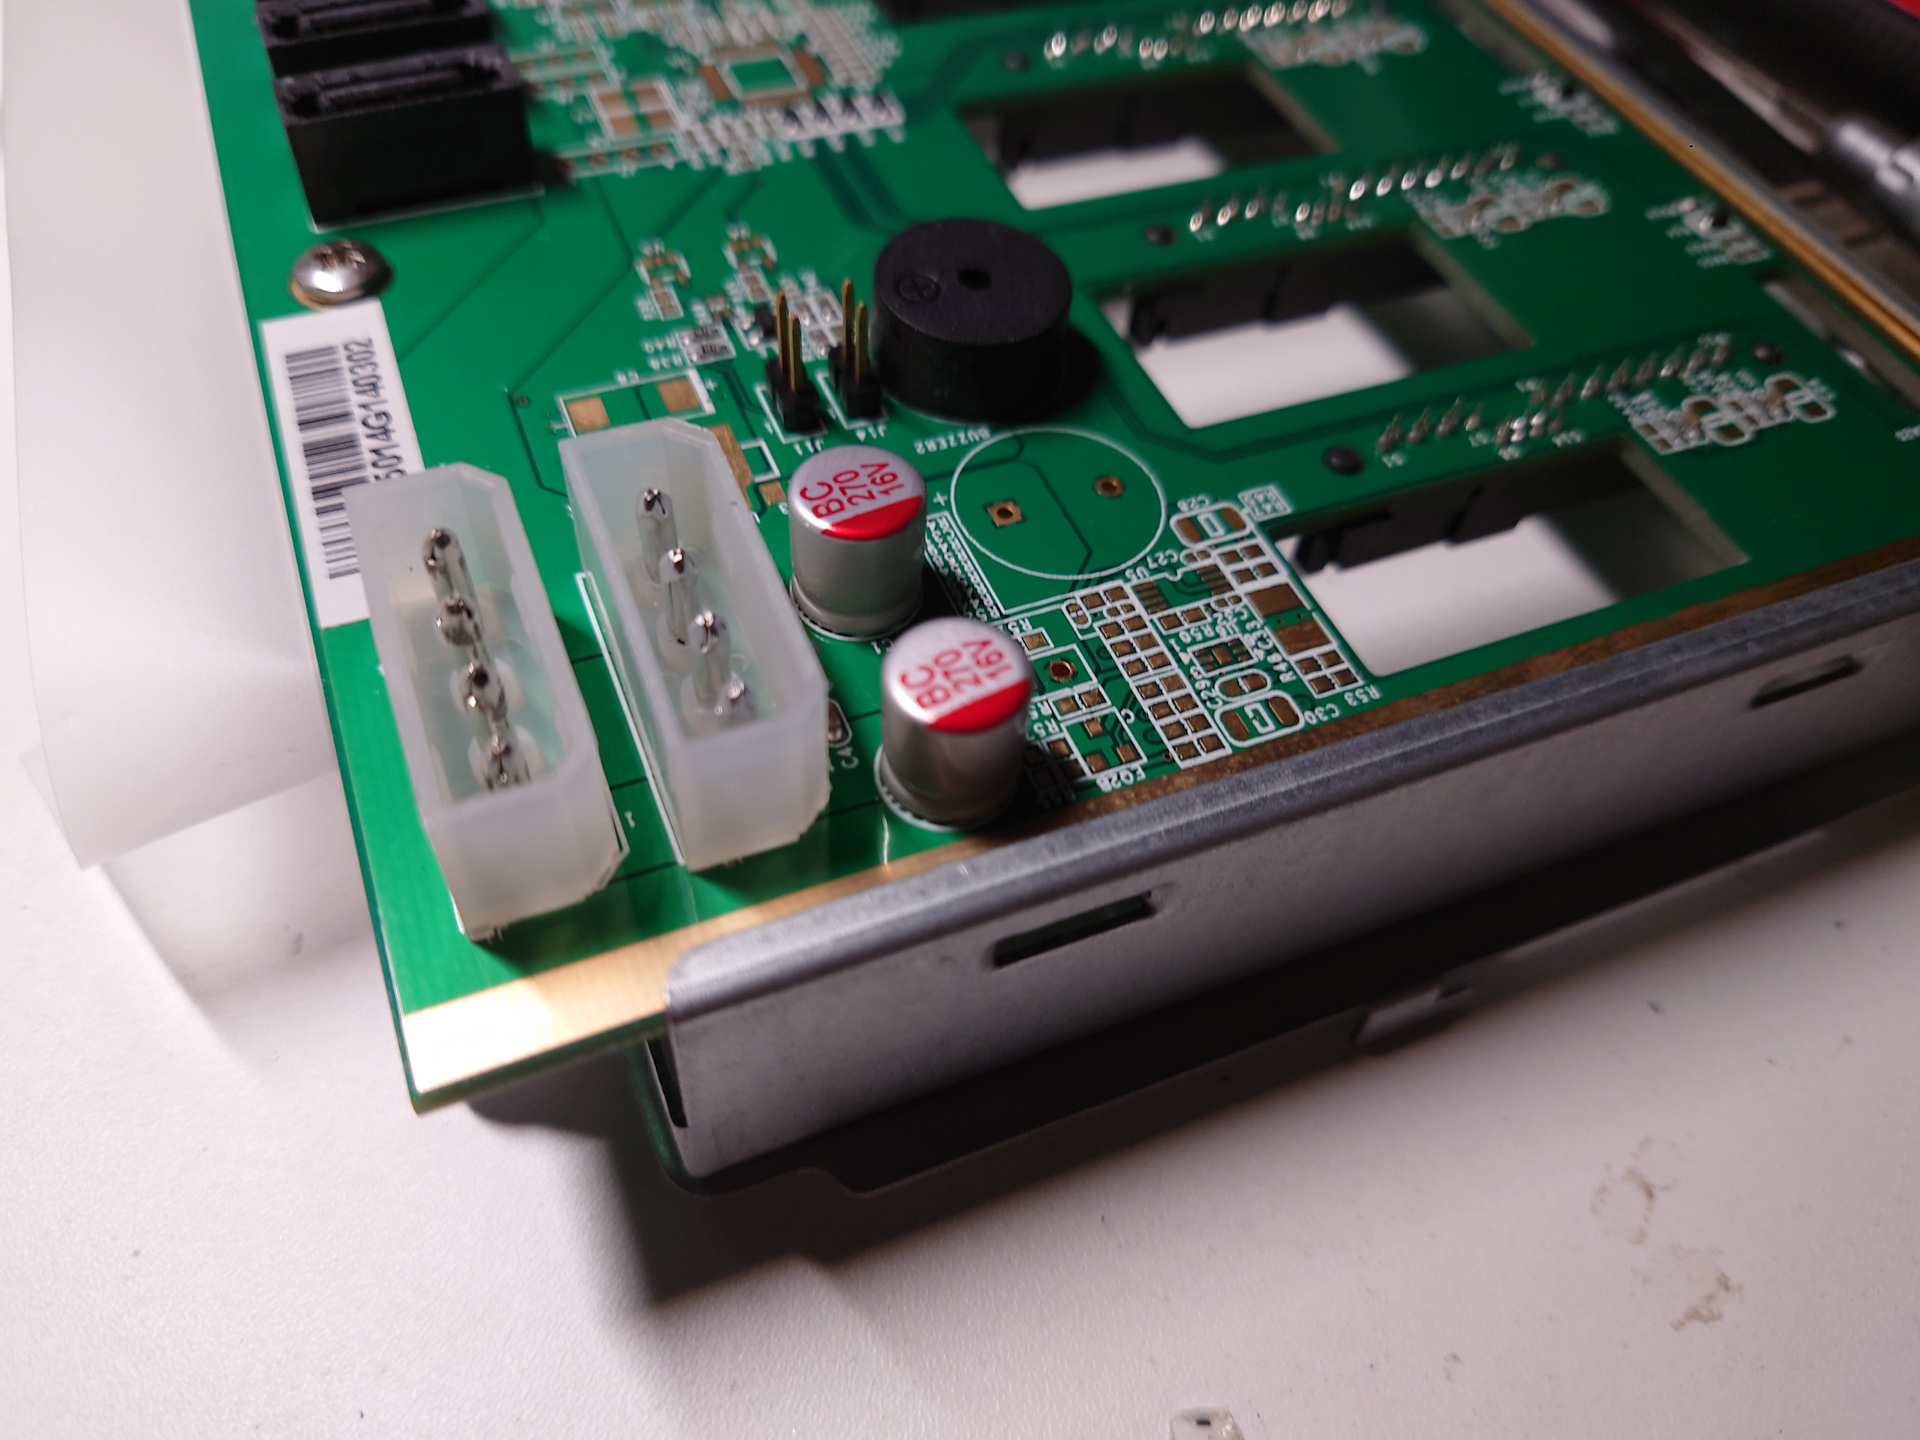
The SATA backplane was also a lower-trim version which only had one power connector. Although one is absolutely fine, for some peace of mind I still decided to solder on another one.
The motherboard tested fine when used out of the chassis, but once I put it in the tray it no longer want to boot. Took some time before I found out the problem was the external clear-CMOS button was stuck pressed. The back panel was about 1mm higher than it should be and pinched the button. So I drilled the button hole to a much larger diameter.
System Installation
I just plugged the USB disk and followed the GUI to install TrueNAS Scale, and before long I was greeted with a functional WebUI.

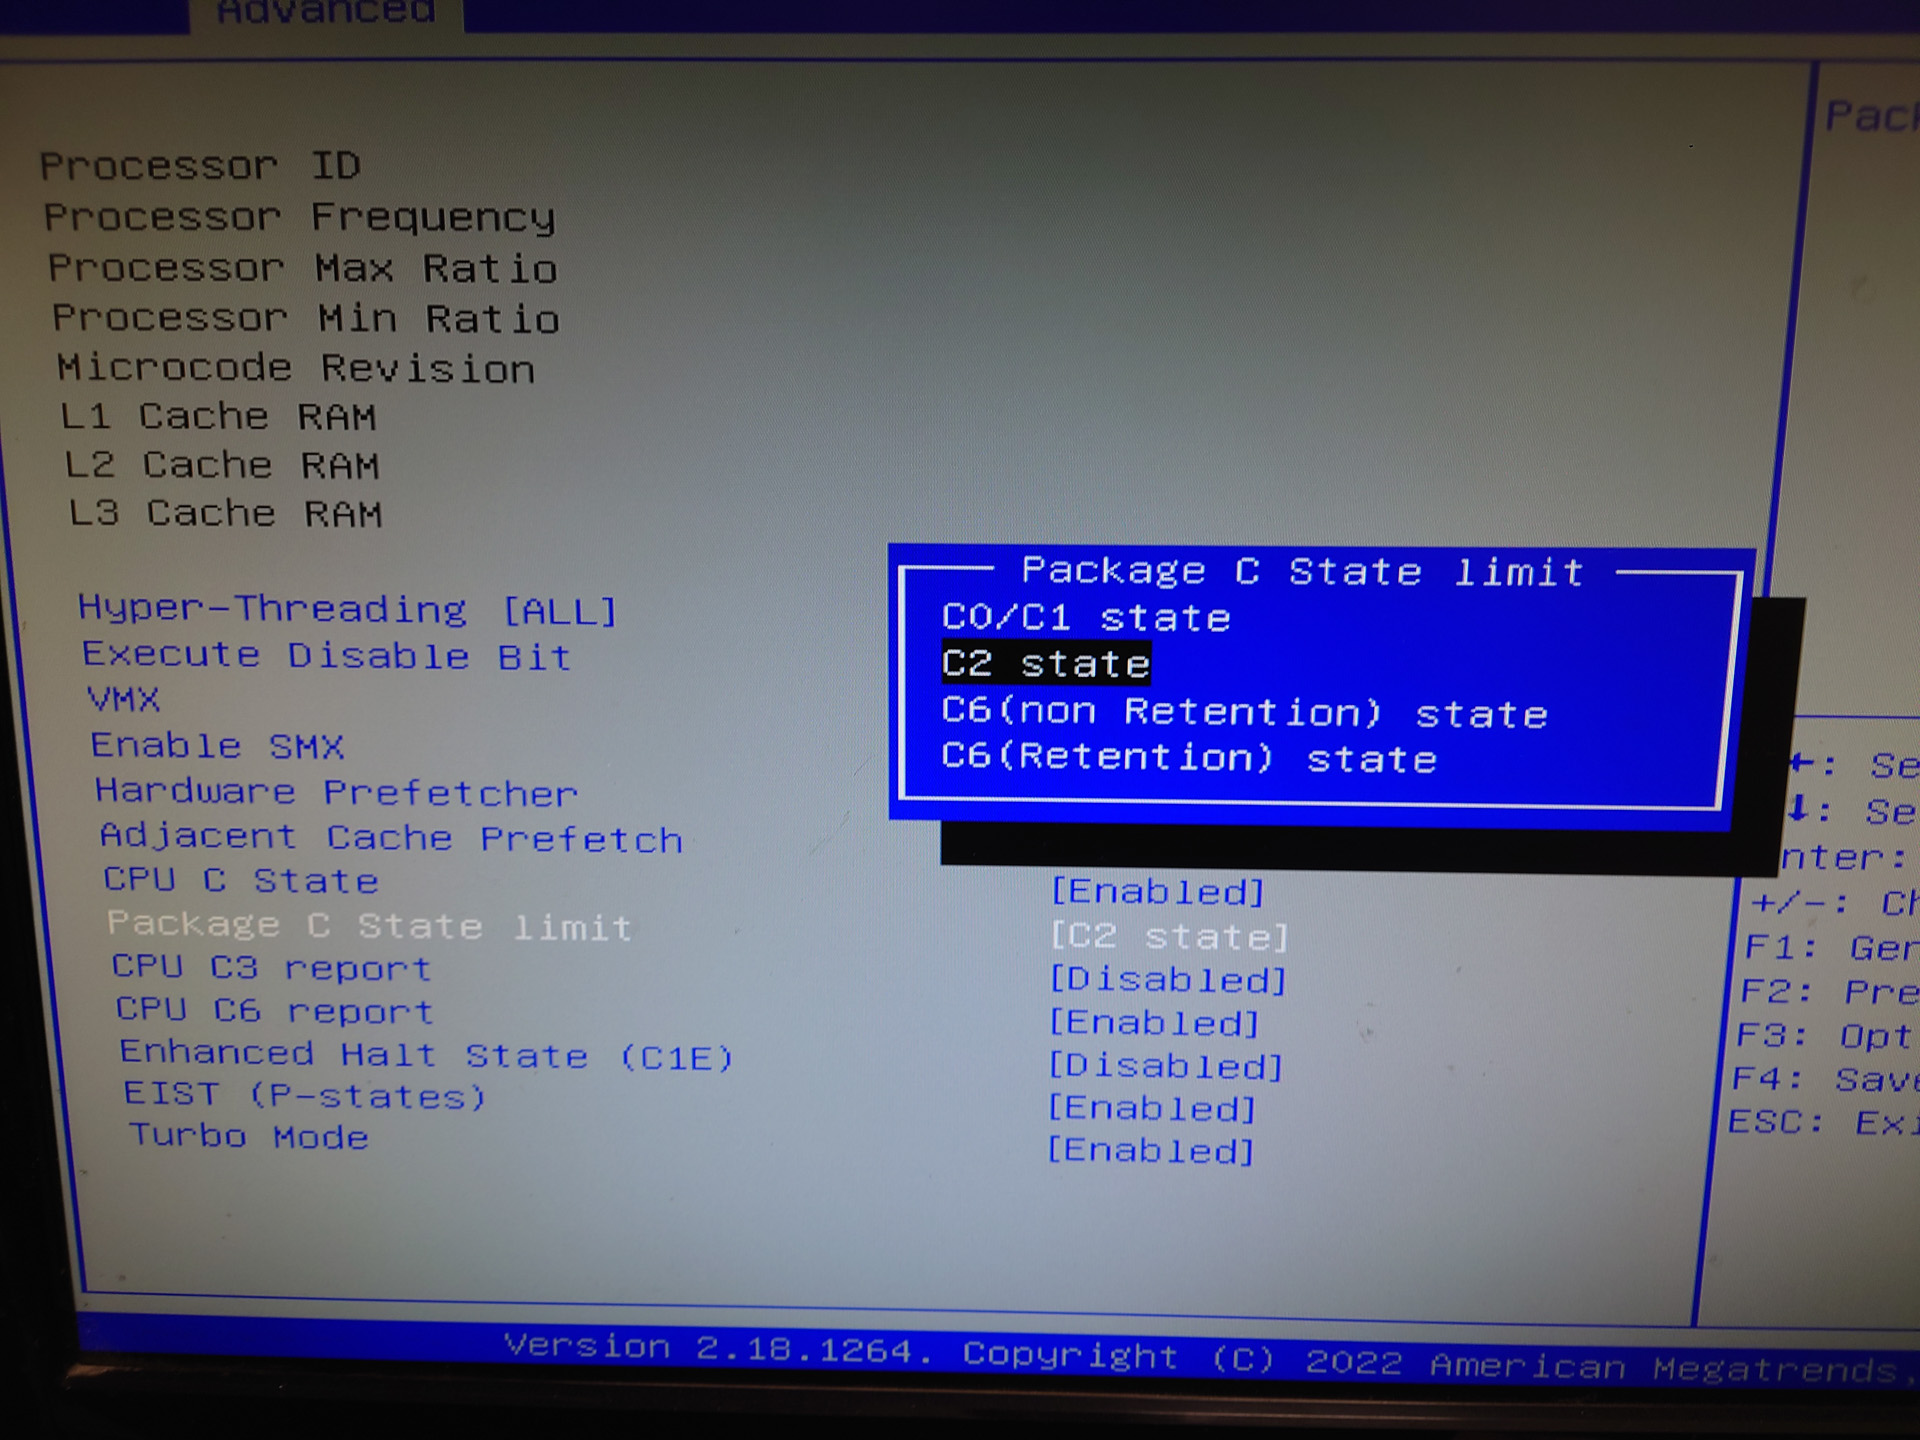
At this stage, I found that the system can boot, but cannot reboot. On reboot, it get stuck at
freeing unused kernel image memorySince it only happen at reboot, it is mostly related to ACPI or other power settings. After limiting processor C-state to C2, it now can boot and reboot just fine.
Software Configuration
I created a main pool called tank and create a dataset called config to act as home directories and store scripts.
Fan Control Scripts
Warning: TrueNAS is an appliance, and is meant to be used not modified.
The motherboard has a very poor fan regulation function, which starts out at about 70% PWM where all the fans are screaming. So I have to set the fans to fixed 100% in BIOS and do something on the software side.
I first confirm that my SuperIO chip is supported by running
sensors-detect
At the end of the detection, sensors-detect can automatically insert needed kernel module into /etc/modules. Note this may not persist across TrueNAS update.
Next I have to find a way to control the fan speed. For this I need the fancontrol package, which unfortunately didn’t come with install. TrueNAS also disabled apt use by default. So I had to do the following to install the package. This will not persist across update as well.
chmod +x /bin/apt*
apt-get install fancontrol
I would like to control the chassis fan based on the temperature of the disk which is hottest, and fancontrol does not offer this function. I found some related stuff here, and wrote some script based on the code there. Basically it reads drive temperature, found out the maximum value and store it as milli-degree-Celsius in a file for fancontrol to read in as a sensor value. It also handles situation where return value is “” (when drive is in spin-down).
For this to work I used the hddtemp package:
apt-get install hddtempHere is my script (drive string is removed), located at /mnt/tank/config/home/admin/gethddtemp.sh. To use it one need to add their disks to the array. The strings can be found at /dev/disk/by-id/
admin@TRUENAS:~$ cat gethddtemp.sh
declare -a DiskList=(
"ata-WDC_WUH721816ALE6L4_2P111111"
"ata-WDC_WUH721816ALE6L4_2P222222"
"ata-WDC_WUH721816ALE6L4_2P333333"
"ata-WDC_WUH721816ALE6L4_2P444444"
)

FILE=/tmp/Hddtemp
re='^[0-9]+$'

while true
do
  maxtemp=0
  for disk in "${DiskList[@]}"; do
    temperature=$(hddtemp -n /dev/disk/by-id/$disk 2>/dev/null)
    # Set base temp if we got nothing in stdout, this mean we are asleep
    if ! [[ "$temperature" =~ $re ]];
      then
        temperature=0;
      else
        if [ "$temperature" -ge "$maxtemp" ];
          then maxtemp="$temperature";
        fi
    fi
  done


  # Get a tempfile to write out temp
  NEW=$(mktemp /tmp/Hddtemp.XXXX)
  echo $(($maxtemp * 1000)) > $NEW
  # Handle case of initial/clean run
  if [ -e $FILE ]; then
    CLEAN="rm -f $(readlink -f $FILE)"
  fi
  # Atomic symlink replacement
  ln -s $NEW $FILE.lnk
  mv -T $FILE.lnk $FILE
  # Clean old link, if it existed
  $CLEAN
  sleep 30

done
I wrote a service file /lib/systemd/system/gethddtemp.service for this script to be used as a systemd service.
admin@TRUENAS:~$ cat /lib/systemd/system/gethddtemp.service
[Service]
ExecStart=/mnt/tank/config/home/admin/gethddtemp.sh
Restart=on-failure
RestartSec=3s

[Install]
WantedBy=multi-user.target
Next step is to configure the fancontrol config file. Here’s my /etc/fancontrol
admin@TRUENAS:~$ cat /etc/fancontrol
# Configuration file generated by pwmconfig, changes will be lost
INTERVAL=1
DEVPATH=hwmon0=devices/platform/coretemp.0 hwmon1=devices/platform/nct6775.2592
DEVNAME=hwmon0=coretemp hwmon1=nct6779
FCTEMPS=hwmon1/pwm2=hwmon0/temp1_input hwmon1/pwm1=/tmp/Hddtemp
FCFANS=hwmon1/pwm2=hwmon1/fan2_input hwmon1/pwm1=hwmon1/fan1_input
MINTEMP=hwmon1/pwm2=55 hwmon1/pwm1=30
MAXTEMP=hwmon1/pwm2=85 hwmon1/pwm1=50
MINSTART=hwmon1/pwm2=150 hwmon1/pwm1=150
MINSTOP=hwmon1/pwm2=0 hwmon1/pwm1=0
MAXPWM=hwmon1/pwm2=255
This will update the fan PWM every second, and maximum temperature allowed for hard drives are 50 ℃ beyond which the fan will spin at full speed.
I also modified the fancontrol systemd service file to depend on my service, and auto restart on failure.
admin@TRUENAS:~$ cat /lib/systemd/system/fancontrol.service
[Unit]
Description=fan speed regulator
# Run pwmconfig to create this file.
ConditionFileNotEmpty=/etc/fancontrol
After=lm-sensors.service
After=gethddtemp.service
Documentation=man:fancontrol(8) man:pwmconfig(8)

[Service]
ExecStartPre=/usr/sbin/fancontrol --check
ExecStart=/usr/sbin/fancontrol
PIDFile=/run/fancontrol.pid
Restart=on-failure
RestartSec=3s

[Install]
WantedBy=multi-user.target
Note: if you need to used fancontrol to control fan speed based on the temperature of one hard drive, you can use the drivetemp kernel module, which parse drive temperature into ACPI sensor zones:
admin@TRUENAS:~$ sudo modprobe drivetemp
admin@TRUENAS:~$ sensors

...
drivetemp-scsi-4-0
Adapter: SCSI adapter
temp1:        +30.0°C  (low  =  +5.0°C, high = +40.0°C)
                       (crit low =  +0.0°C, crit = +80.0°C)
                       (lowest = +27.0°C, highest = +33.0°C)

drivetemp-scsi-2-0
Adapter: SCSI adapter
temp1:        +38.0°C  (low  =  +0.0°C, high = +60.0°C)
                       (crit low = -40.0°C, crit = +70.0°C)
                       (lowest = +30.0°C, highest = +39.0°C)

drivetemp-scsi-0-0
Adapter: SCSI adapter
temp1:        +36.0°C  (low  =  +0.0°C, high = +60.0°C)
                       (crit low = -40.0°C, crit = +70.0°C)
                       (lowest = +29.0°C, highest = +37.0°C)

drivetemp-scsi-5-0
Adapter: SCSI adapter
temp1:        +29.0°C  (low  =  +5.0°C, high = +40.0°C)
                       (crit low =  +0.0°C, crit = +80.0°C)
                       (lowest = +26.0°C, highest = +32.0°C)

drivetemp-scsi-3-0
Adapter: SCSI adapter
temp1:        +36.0°C  (low  =  +0.0°C, high = +60.0°C)
                       (crit low = -40.0°C, crit = +70.0°C)
                       (lowest = +29.0°C, highest = +37.0°C)

drivetemp-scsi-1-0
Adapter: SCSI adapter
temp1:        +37.0°C  (low  =  +0.0°C, high = +60.0°C)
                       (crit low = -40.0°C, crit = +70.0°C)
                       (lowest = +30.0°C, highest = +38.0°C)

...
To find out which SCSI host is which drive, use lsblk -S
admin@TRUENAS:~$ lsblk -S
NAME HCTL       TYPE VENDOR   MODEL                  REV SERIAL       TRAN
sda  0:0:0:0    disk ATA      WDC_WUH721816ALE6L4   W680 2P111111     sata
sdb  1:0:0:0    disk ATA      WDC_WUH721816ALE6L4   W232 2P222222     sata
sdc  2:0:0:0    disk ATA      WDC_WUH721816ALE6L4   W232 2P333333     sata
sdd  3:0:0:0    disk ATA      WDC_WUH721816ALE6L4   W232 2P444444     sata
sde  4:0:0:0    disk ATA      TOSHIBA_THNSNJ128GCSU 0101 XXXXXXXXTKJW sata
sdf  5:0:0:0    disk ATA      TOSHIBA_THNSNJ128GCSU 0101 XXXXXXXXTKJW sata
This way you can use fancontrol in the normal way without having to resort to custom scripts.
Putting the NAS to Use
For now I put the machine on the shelf in the living room. It’s October now, room temperature is about 22℃ and the fan noise is very low, hard drive temperatures are about 37℃. In the summer it may be louder and hotter.
I don’t have multi-gig infrastructure at home so I’m using my GbE connection for now. In the future I may upgrade my network system to multi-gig or directly to 10G.
I’m considering a similar build with this motherboard. I have two quick questions regarding your experience:
PCIe Bifurcation: Does the BIOS support splitting the PCIe lanes (e.g., x8/x8 or x4/x4/x4/x4)? Did you spot any bifurcation settings in the menus?
Reboot Issue: Regarding the reboot problem you mentioned, did you try experimenting with different CPU C-States, specifically toggling C6 (Retention or Non-Retention), to see if it stabilizes the system?
Thanks for the great write-up!”
The system is stable, regardless of the C-state settings. It’s just it will hang on reboot if I don’t limit processor C-state to C2. I did not try other settings as I didn’t think those were necessary.
There is bifurcation settings in the BIOS however I don’t remember the exact settings. I don’t own this rig anymore. You can write an email to JGINYUE and ask them.
Hello!
I’m considering a similar build with this motherboard. I have two quick questions regarding your experience:
PCIe Bifurcation: Does the BIOS support splitting the PCIe lanes (e.g., x8/x8 or x4/x4/x4/x4)? Did you spot any bifurcation settings in the menus?
Reboot Issue: Regarding the reboot problem you mentioned, did you try experimenting with different CPU C-States, specifically toggling C6 (Retention or Non-Retention), to see if it stabilizes the system?
Thanks for the great write-up!
hello
i am trying to setup motherboard with the following specs
xeon e5 2667 v3
2x32gb DDR4 ECC REG 2133 MHZ
nvidia GTX 1650 SUPER
no SSD installed at the moment
i am trying to boot but nothing on screen
no bip error
i also tried with V4 CPU and 2400 MHZ and still nothing
maybe something is missing ?
many thanks for your help
Hi:
No beep means CPU error. Check CPU contacts on motherboard for bent pins. Try to remove oxidation of contacts on the CPU with eraser.
Hello 😊
Thanks for your help and reply
I check everything but still nothing
I also changed RAM for 2133 MHz as support told me
Result still the same
When turning on motherboard, CPU Fan and GPU Fan works but nothing appear
After some seconds, it stop by hitsemf
My CPU is Intel Xeon E5 2697 V3
RAM DDR4 ECC REG 2133 Mhz
Did you fix it? I have the same problem but I got one quick beep when I turn on